we will talk about Service Accounts in Kubernetes.
The concept of service accounts
is linked to other security related concepts
 in Kubernetes, such as authentication,
authorization, role-based access controls, et cetera.
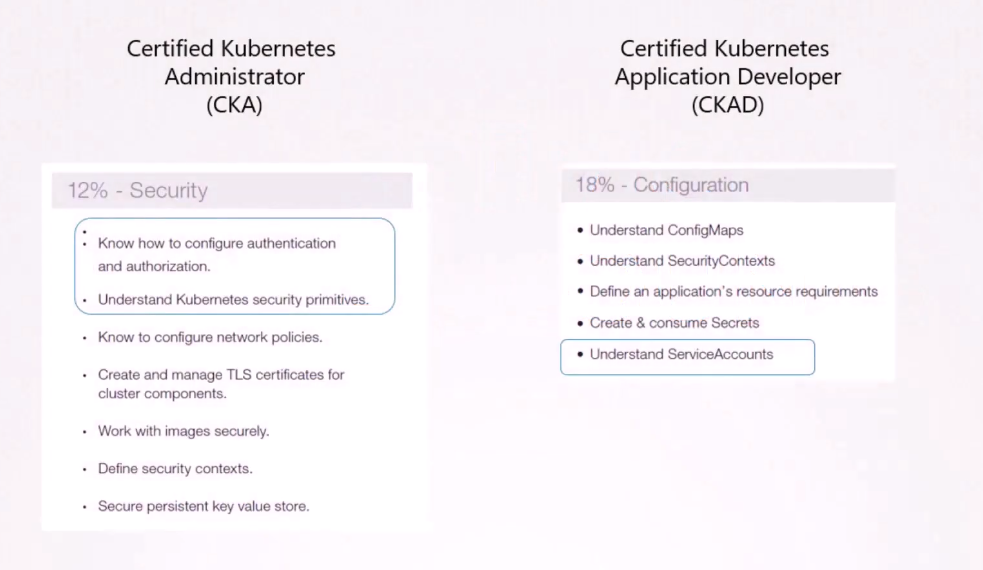
However, as part of the Kubernetes
for the Application Developers Exam Curriculum,
you only need to know how to work with service accounts.
We have detailed sections
covering the other concepts and security
in the Kubernetes Administrators course.
So there are two types of accounts in Kubernetes,
a user account and a service account.
As you might already know,
the user account is used by humans,
and service accounts are used by machines.
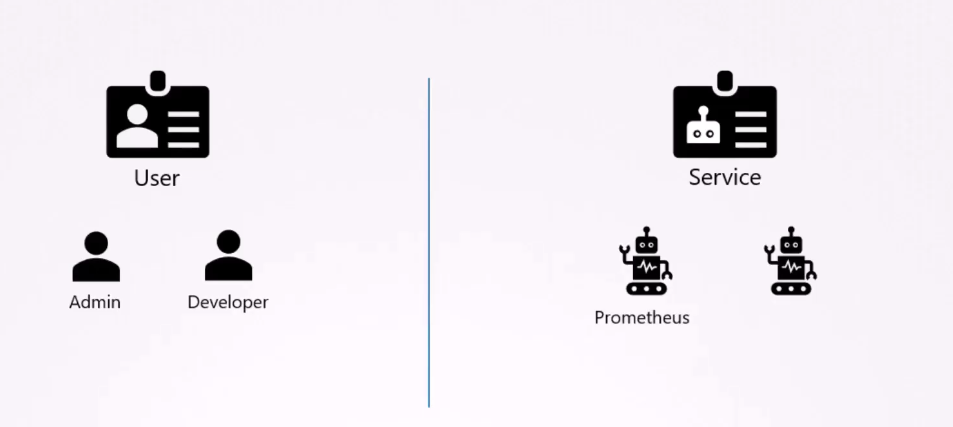 A user account could be for an administrator
accessing the cluster to perform administrative tasks,
or a developer accessing the cluster
to deploy applications, et cetera.
A service account could be an account used by an application
to interact with the Kubernetes cluster.
For example, a monitoring application like Prometheus
uses a service account to pull the Kubernetes API
for performance metrics.
An automated built tool like Jenkins,
user service accounts to deploy applications
on the Kubernetes cluster.
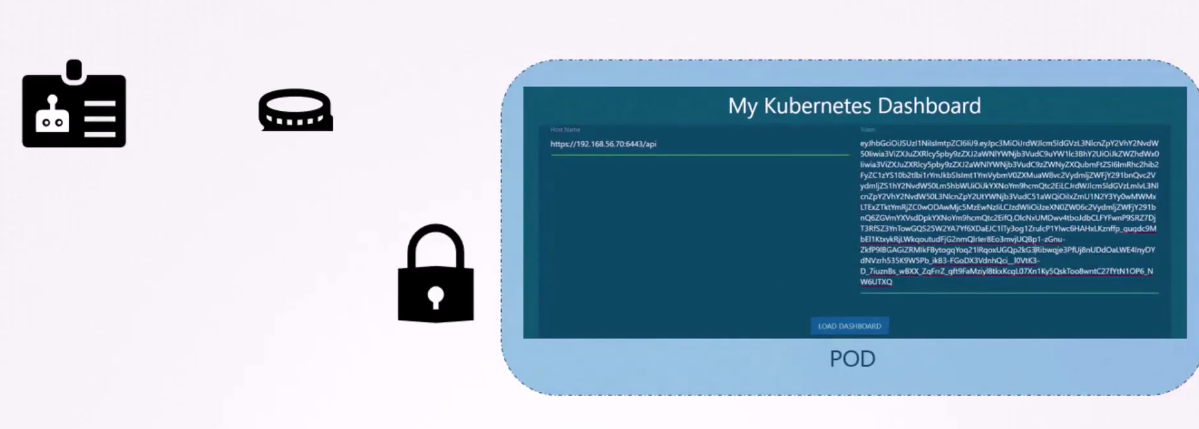
Let’s take an example.
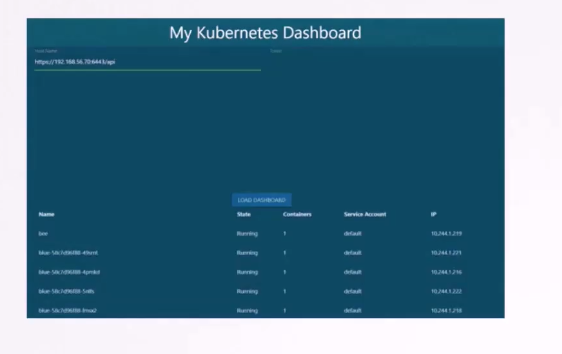 I’ve built a simple Kubernetes dashboard application
named My Kubernetes Dashboard.
It’s a simple application built in Python,
and all that it does when deployed
is retrieve the list of pods on a Kubernetes cluster
 by sending a request to the Kubernetes API,
and display it on a webpage.
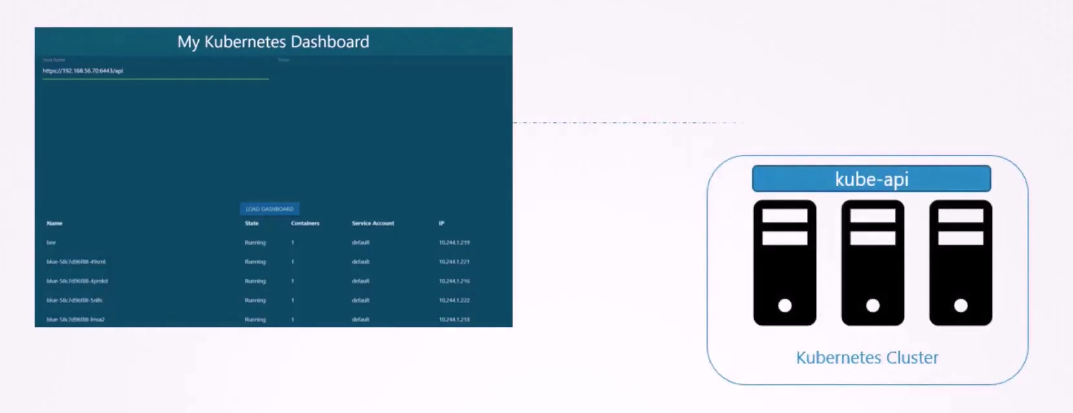
In order for my application to query the Kubernetes API,
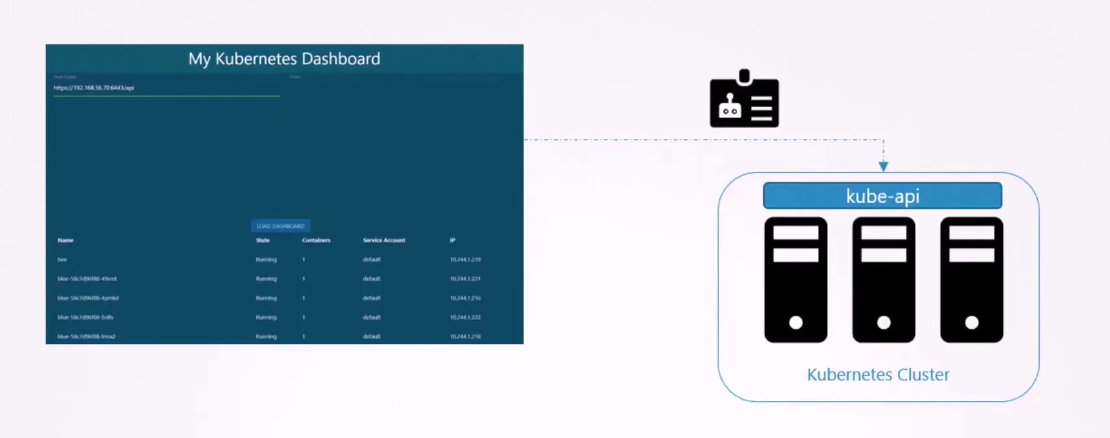 it has to be authenticated.
For that, we use a service account.
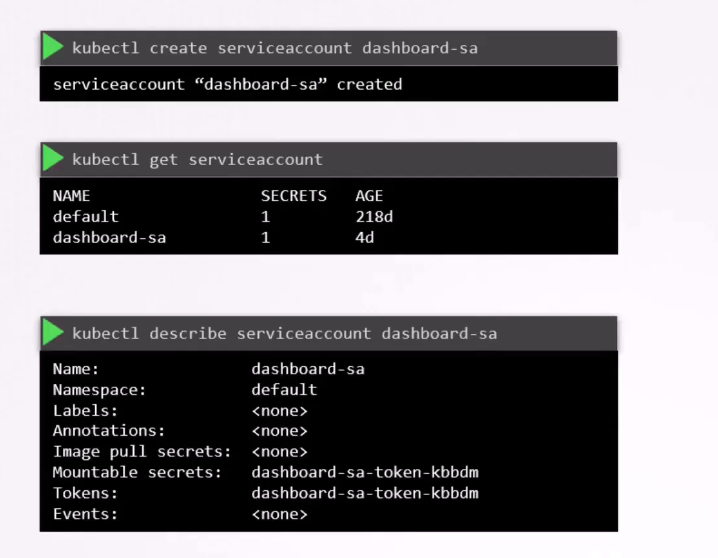 To create a service account, run the command
kubectl create serviceaccount,
followed by the account name,
which is “dashboard-sa” in this case.
To view the service accounts,
run the kubectl get serviceaccount command,
this will list all the service accounts.
When the service account is created,
it also creates a token automatically.
The service account token
is what must be used by the external application
while authenticating to the Kubernetes API.
The token, however, is stored as a secret object.
In this case, it’s named dashboard-sa-token-kbbdm.
So when a service account is created,
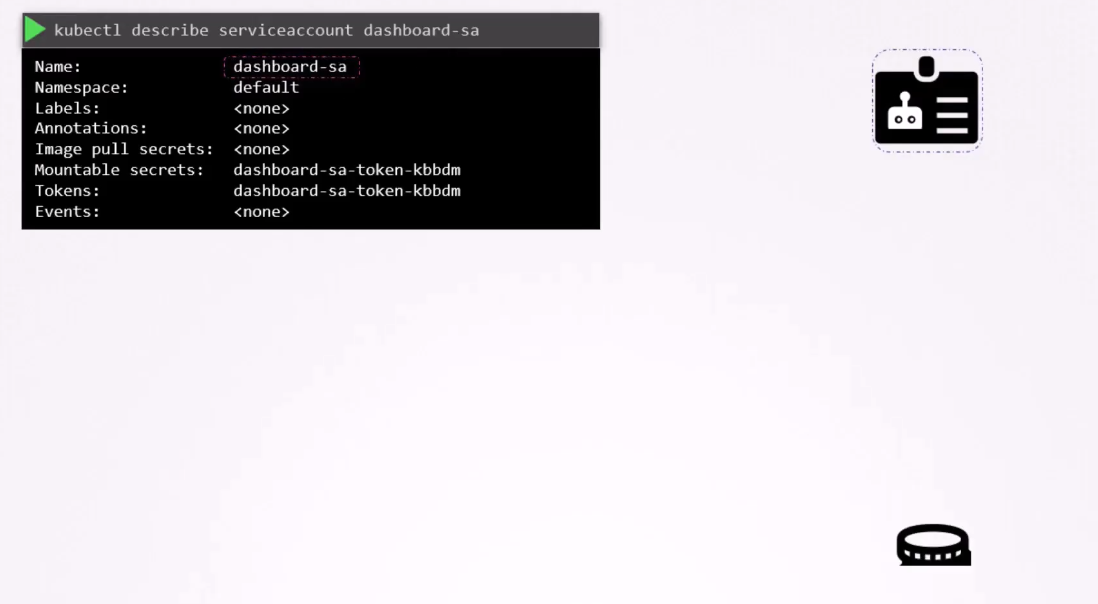 it first creates the service account object,
and then generates a token for the service account.
It then creates a secret object
 and stores that token inside the secret object.
The secret object is then linked to the service account.
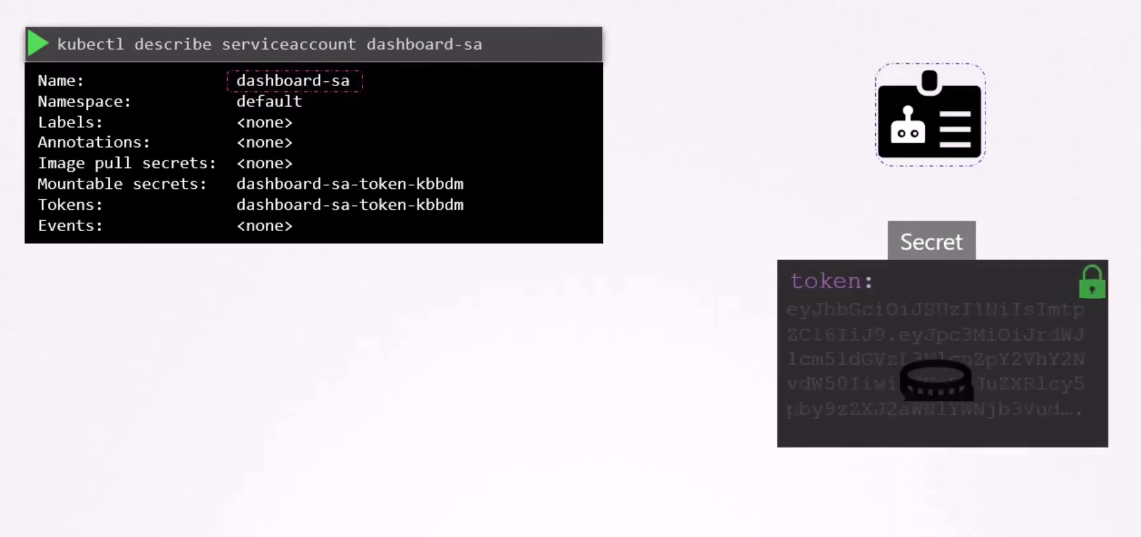
To view the token, view the secret object
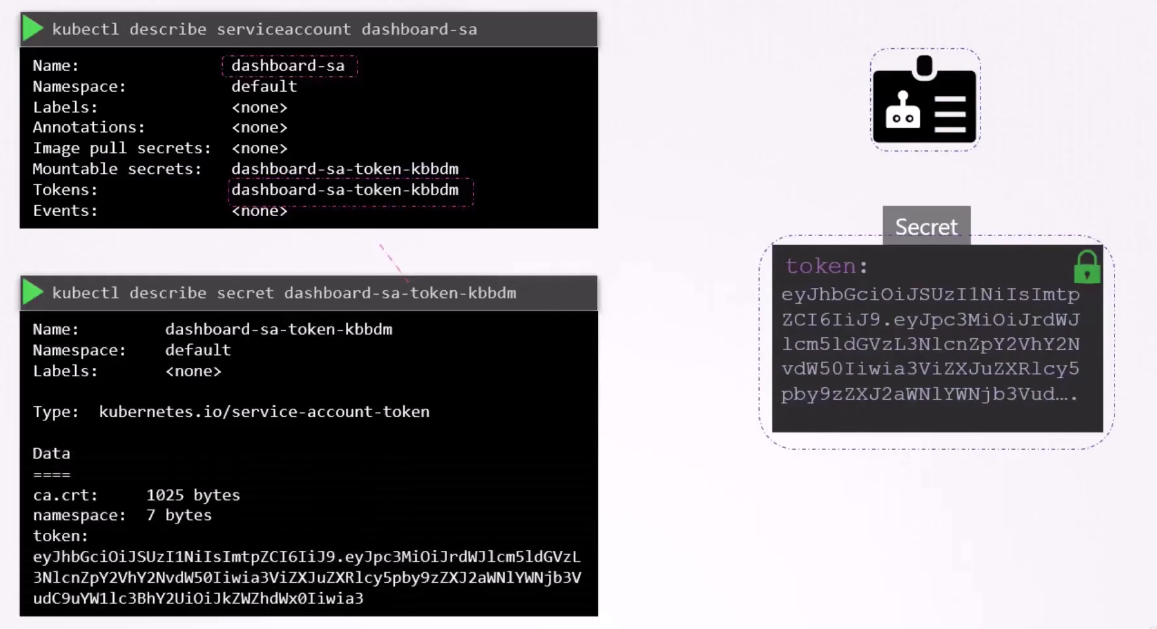 by running the command kubectl describe secret.
This token can then be used
as an authentication bearer token
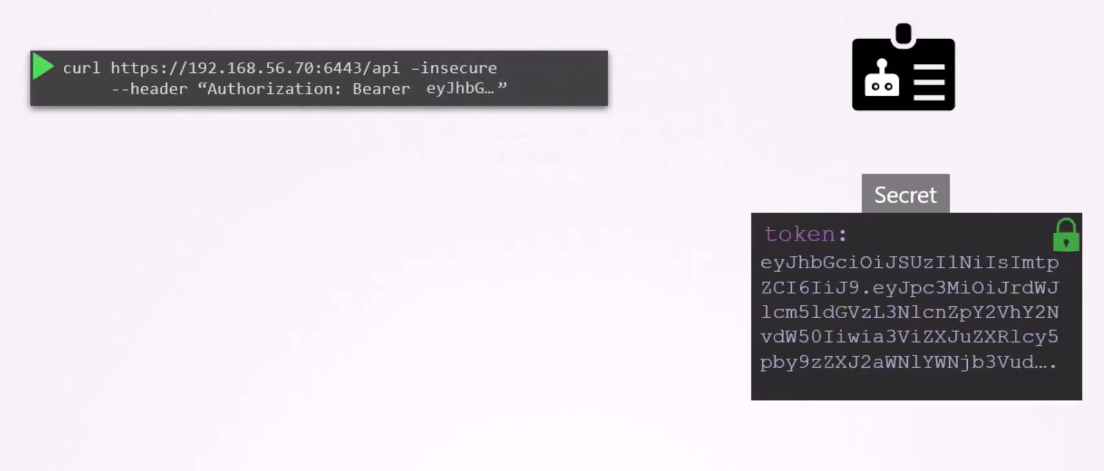 while making a risk call to the Kubernetes API.
For example, in this simple example, using Curl,
you could provide the bearer token
as an authorization header
while making a risk call to the Kubernetes API.
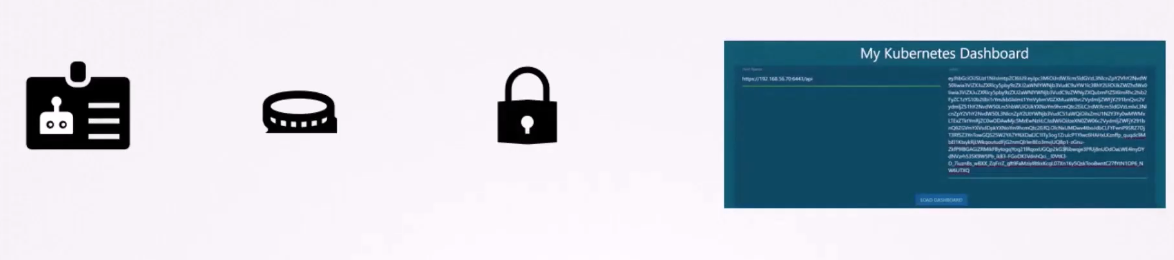
 In case of my custom dashboard application,
copy and paste the token into the tokens field
to authenticate the dashboard application.
So that’s how you create a new service account and use it.
 You can create a service account,
assign the right permissions
using role-based access control mechanisms,
and export your service account tokens,
and use it to configure your third party application
to authenticate to the Kubernetes API.
But what if your third party application
is hosted on the Kubernetes cluster itself?
For example, we can have
our custom Kubernetes dashboard application,
or the Prometheus application
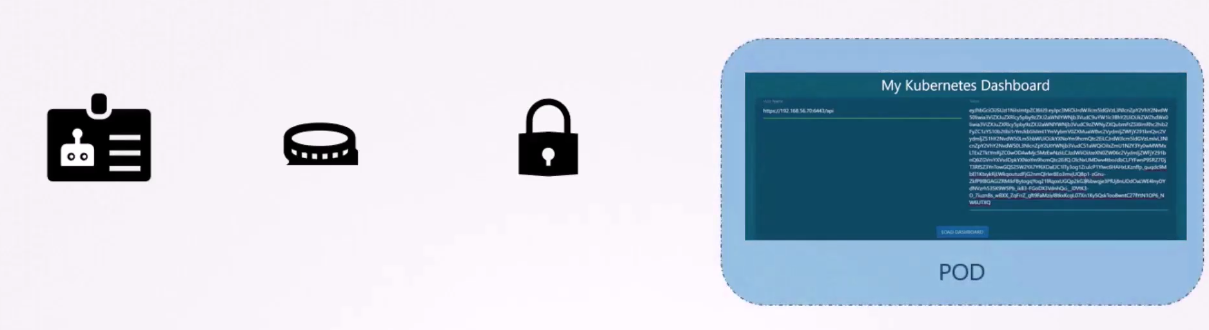 deployed on the Kubernetes cluster itself.
In that case, this whole process
 of exporting the service account token,
and configuring the third party application to use it
can be made simple
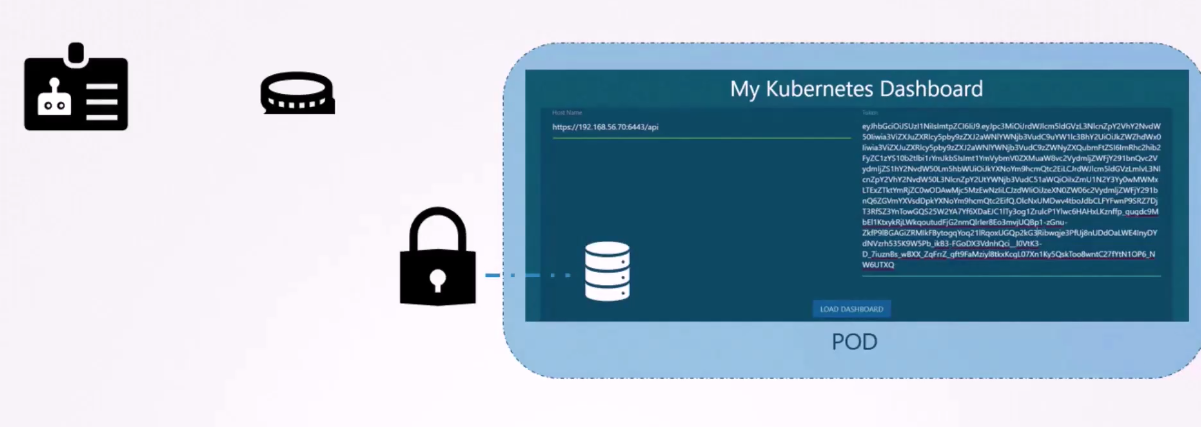 by automatically mounting the service token secret
as a volume inside the pod,
hosting the third party application.
That way, the token
to access the Kubernetes API
is already placed inside the pod
and can be easily read by the application.
You don’t have to provide it manually.
If you go back and look at the list of service accounts,
you will see that there is a default service account
that exists already.
For every namespace in Kubernetes,
a service account named default is automatically created.
Each namespace has its own default service account.
Whenever a pod is created,
the default service account and its token
are automatically mounted to that pod as a volume mount.
For example, we have a simple pod definition file
that creates a pod
using my custom Kubernetes dashboard image.
We haven’t specified any secrets
or volume mounts in the definition file.
However, when the pod is created,
if you look at the details of the pod
by running the Kube control described pod command,
you see that a volume is automatically created
from the secret named default token,
which is in fact the secret containing the token
for this default service account.
The secret token is mounted at location
/var/run/secrets/kubernetes.io/serviceaccount
inside the pod.
So from inside the pod, if you run the LS command
to list the contents of the directory,
you will see the secret mounted as three separate files.
The one with the actual token is the file’s named token.
If you view contents of that file,
you will see the token to be used for accessing
the Kubernetes API.
Now remember that the default service account
is very much restricted.
It only has permission to run basic Kubernetes API queries.
If you’d like to use a different service account
such as the one we just created,
modify the pod definition file
to include a service account field
and specify the name of the new service account.
Remember, you cannot edit the service account
of an existing pod.
You must delete and recreate the pod.
However, in case of a deployment,
you will be able to edit the service account
as any changes to the pod definition file,
will automatically trigger a new rollout for the deployment.
So the deployment will take care of deleting
and recreating new pods, with the right service account.
When you look at the pod details now,
you see that the new service account is being used.
So remember, Kubernetes automatically mounts
the default service account
if you haven’t explicitly specified any.
You may choose not to mount a service account automatically
by setting the automountServiceAccountToken field
to false in the pod spec section.
Let’s now discuss some of the changes
that were made in releases
version 1.22 and 1.24 of Kubernetes
that changed the way service accounts
secrets and tokens worked.
Now, as we discussed in the previous video,
every namespace has a default service account,
and that service account has a secret object
with a token associated with it.
When a pod is created,
it automatically associates the service account
to the pod and mounts the token
to a well-known location within the pod.
In this case, it’s under
a /var/run/secrets/kubernetes.io/serviceaccount.
This makes the token accessible
to a process that’s running within the pod,
and that enables that process to query the Kubernetes API.
Now, if you list the contents of the directory
inside the pod,
you will see the secret mounted as three separate files.
The one with the actual token is the file named token.
So if you list the contents of that file,
you’ll see the token to be used
for accessing the Kubernetes API.
So all of that remains same.
This is exactly what we discussed in previous video.
Now let’s take that token that we just saw,
and if you decode this token using this command,
or you could just copy and paste this token
in the JWT website at jwt.io,
you’ll see that it has no expiry date defined
in the payload section here on the right.
So this is a token that does not have an expiry date set.
So this excerpt from the Kubernetes enhancement proposal
for creating bound service account tokens
describes this form of JWT
to be having some security and scalability related issues.
So the current implementation of JWT
is not bound to any audience and is not time bound.
As we just saw, there was no expiry date for the token.
So the JWT is valid, as long as the service account exists.
Moreover, each JWT requires a separate secret object
per service account, which results in scalability issues.
And as such, in version 1.22,
the token request API was introduced
as part of the Kubernetes enhancement proposal 1205,
that aimed to introduce a mechanism
for provisioning Kubernetes service account tokens
that are more secure and scalable via an API.
So tokens generated by the token request API
are audience bound.
They’re time bound, and object bound,
and hence are more secure.
Now, since version 1.22, when a new pod is created,
it no longer relies on the service account,
a secret token, that we just saw.
Instead, a token with a defined lifetime
is generated through the token request, API
by the service account admission controller
when the pod is created.
And this token is then mount
as a projected volume onto the pod.
So in the past, if you look at this space here,
you’d see as the secret,
that’s part of the service account mount as a secret object.
But now as you can see, it’s a projected volume
that actually communicates
with the token controller API token request API
and it gets a token for the pod.
Now with version 1.24, another enhancement was made
as part of the Kubernetes enhancement proposal 2799,
which dealt with the reduction
of secret-based service account tokens.
So in the past when a service account was created,
it automatically created a secret with a token
that has no expiry and is not bound to any audience.
This was then automatically mount as a volume to any pod
that uses that service account.
And that’s what we just saw.
But in version 1.22 that was changed the automatic mounting
of the secret object to the pod was changed,
and instead it then moved to the token request API.
So with version 1.24,
a change was made where when you create a service account,
it no longer automatically creates
a secret or a token access secret.
So you must run the command Kubectl to create token,
followed by the name of the service account
to generate a token for that service account
if you needed one.
And it will then print that token on screen.
Now, if you copy that token,
and then if you try to decode this token,
this time, you’ll see that it has an expiry date defined.
And if you haven’t specified any time limit,
then it’s usually one hour
from the time that you run the command.
You can also pass in additional options to the command
to increase the expiry of the token.
So now post version 1.24,
if you would still like to create secrets
the old way with non expiring token,
then you could still do that by creating a secret object
with the type set
to kubernetes.io/service-account-token,
and the name of the service account specified
within annotations in the metadata section like this.
So this is how the secret object will be associated
with that particular service account.
So when you do this,
just make sure that you have the service account
created first, and then create a secret object.
Otherwise the secret object will not be created.
So this will create a non expiring token in a secret object
and associated with that service account.
Now you have to be sure if you really wanna do that,
because as per the Kubernetes documentation pages
on service account token secrets,
it says you should only create
service account token secrets,
if you can’t use the token request API to obtain a token.
So that’s either the kubectl create token command
we just talked about,
or it talks to the token request API to generate that token,
or it’s the automated token creation
that happens on pods when they’re created post version 1.22.
And also, you should only create
service account token request if the security exposure
of persisting in non-expiring token credential
is acceptable to you.
Now, the token request API is recommended
instead of using the service account token,
secret objects as they are more secure
and have a bounded lifetime,
unlike the service account token secrets
that have no expiry.
Well, that’s all for now,
to read more about these changes
refer to the Kubernetes enhancement proposals
that are listed here, as well as the documentation pages
on service account and secrets.
All right, thank you very much.