Operating System Upgrade
healthcheck = 5s mark as unreachable = 40s mark as dead = 5m (Pod Eviction timeou)
Node comes before the pod eviction timeout
For example, since you have multiple replicas of the blue pod, the users accessing the blue application are not impacted as they are being served through the other blue pod that’s online.
However, users accessing the green pod are impacted as that was the only pod running the green application.
Now, what does Kubernetes do in this case?
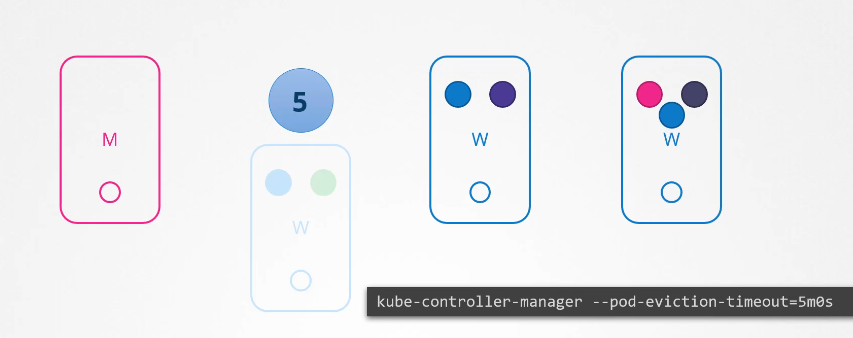
If the node came back online immediately, then the kubelet process starts and the pods come back online.
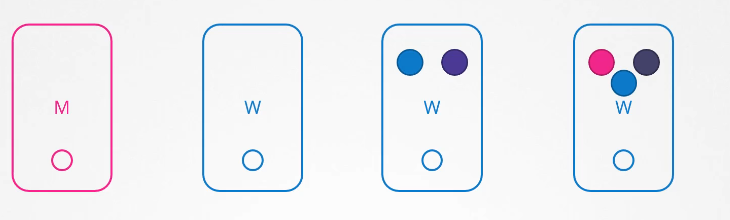
Node comes after the pod eviction timeout
-
However, if the node was down for more than five minutes, then the pods are terminated from that node. Well, Kubernetes considers them as dead.
-
If the pods were part of your replica set, then they are recreated on other nodes.
-
When the node comes back online after the pod-eviction-timeout, it comes up blank without any pod scheduled on it.
-
Since the blue pod was part of a replica set, it had a new pod created on another node.
-
However, since the green pod was not part of a replica set, it’s just gone.
Node draining
Thus, if you have maintenance tasks to be performed on a node,
if you know that the workloads running on the node have other replicas, and if it’s okay that they go down for a short period of time, and if you’re sure the node will come back online within five minutes, you can make a quick upgrade and reboot.
However, you do not for sure know if a node is going to be back online in five minutes. Well, you cannot for sure say it is going to be back at all, so there is a safer way to do it.
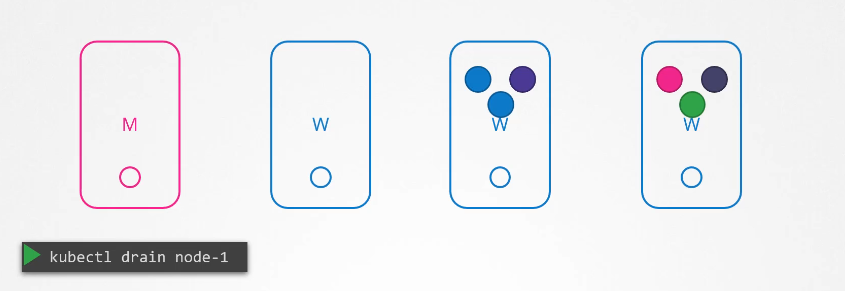 You can purposefully drain the node of all the workloads so that the workloads are moved to other nodes in the cluster.
Well, technically, they’re not moved. When you drain a node, the pods are gracefully terminated from the node that they’re on and recreated on another.
The node is also cordoned or marked as unschedulable, meaning no pods can be scheduled on this node until you specifically remove the restriction.
Now that the pods are safe on the other nodes, you can reboot the first node.
When it comes back online, it is still unschedulable.
You then need to uncordon it so that the pods can be scheduled on it again.
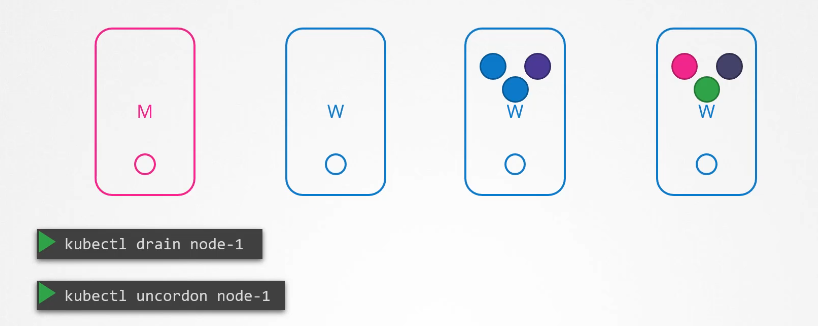
Now, remember, the pods that were moved to the other nodes don’t automatically fall back.
If any of those pods were deleted or if new pods were created in the cluster, then they would be created on this node.
Apart from drain and uncordon,
there is also another command called cordon.
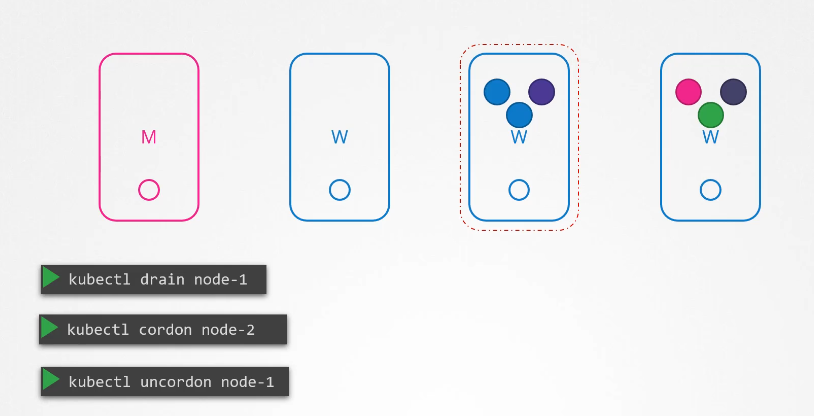 Cordon simply marks a node unschedulable.
Unlike drain, it does not terminate or move the pods on an existing node.
It simply makes sure that new pods are not scheduled on that node.