DNS Basics
we will discuss how Kubernetes implements DNS in the cluster. In the previous lecture,
we saw how you can address a service or pod from another pod.
In this lecture we will see how Kubernetes makes that possible.
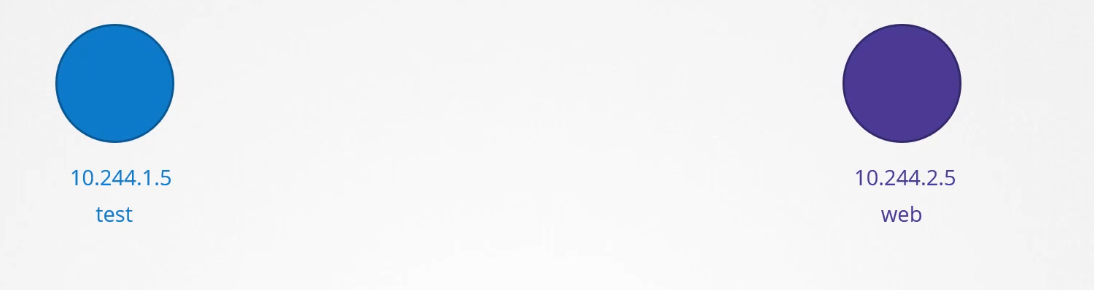 Say you were given two pods with two IP addresses,
how would you do it?
Based on what we learned
in the prerequisite lectures on DNS,
an easy way to get them to resolve each other
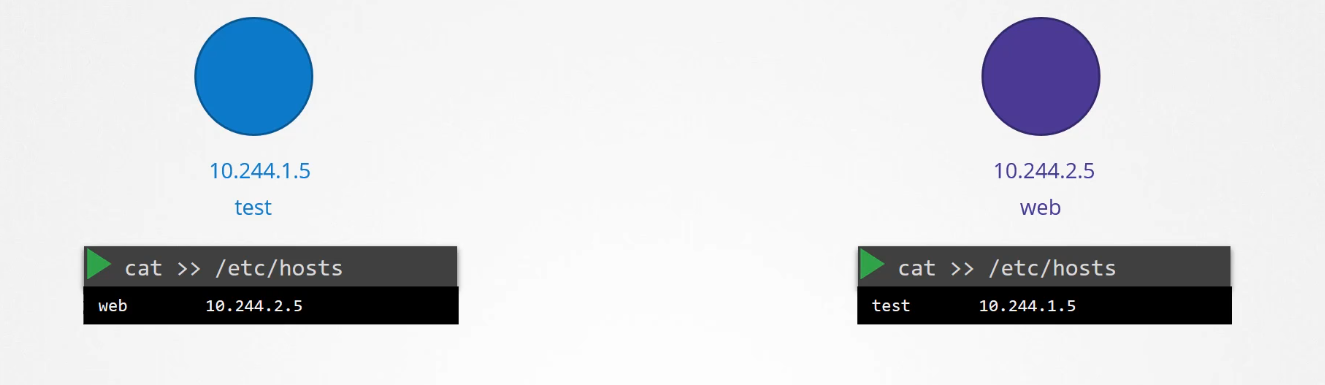 is to add an entry into each of their etc/hosts file.
On the first part, I would say the second pod web
is at 10.244.2.5, and on the second pod
I would say the first pod test is at 10.244.1.5.
But of course, when you have thousands of pods
in the cluster and hundreds of them being created
and deleted every minute, this is not a suitable solution.
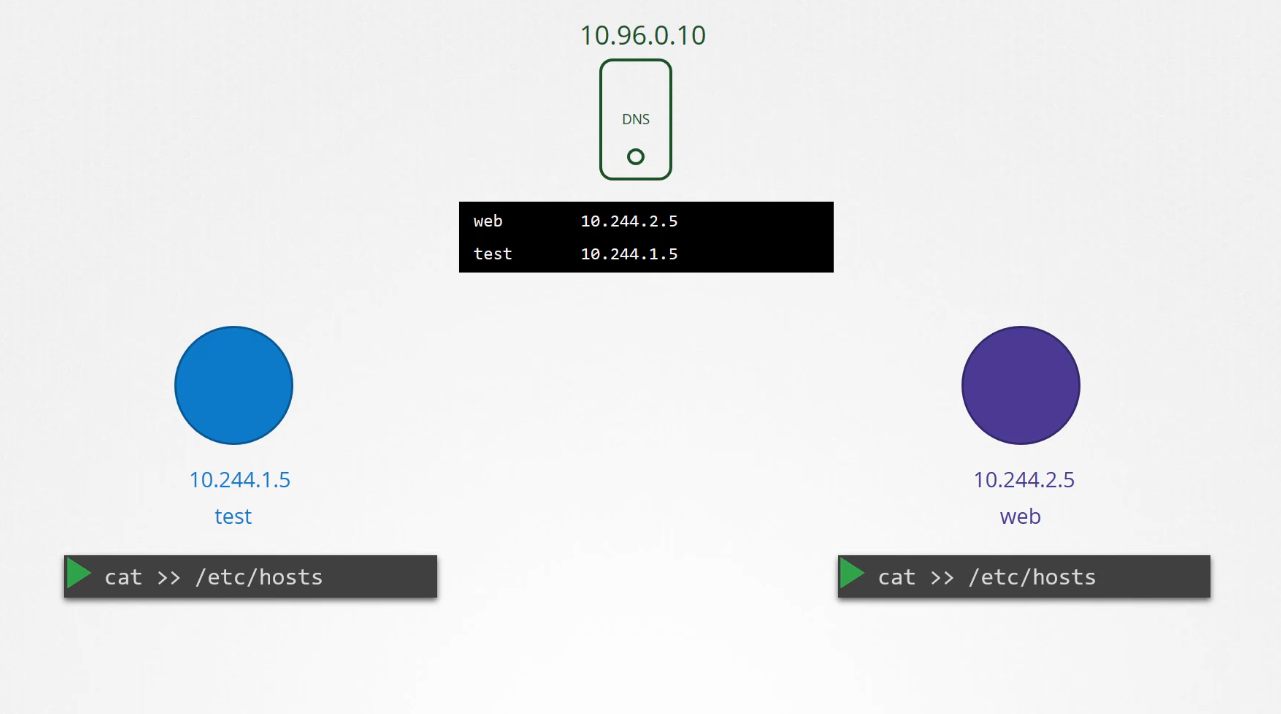 So we move these entries into a central DNS server.
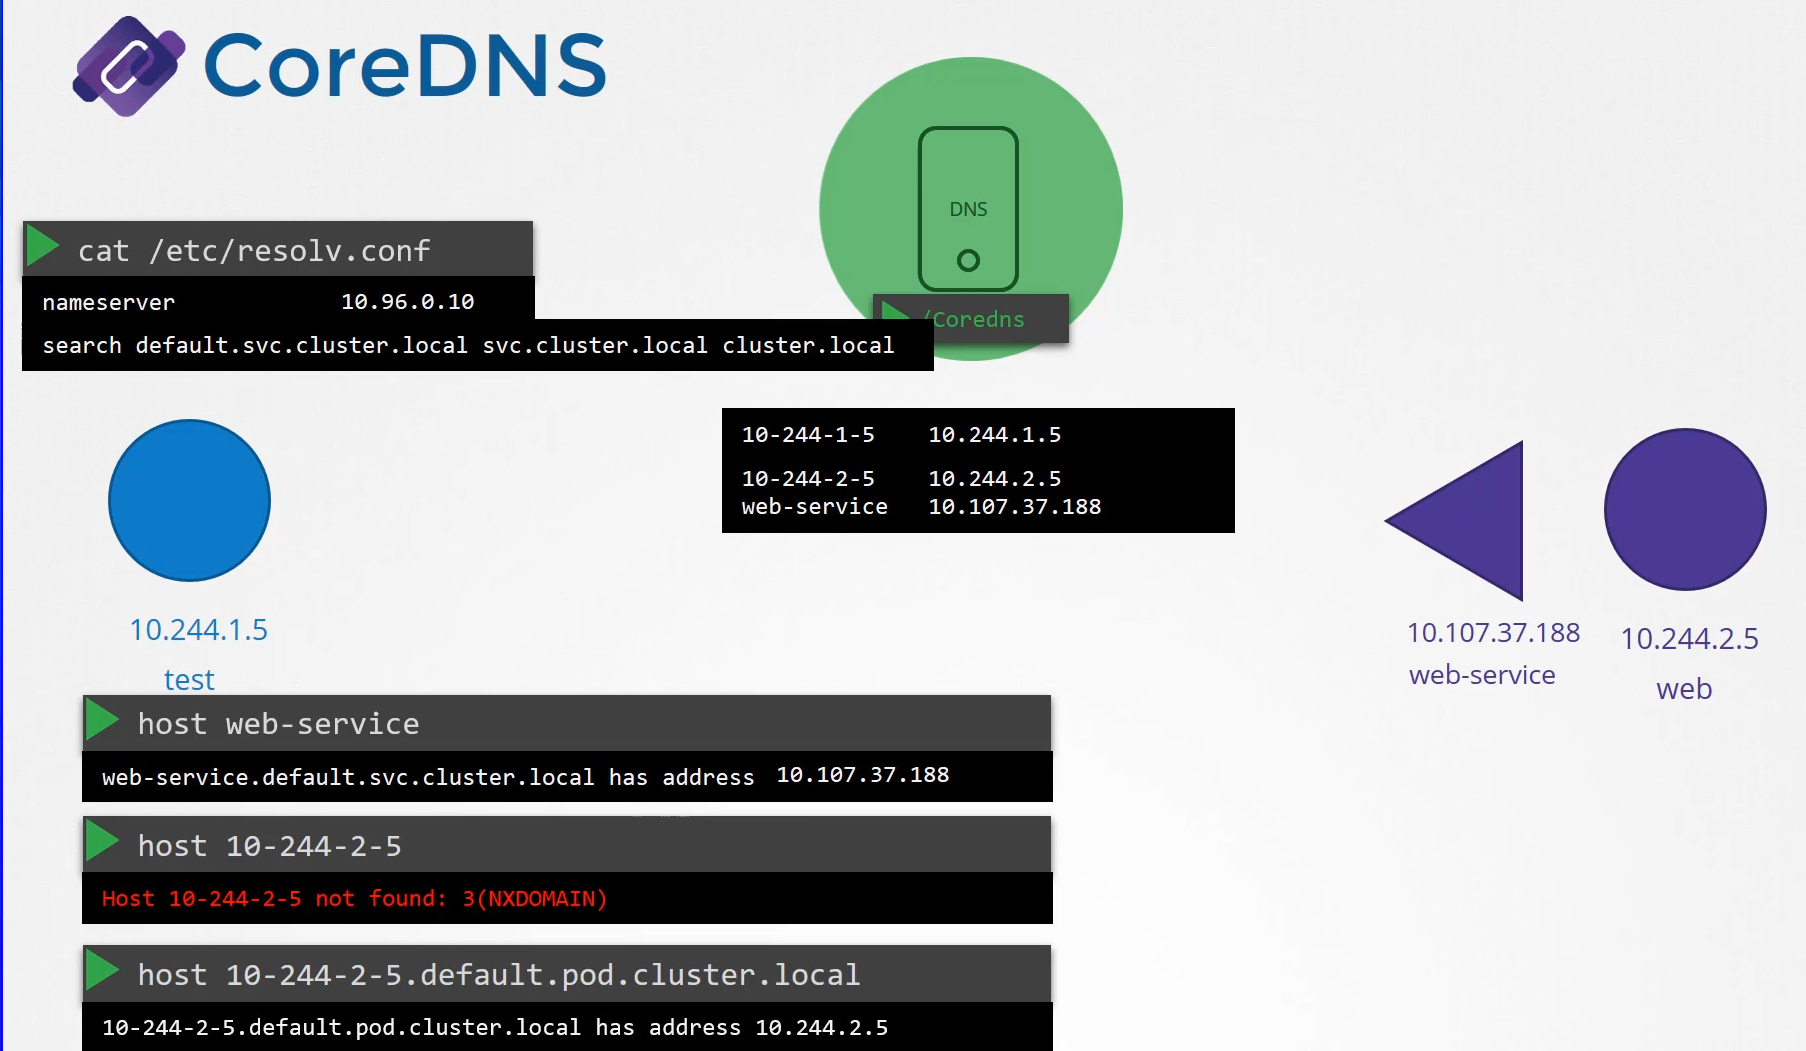
We then point these pods to the DNS server
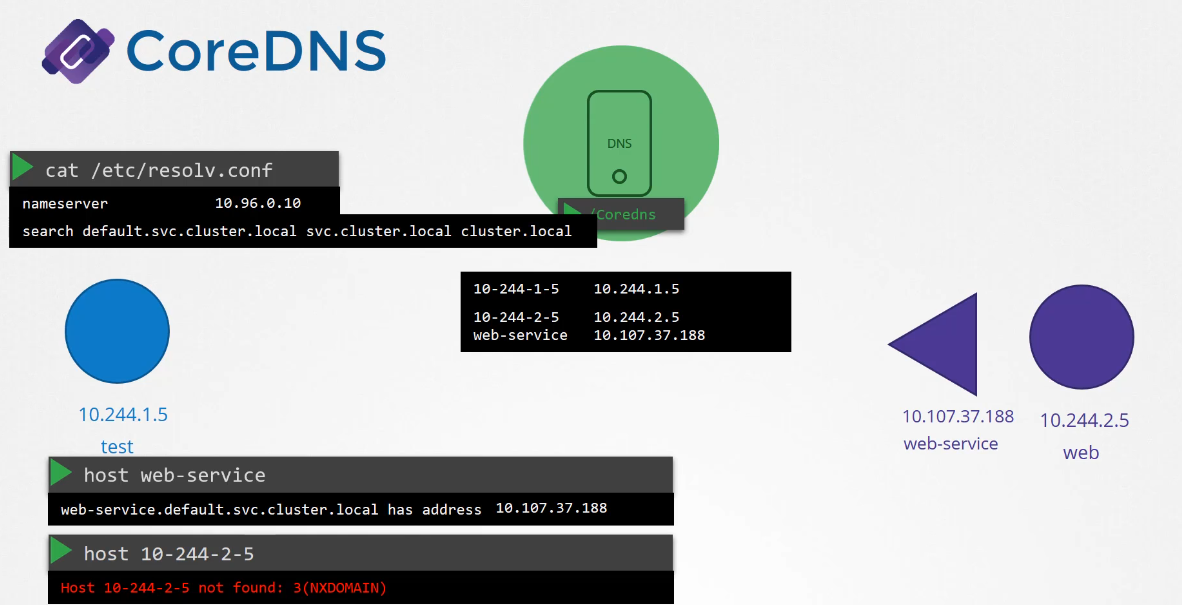
by adding an entry into their etc/resolv.conf file
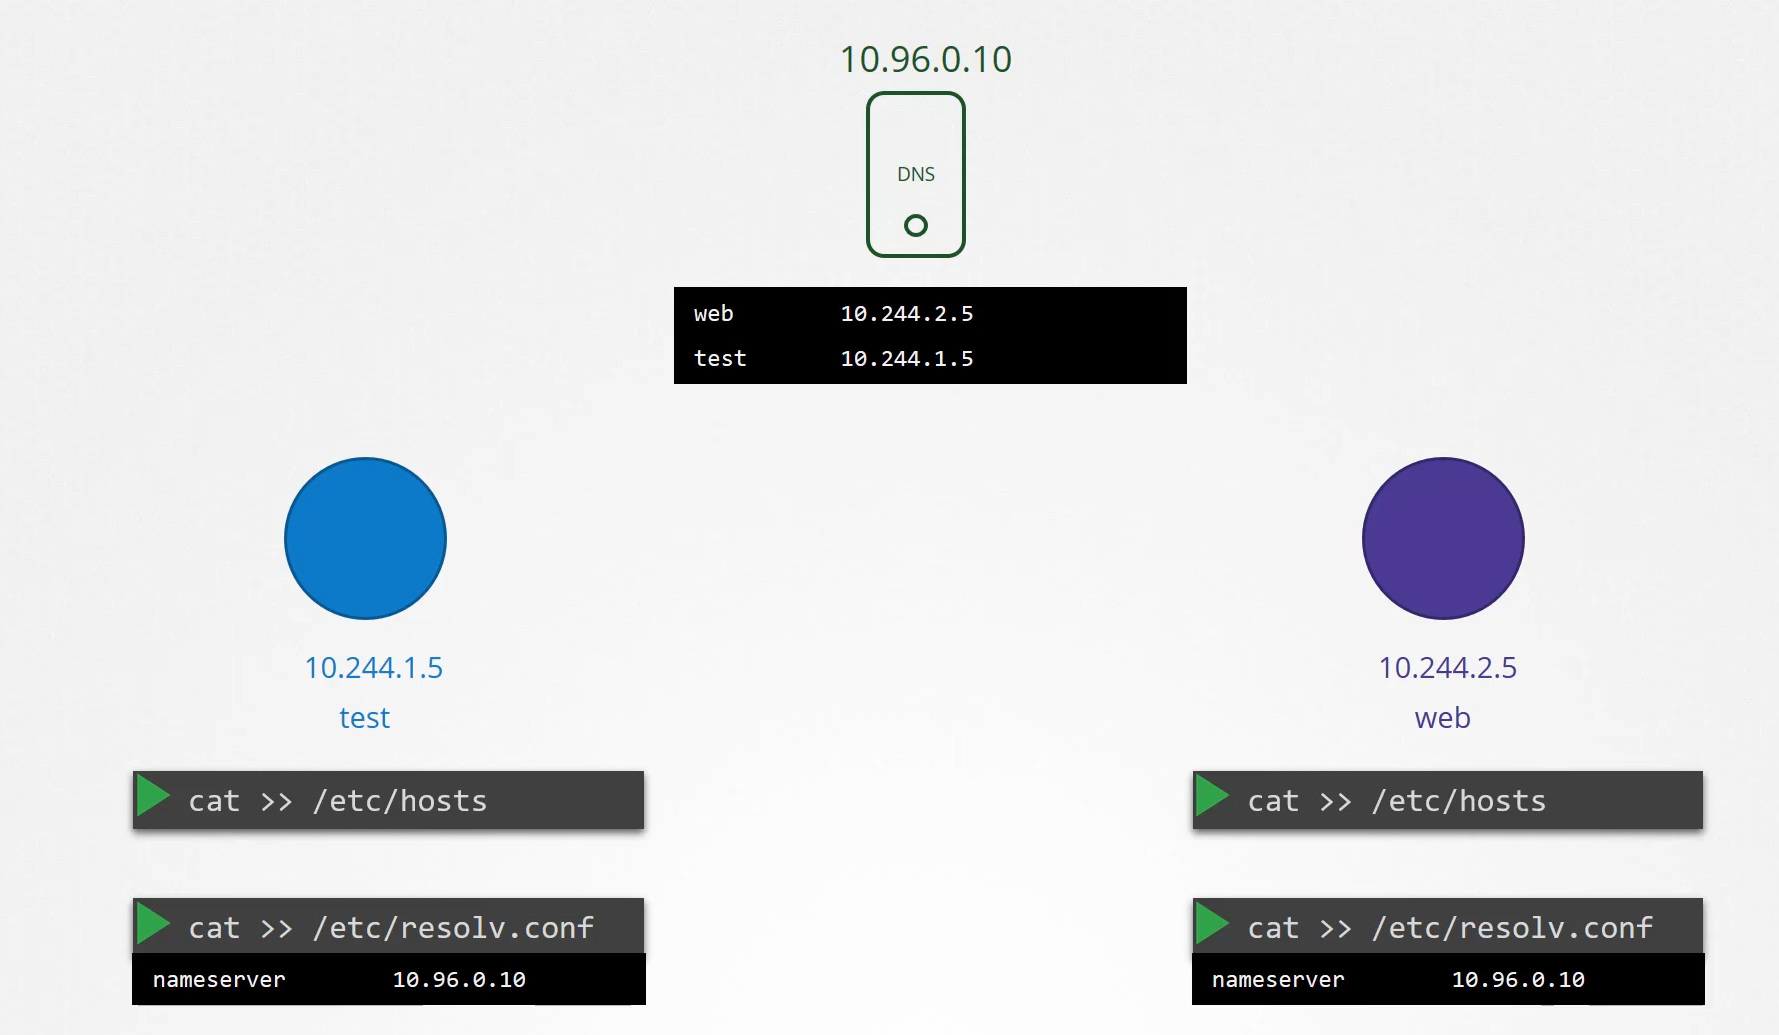
specifying that the nameserver is at the IP address
of the DNS server, which happens to be 10.96.0.10
in this case.
Every time a new pod is created,
 we add a record in the DNS server for that pod
so that other pods can access the new pod
and configure the etc/resolv.conf file in the pod
to point to the DNS server
so that the new pod can resolve other pods in the cluster.
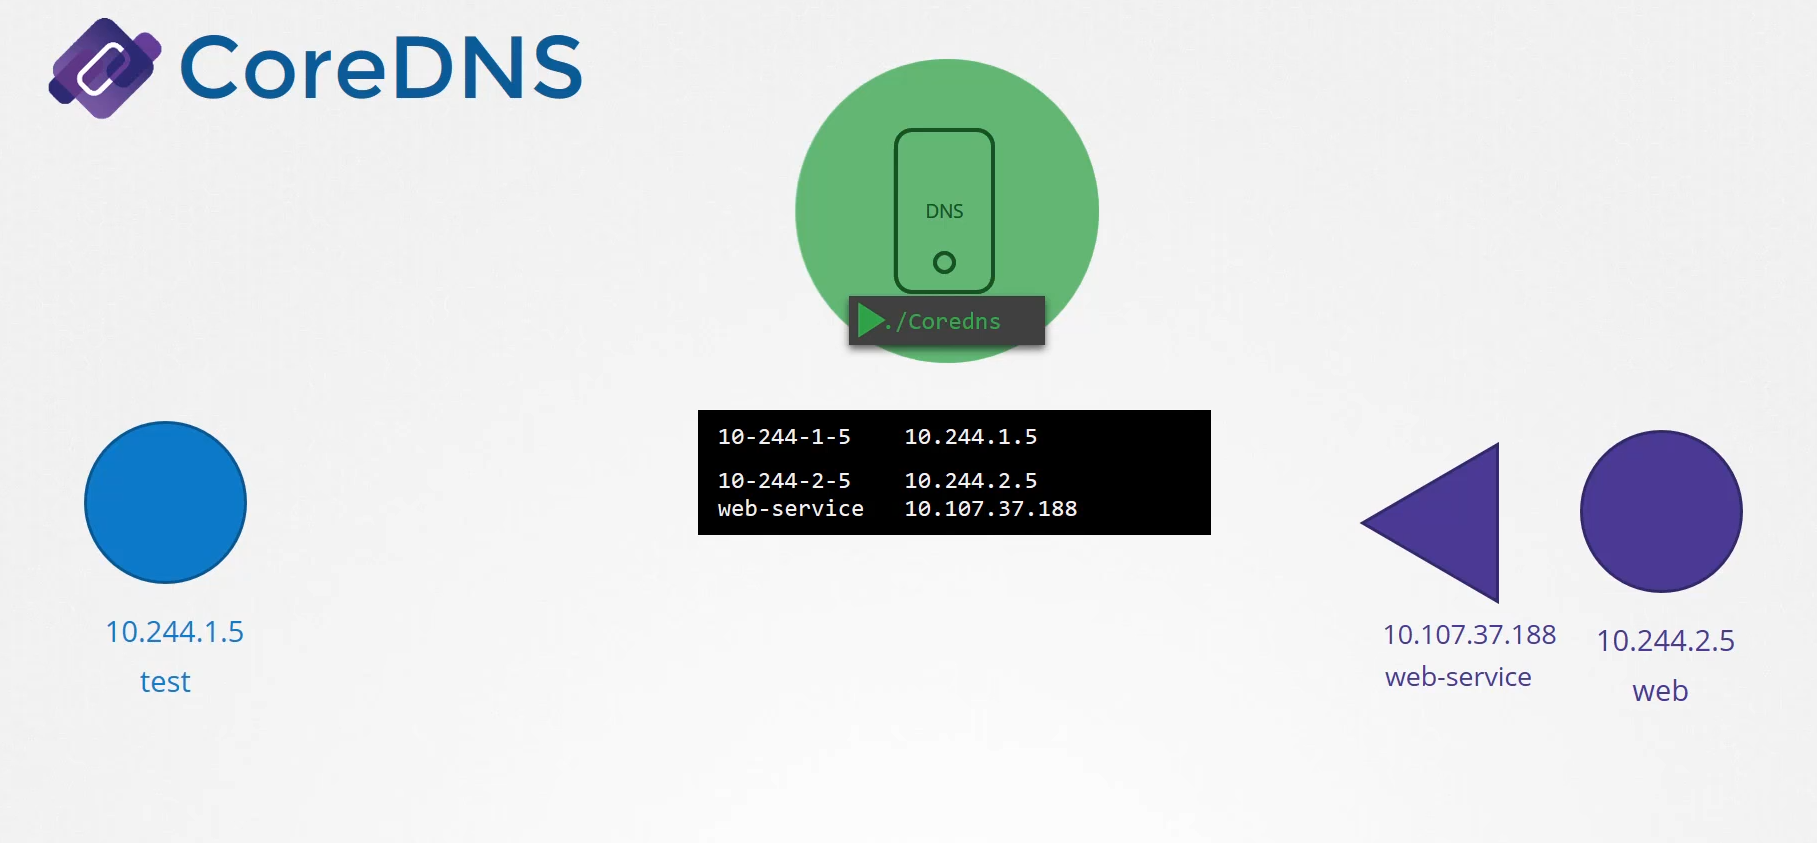
This is kind of how Kubernetes does it,
except that it does not create similar entries for pods
to map pod name to its IP address
as we have seen in the previous lecture.
It does that for services.
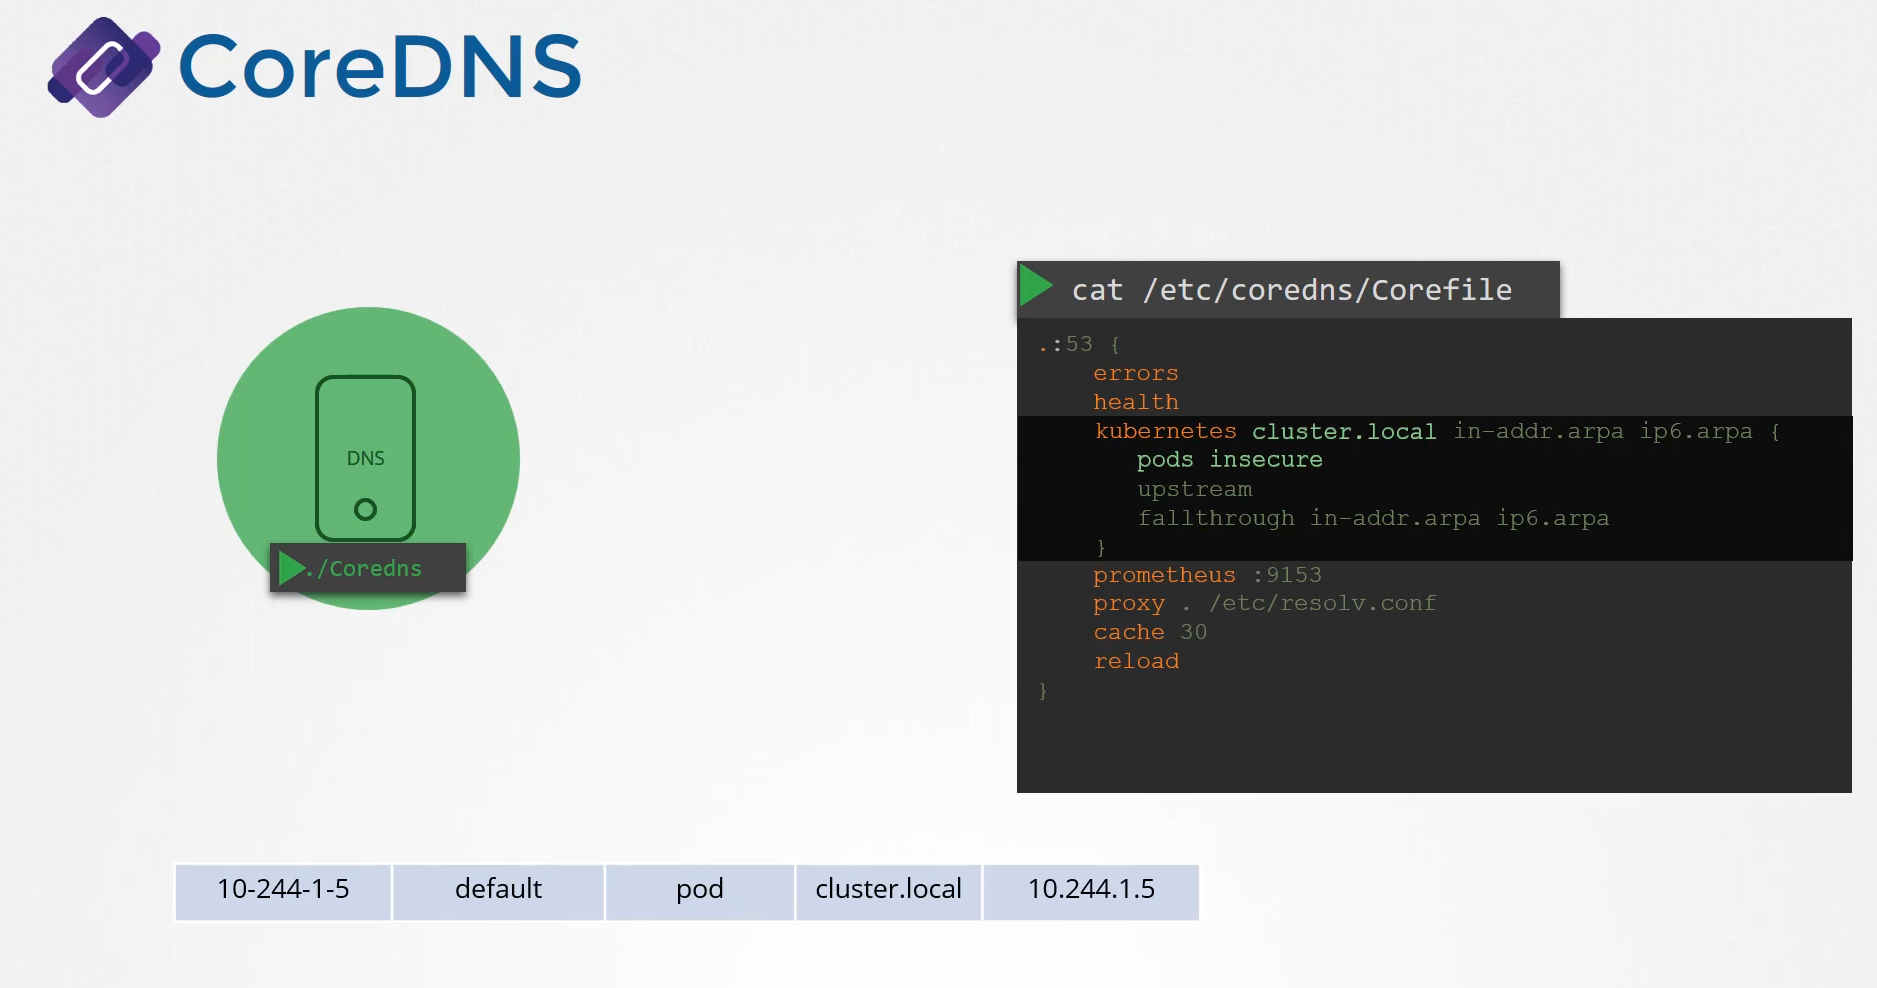
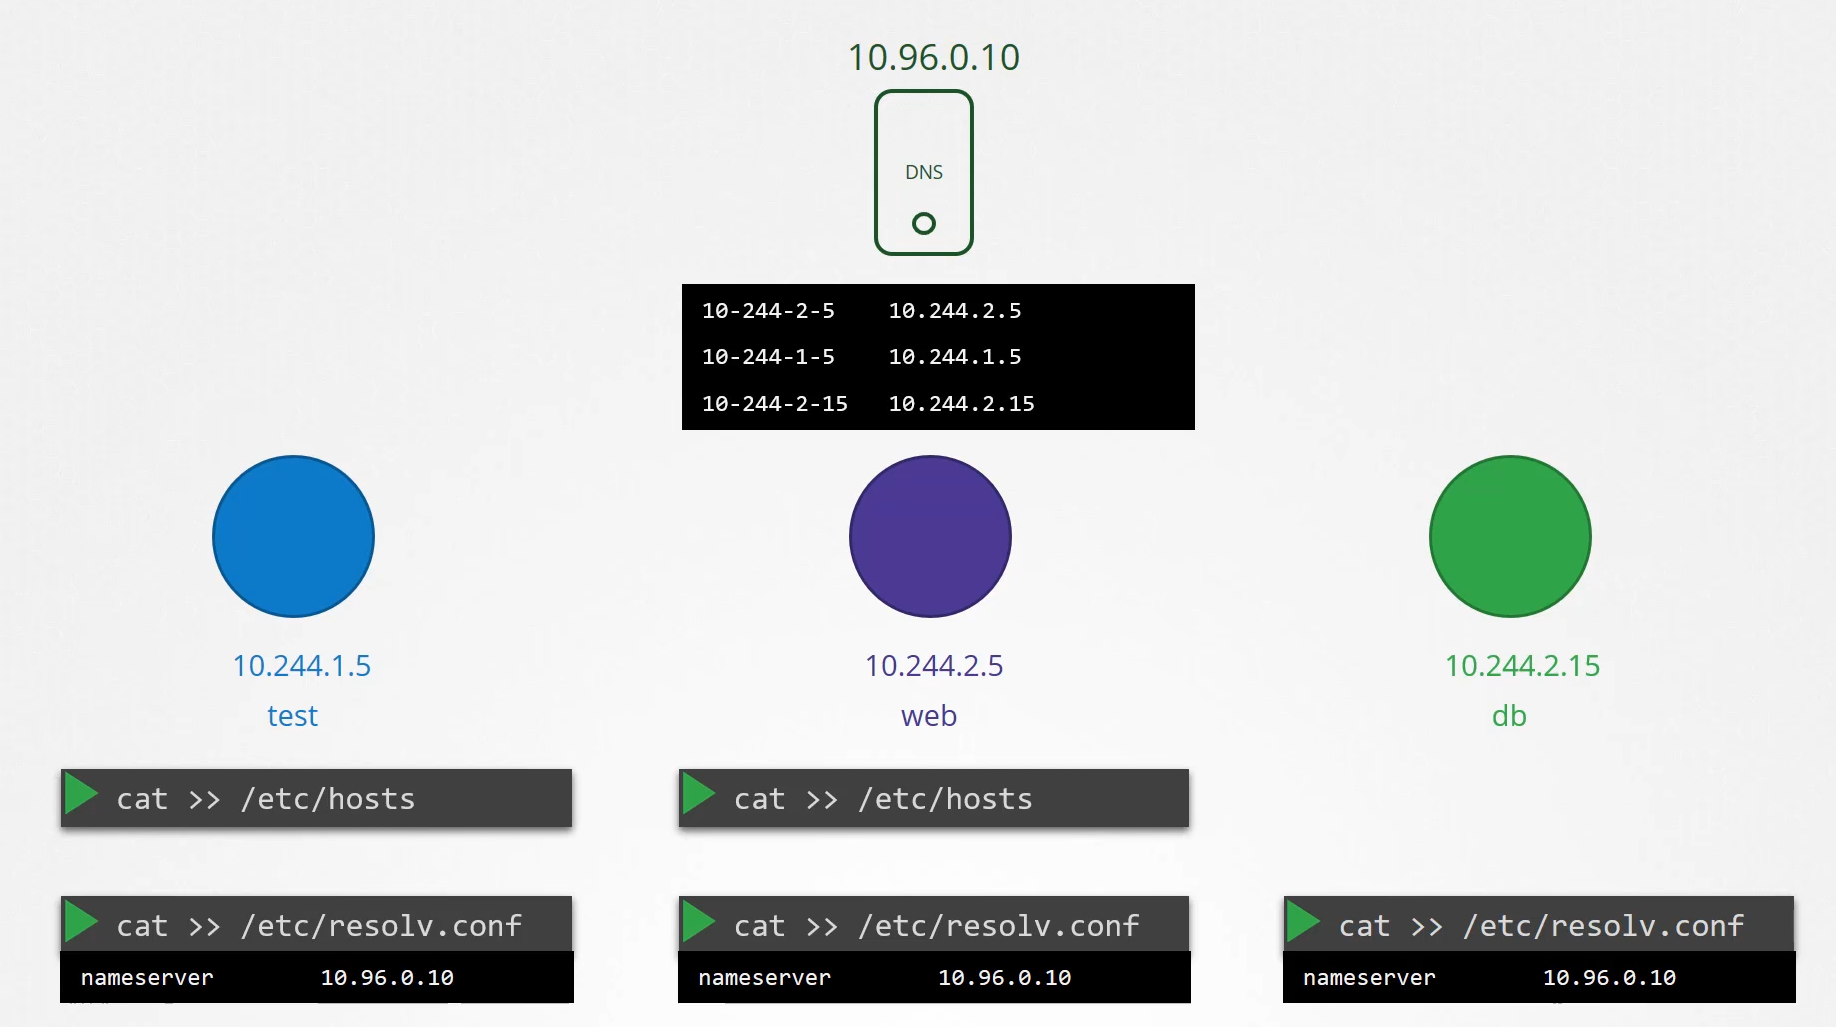 For pods it forms host names by replacing dots with dashes
in the IP address of the pod.
Kubernetes implements DNS in the same way.
It deploys a DNS server within the cluster.
Prior to version 1.12, the DNS server
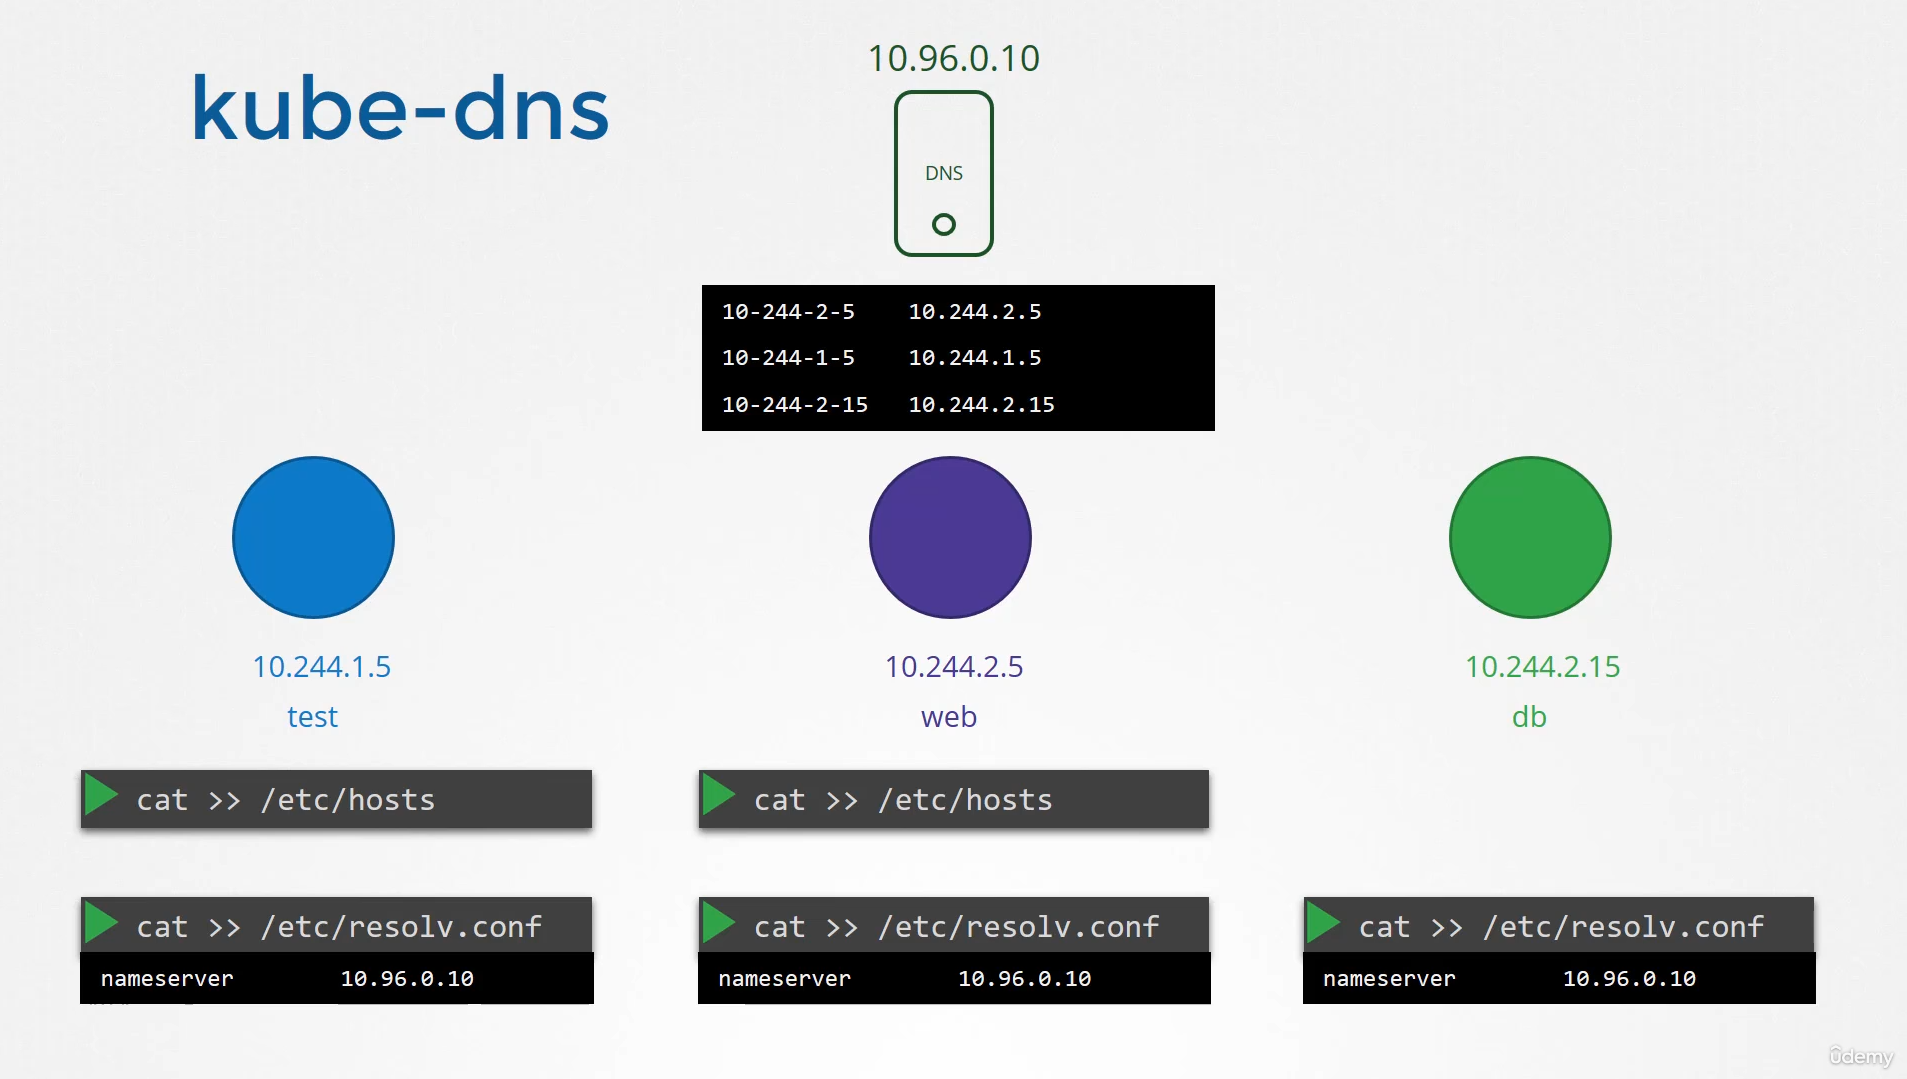 implemented by Kubernetes was known as kube-dns.
With Kubernetes version 1.12,
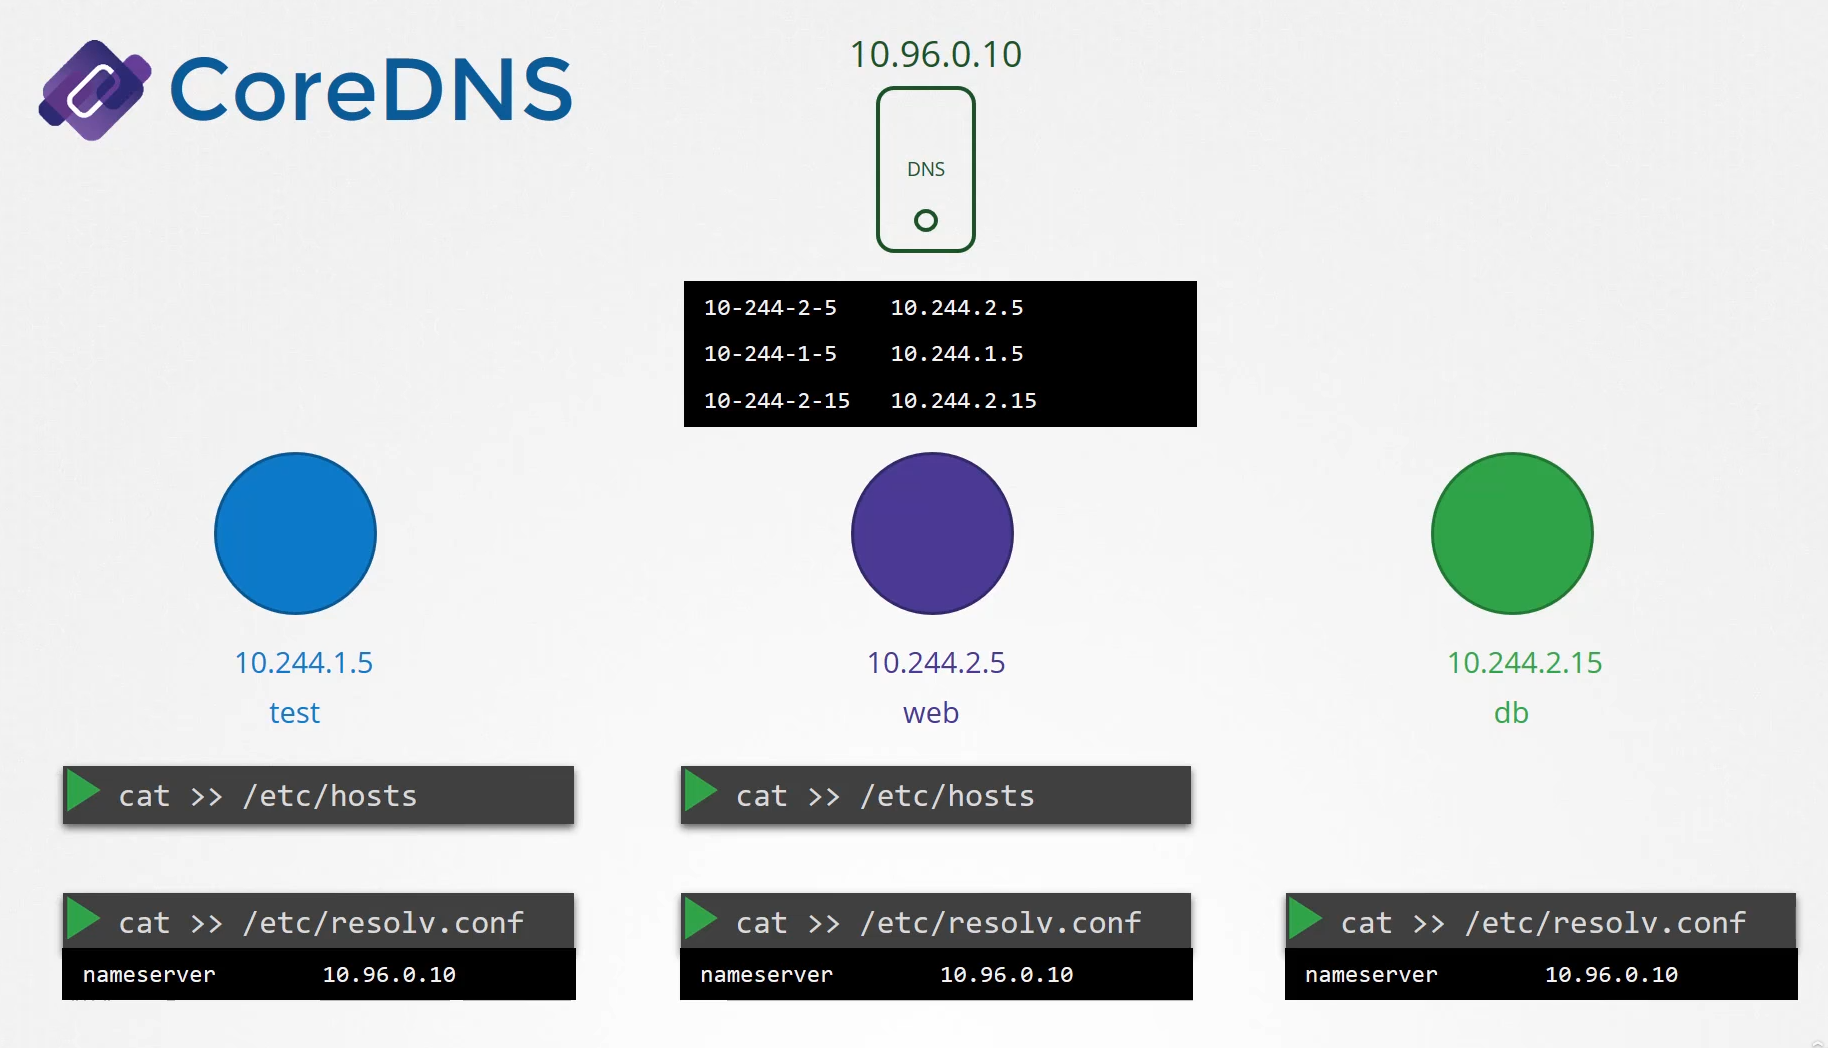 the recommended DNS server is CoreDNS.
We took a brief look at CoreDNS
in one of the prerequisite lectures.
So how is the CoreDNS set up in the cluster?
Coredns Deployment
The CoreDNS server is deployed as a pod
in the Kube system namespace in the Kubernetes cluster.
Well, they’re deployed as two pods
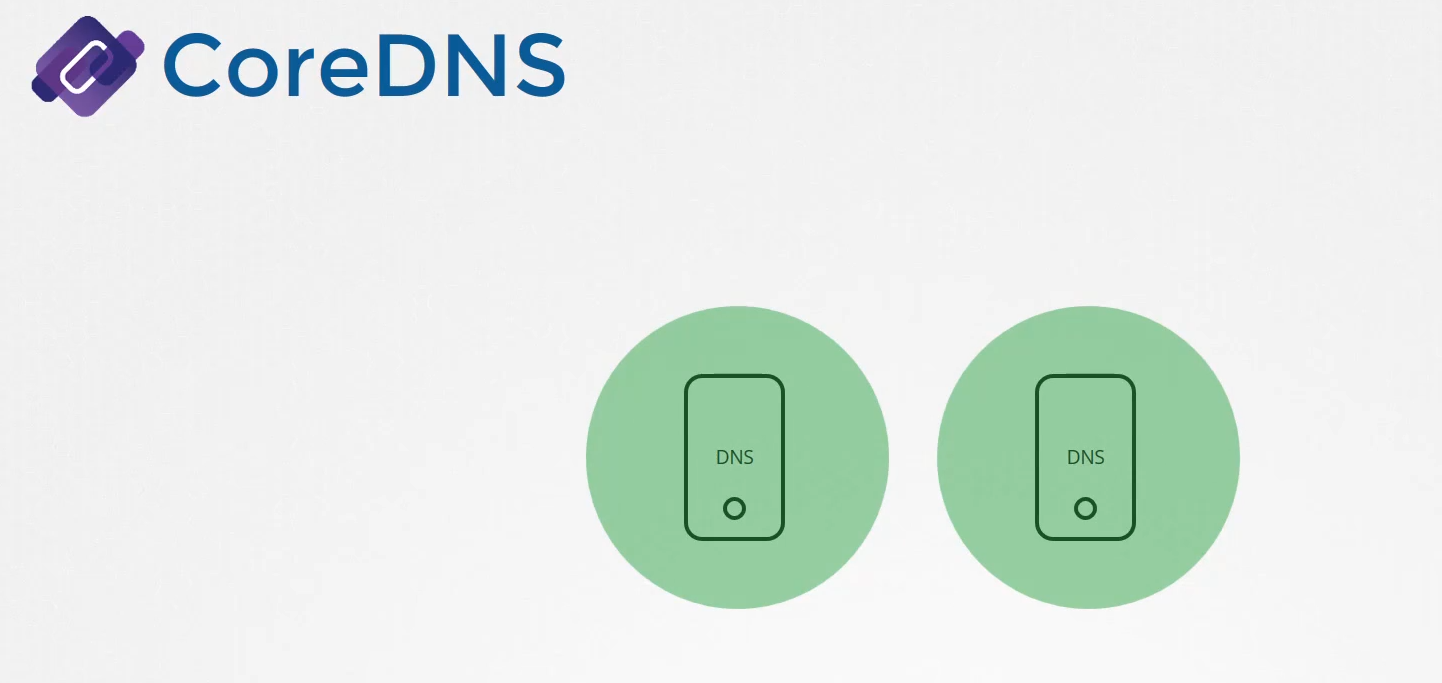 for redundancy as part of a replica set.
They’re actually a replica set within a deployment,
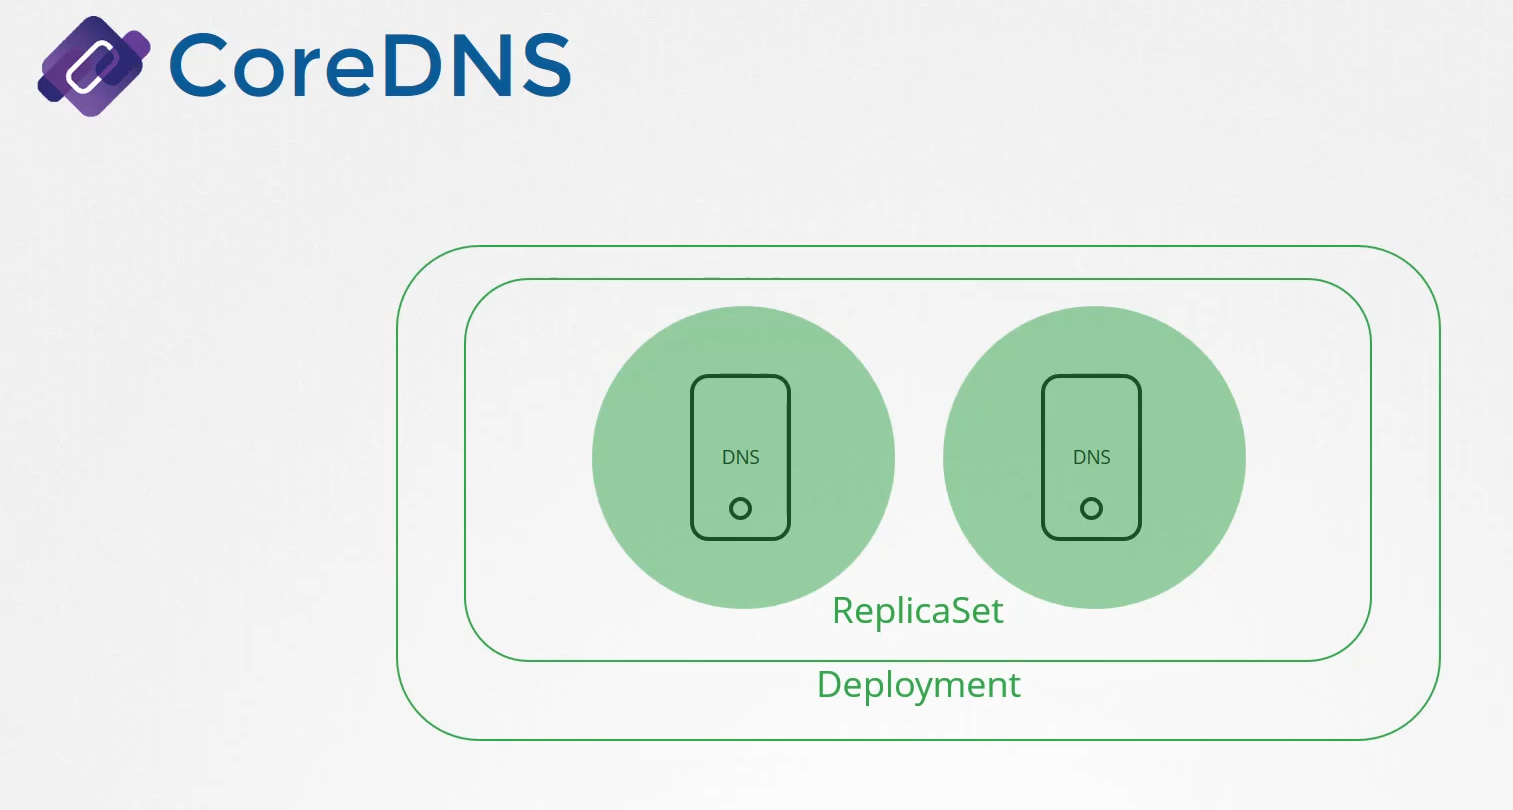 but it doesn’t really matter,
Coredns Executable
but we’ll just see CoreDNS as a pod in this lecture.
 This pod runs CoreDNS executable,
the same executable that we ran
when we deployed CoreDNS ourselves.
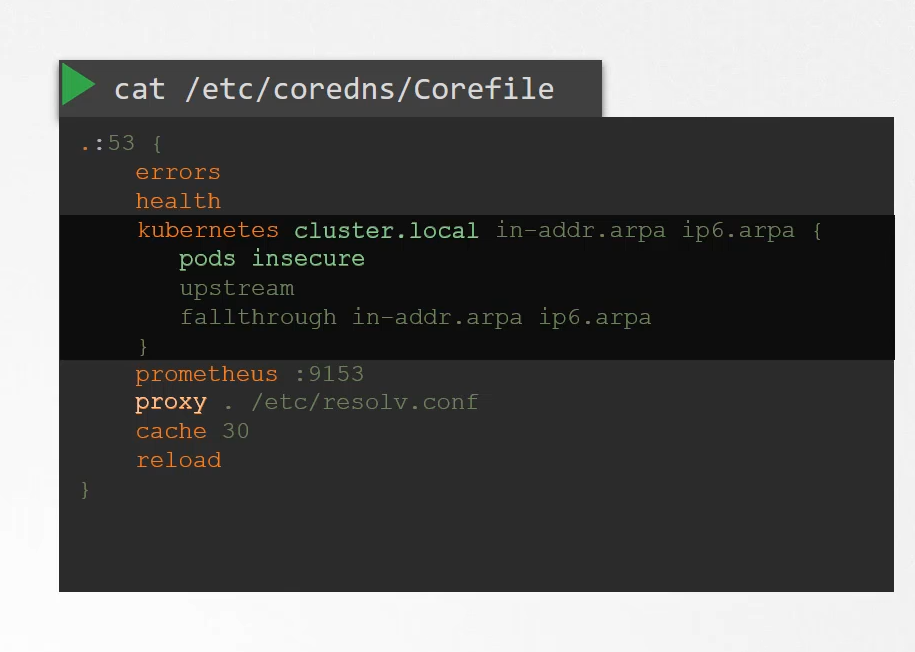
CoreDNS requires a configuration file.
In our case, we used a file named Corefile.
So does Kubernetes.
Corefile
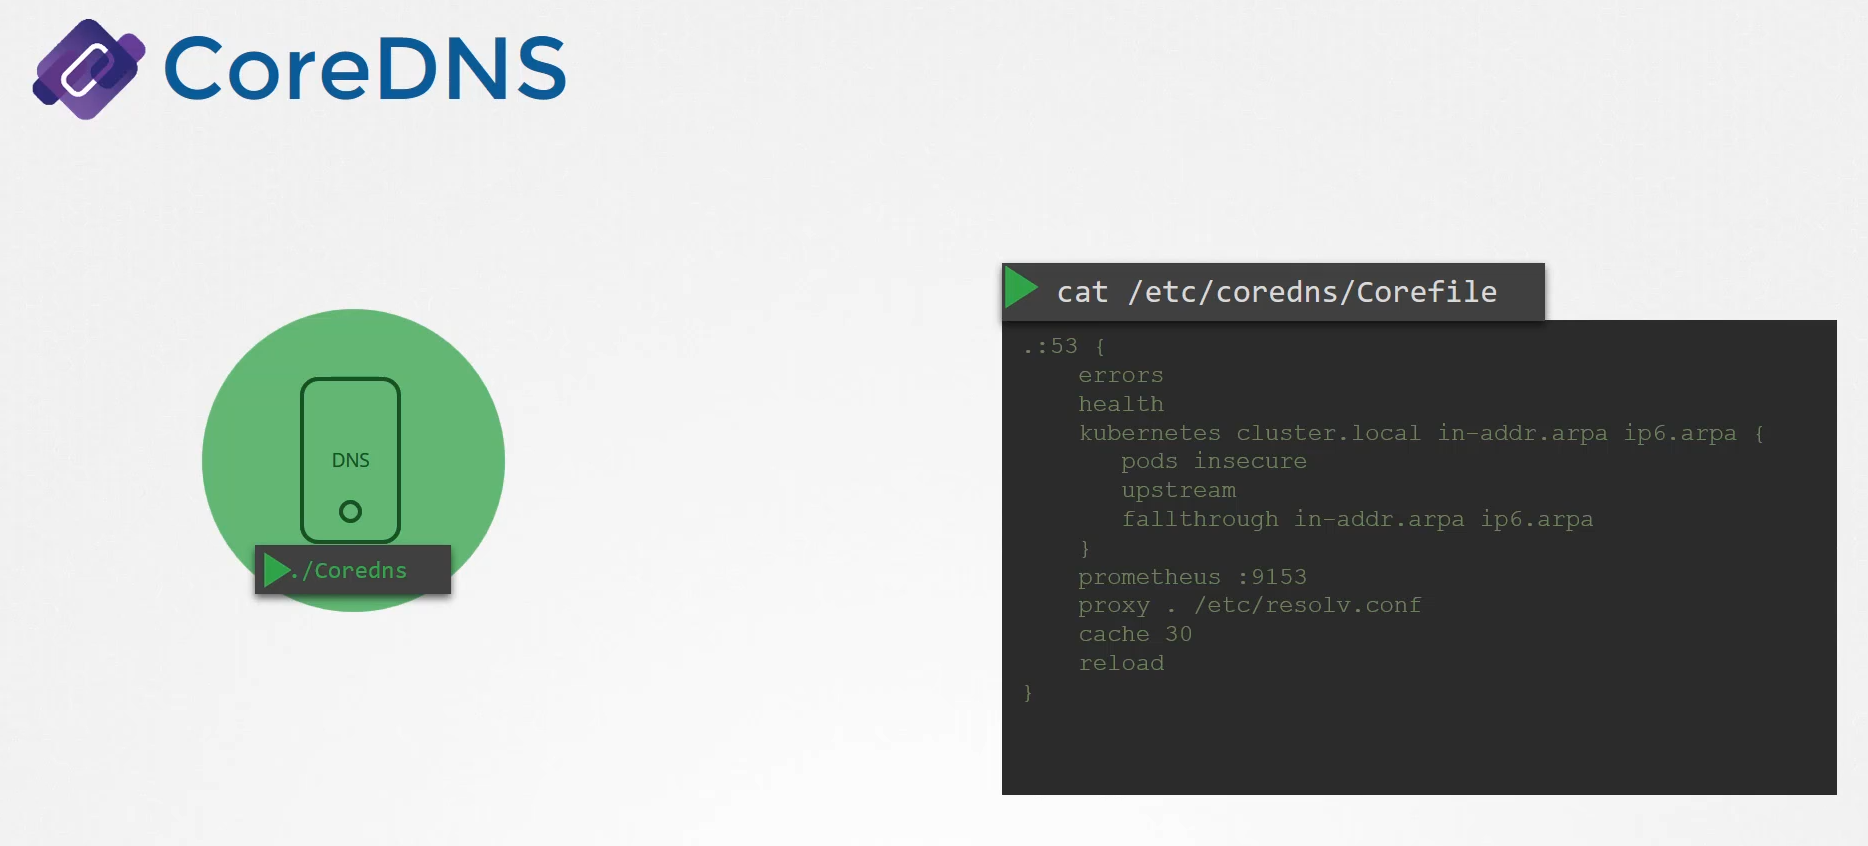
It uses a file named Corefile located at etc/coredns.
Within this file, you have a number of plugins configured,
the ones highlighted in orange.
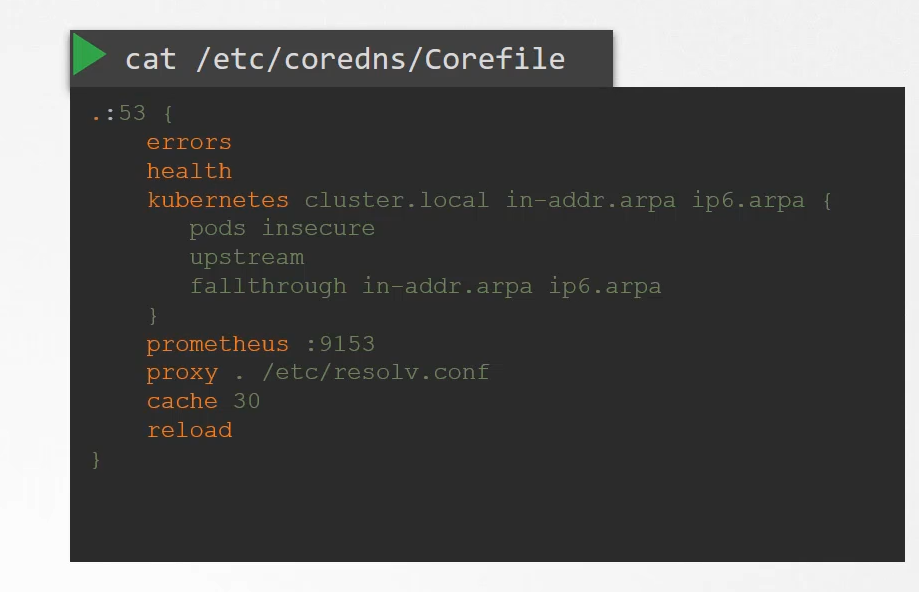 Plugins are configured for handling errors,
reporting health, monitoring metrics, cash, et cetera.
The plugin that makes CoreDNS work with Kubernetes
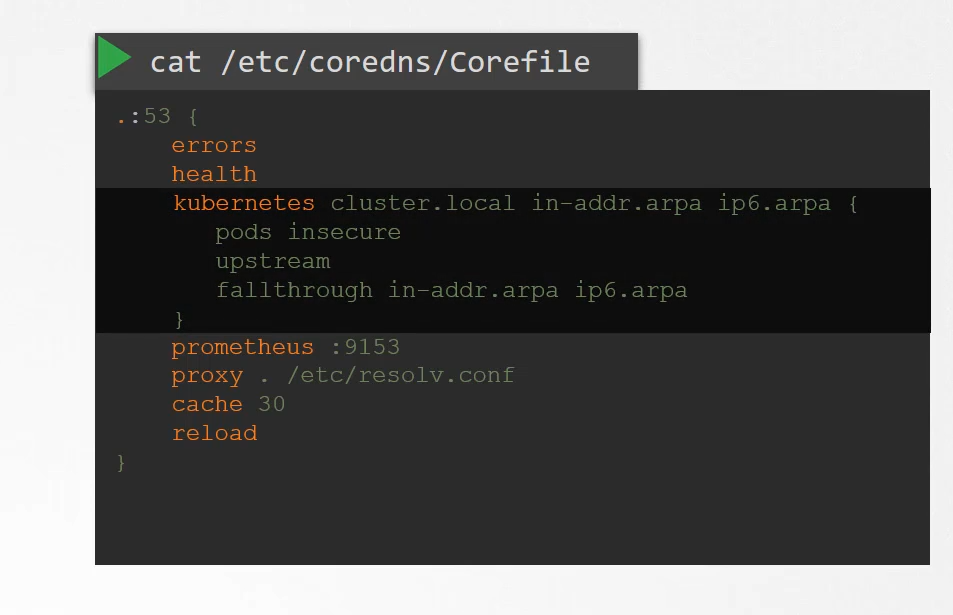 is the Kubernetes plug-in,
and that is where the top level domain name of the cluster is set.
In this case, cluster.local.
So every record in the CoreDNS server falls under this domain.
With the Kubernetes plug in, there are multiple options.
The pods option you can see here
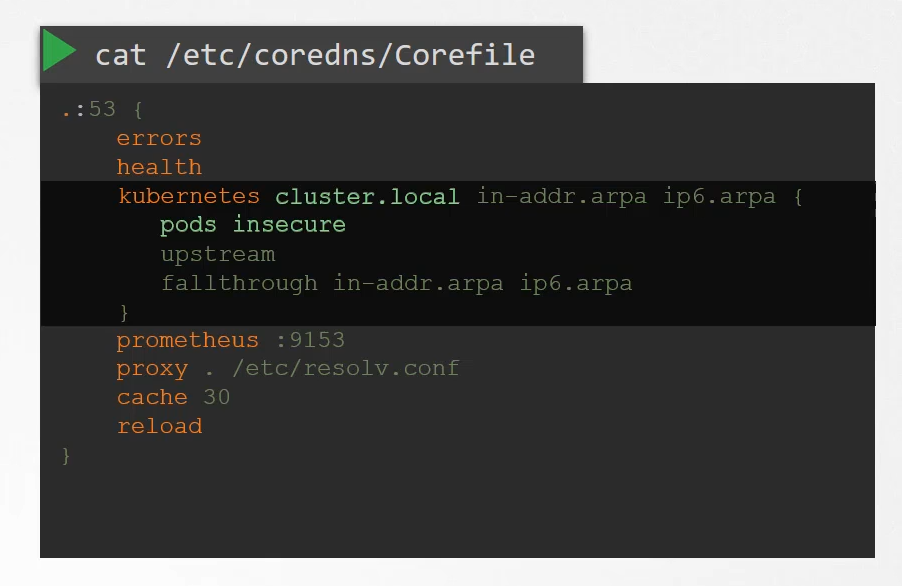 is what is responsible for creating a record for pods
in the cluster.
Remember we talked about a record being created
 for each pod by converting the IPs into the dashed format.
That’s disabled by default, but it can be enabled with this entry here.
Any record that the DNS server can solve, for example, say a pod tries to reach www.google.com,
it is forwarded to the nameserver specified in the CoreDNS pods etc/resolv.conf.
 The etc/resolv.conf file is set to use the nameserver
from the Kubernetes node.
Also, note that this core file is passed in to the pod
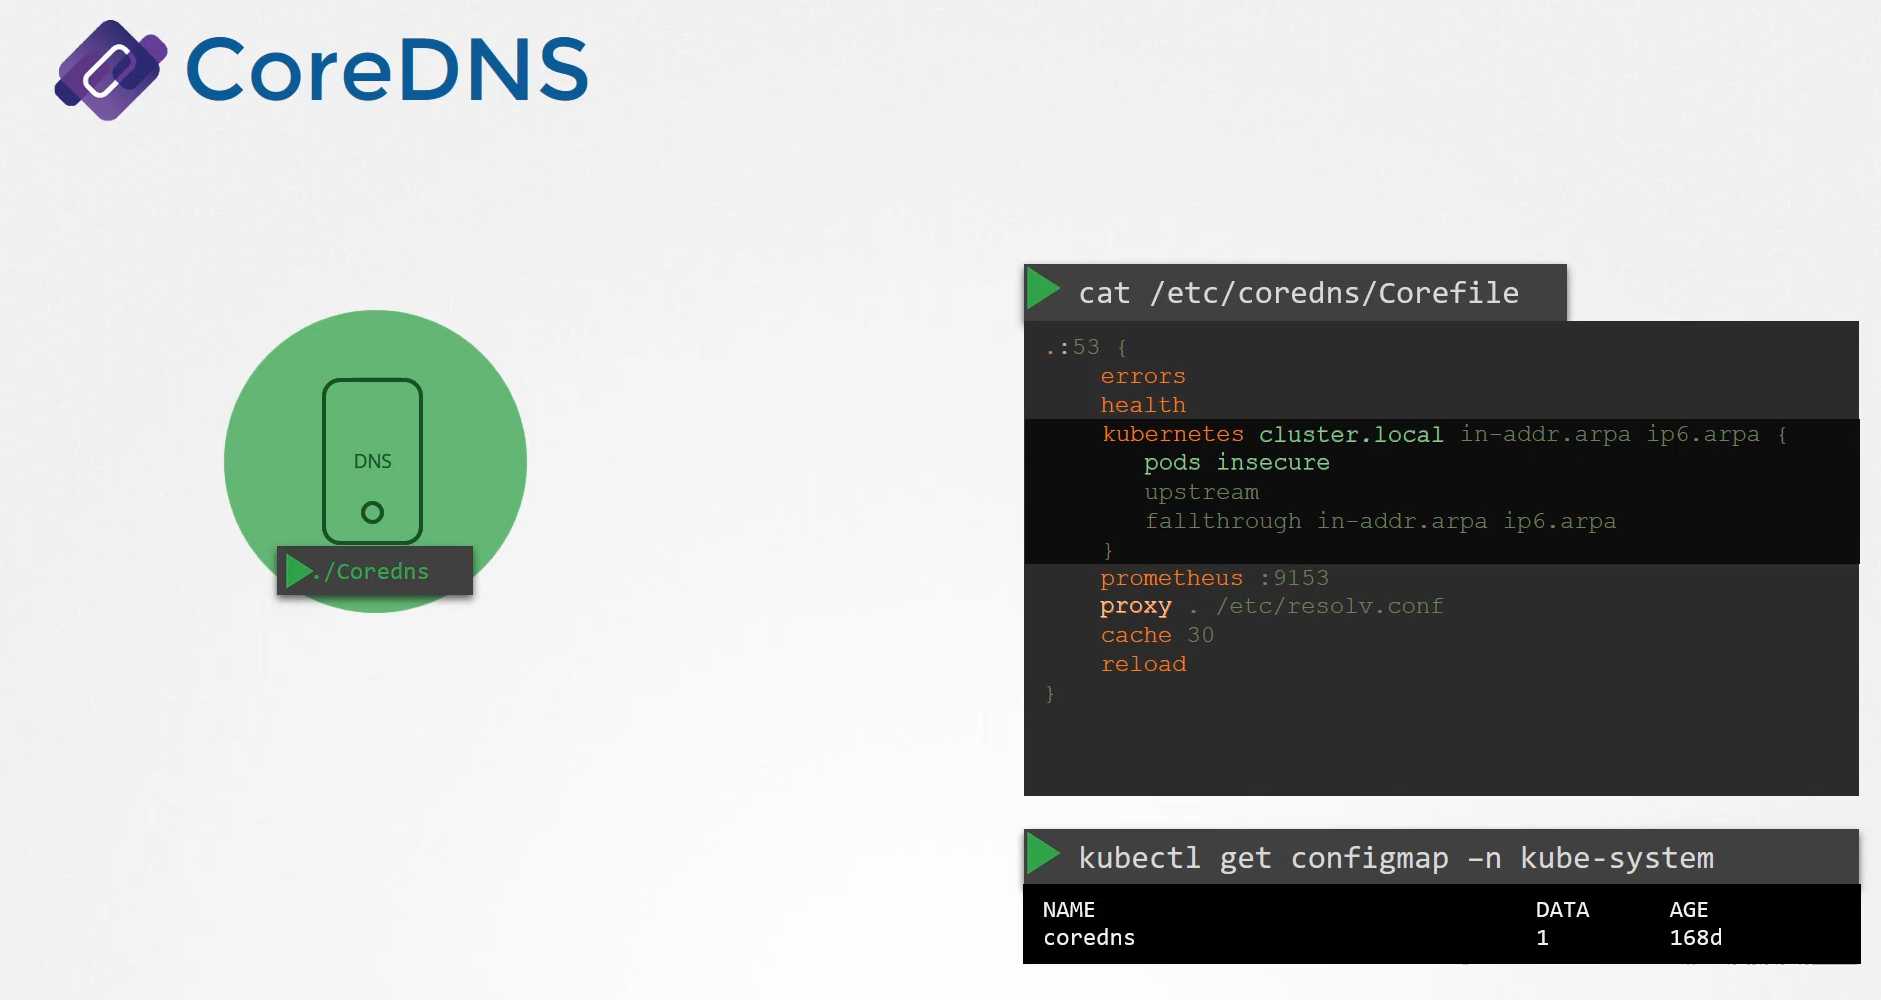 as a config map object.
That way, if you need to modify this configuration,
you can edit the config map object.
We now have the CoreDNS pod up and running
using the appropriate Kubernetes plugin.
It watches the Kubernetes cluster for new pods or services,
 and every time a pod or a service is created,
it adds a record for it in its database.
Next step is for the pods to point to the CoreDNS server.
What address do the pods use to reach the DNS server?
When we deploy the CoreDNS solution,
it also creates a service to make it available
to other components within the cluster.
The service is named as KubeDNS by default.
The IP address of this service
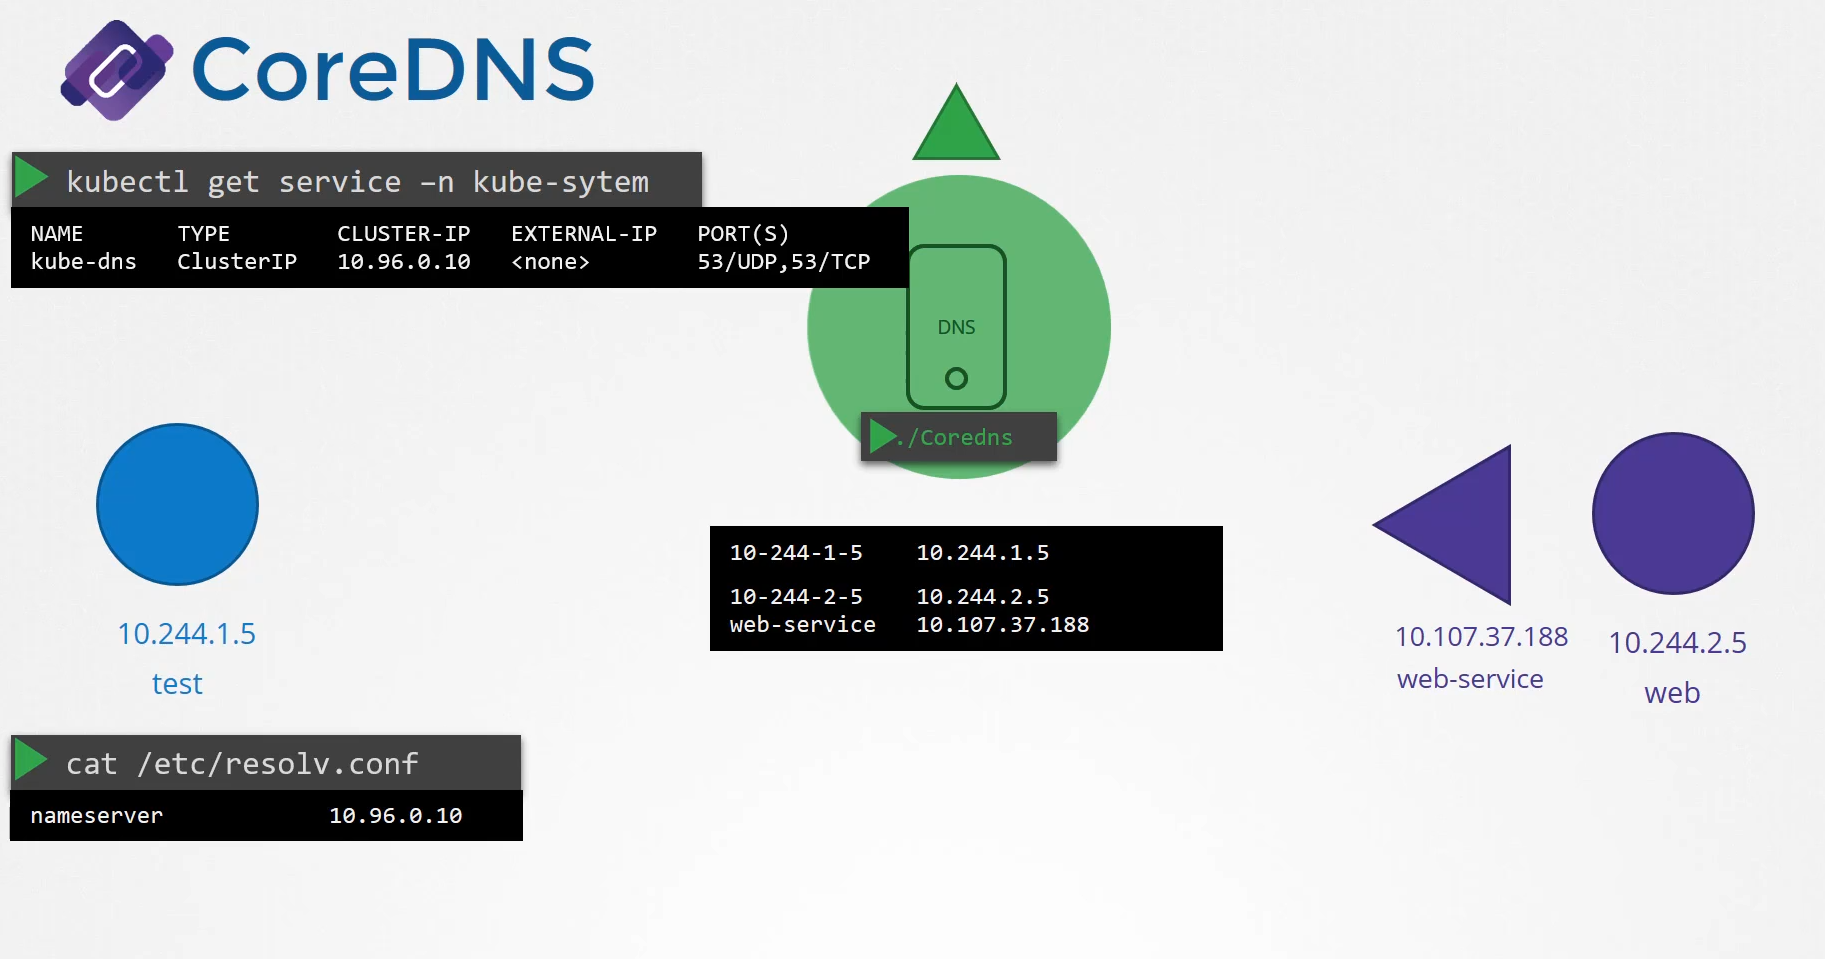 is configured as the name server on pods.
Now you don’t have to configure this yourself.
The DNS configurations on pods
are done by Kubernetes automatically
when the pods are created.
Want to guess which Kubernetes component
is responsible for that?
The kubelet.
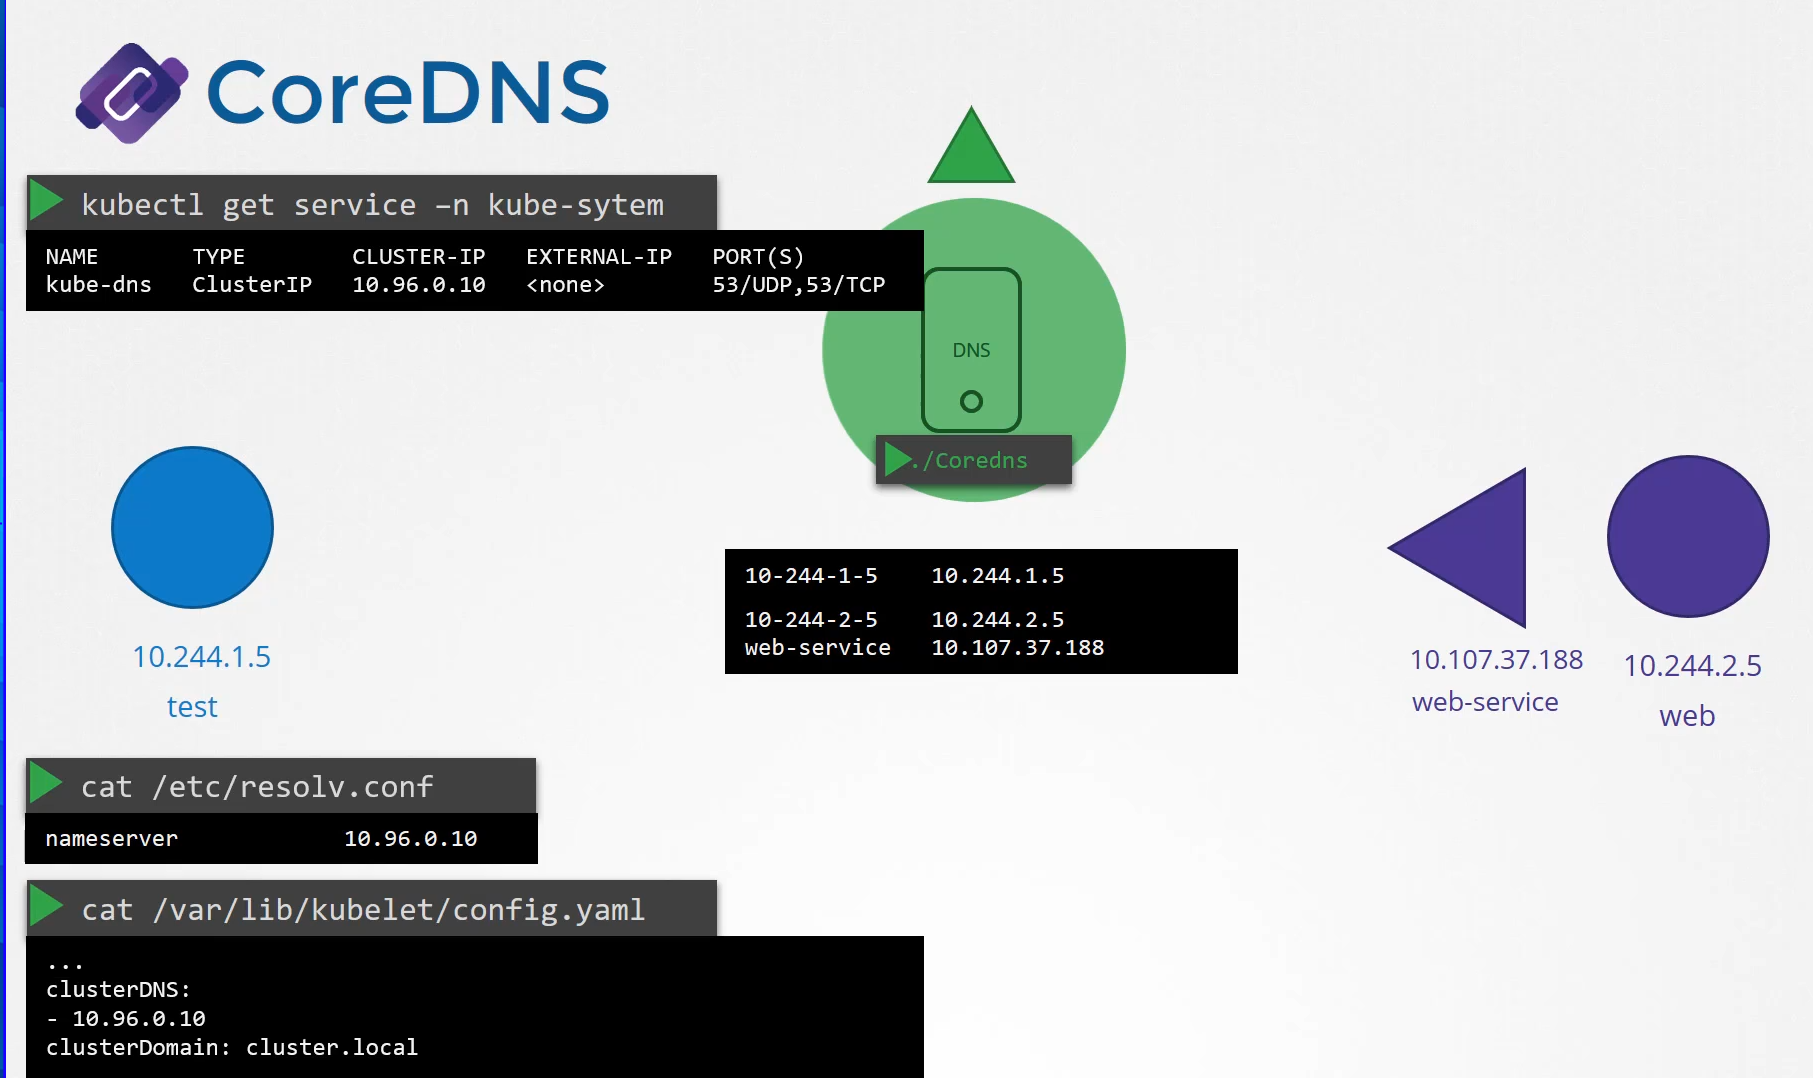 If you look at the config file of the kubelet,
you will see the IP of the DNS server and domain in it.
Once the pods are configured with the right nameserver,
you can now resolve other pod and services.
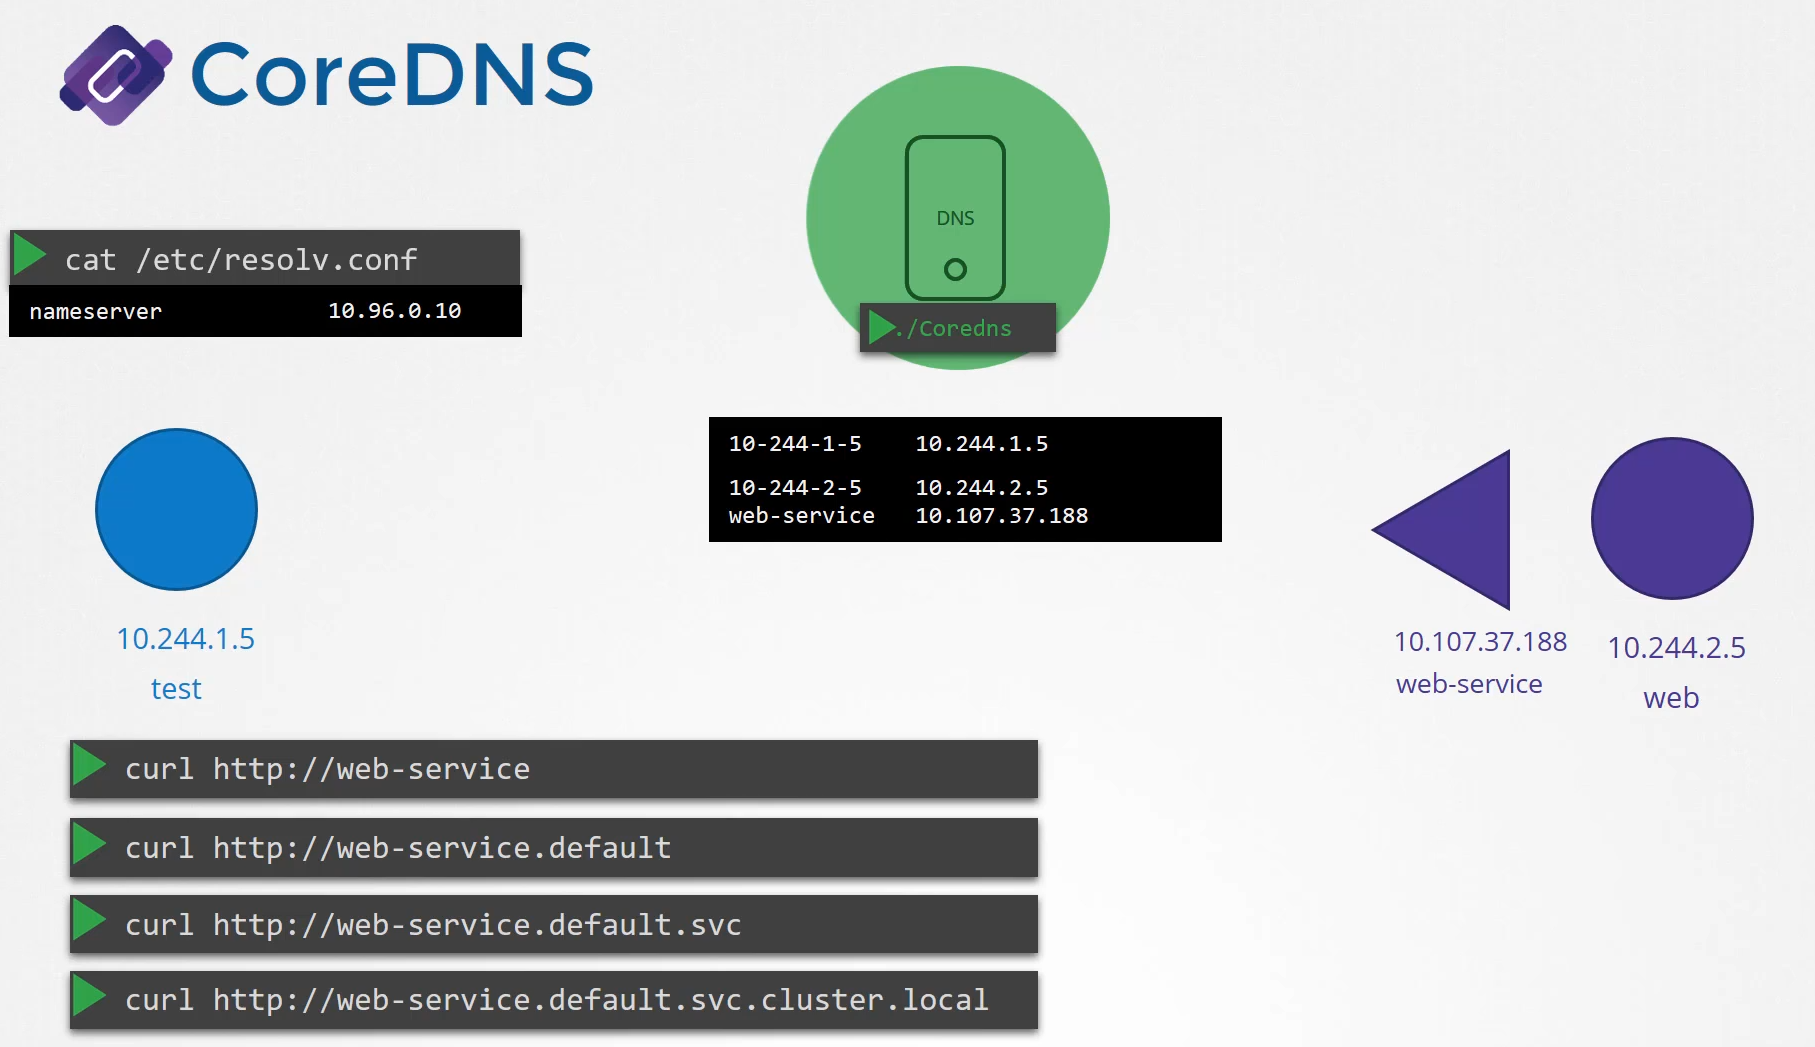 You can access the web service using just web service
or web-service.default or web-service.default.SVC
or web-service.default.svc.cluster.local.
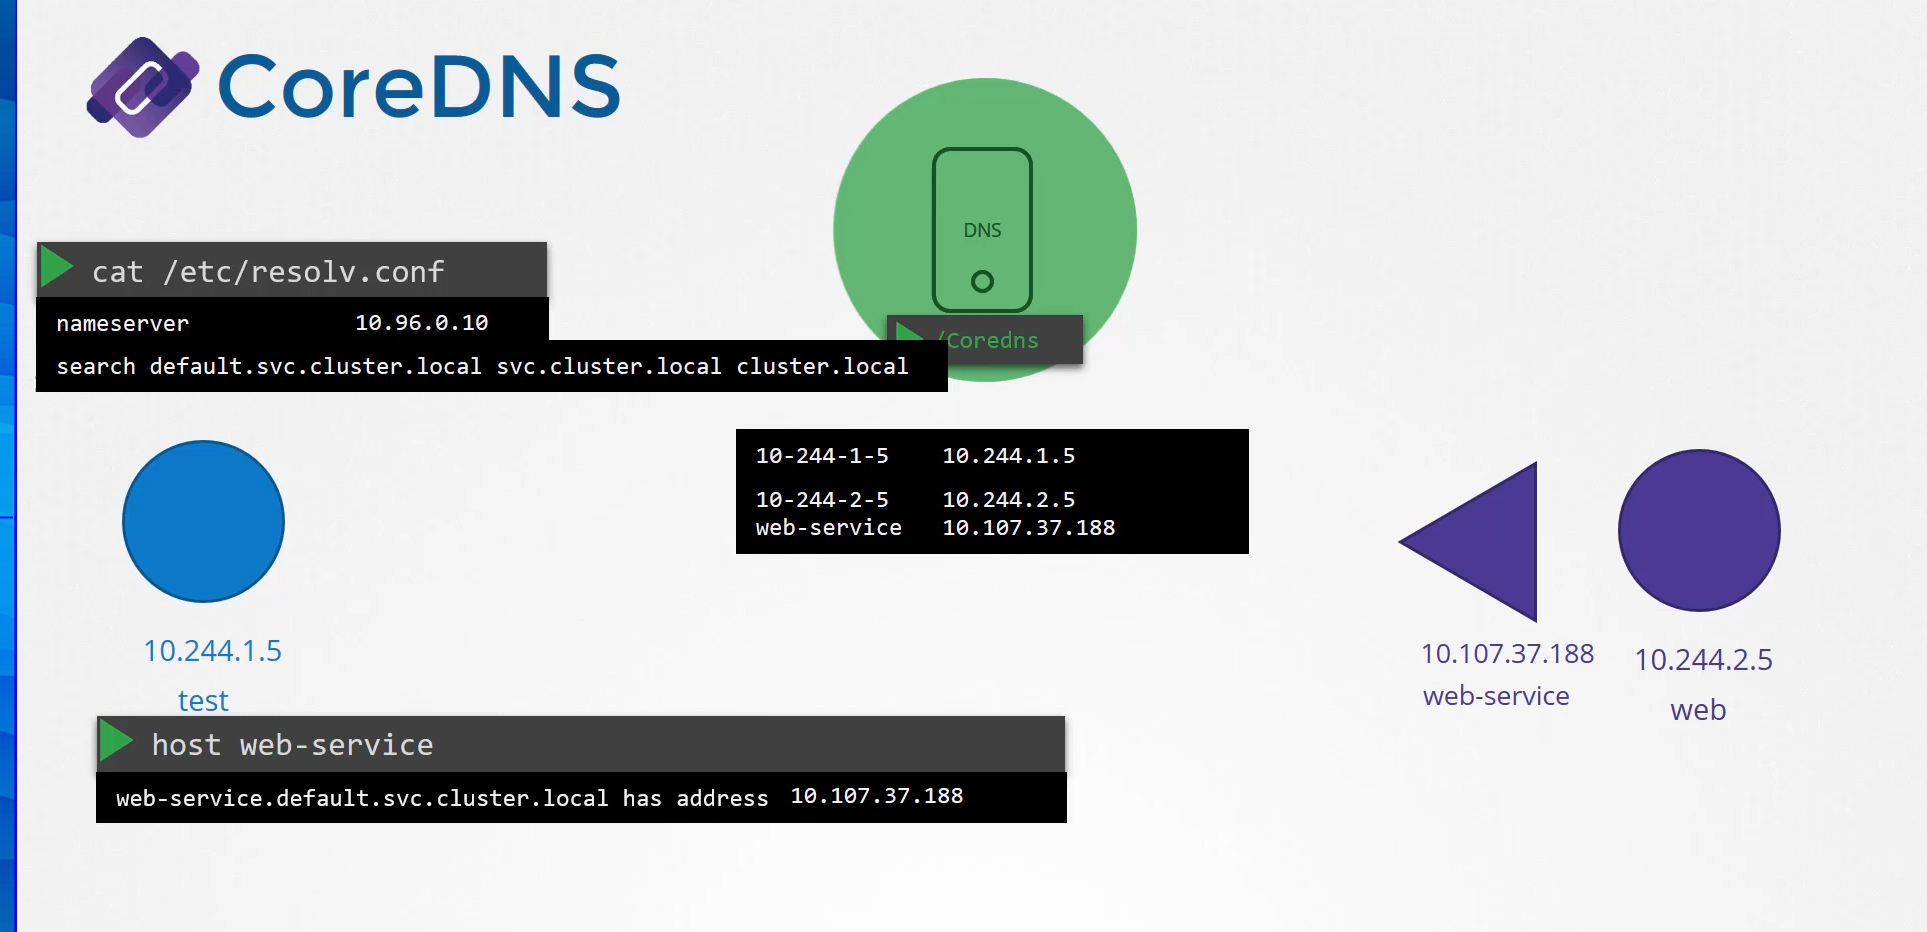
If you try to manually look up the web service
using DNS lookup or the host web service command,
it will return the fully qualified domain name
of the web service
which happens to be web-service.default.SVC.cluster.local.
But you didn’t ask for that.
You just said web service.
 So how did it look up for the full name?
It so happens the resolv.conf file also has a search entry
which is set to default.service.cluster.local
as well as svc.cluster.local and cluster.local.
This allows you to find the service using any name,
web service or web-service.default
or web-service.default.svc.
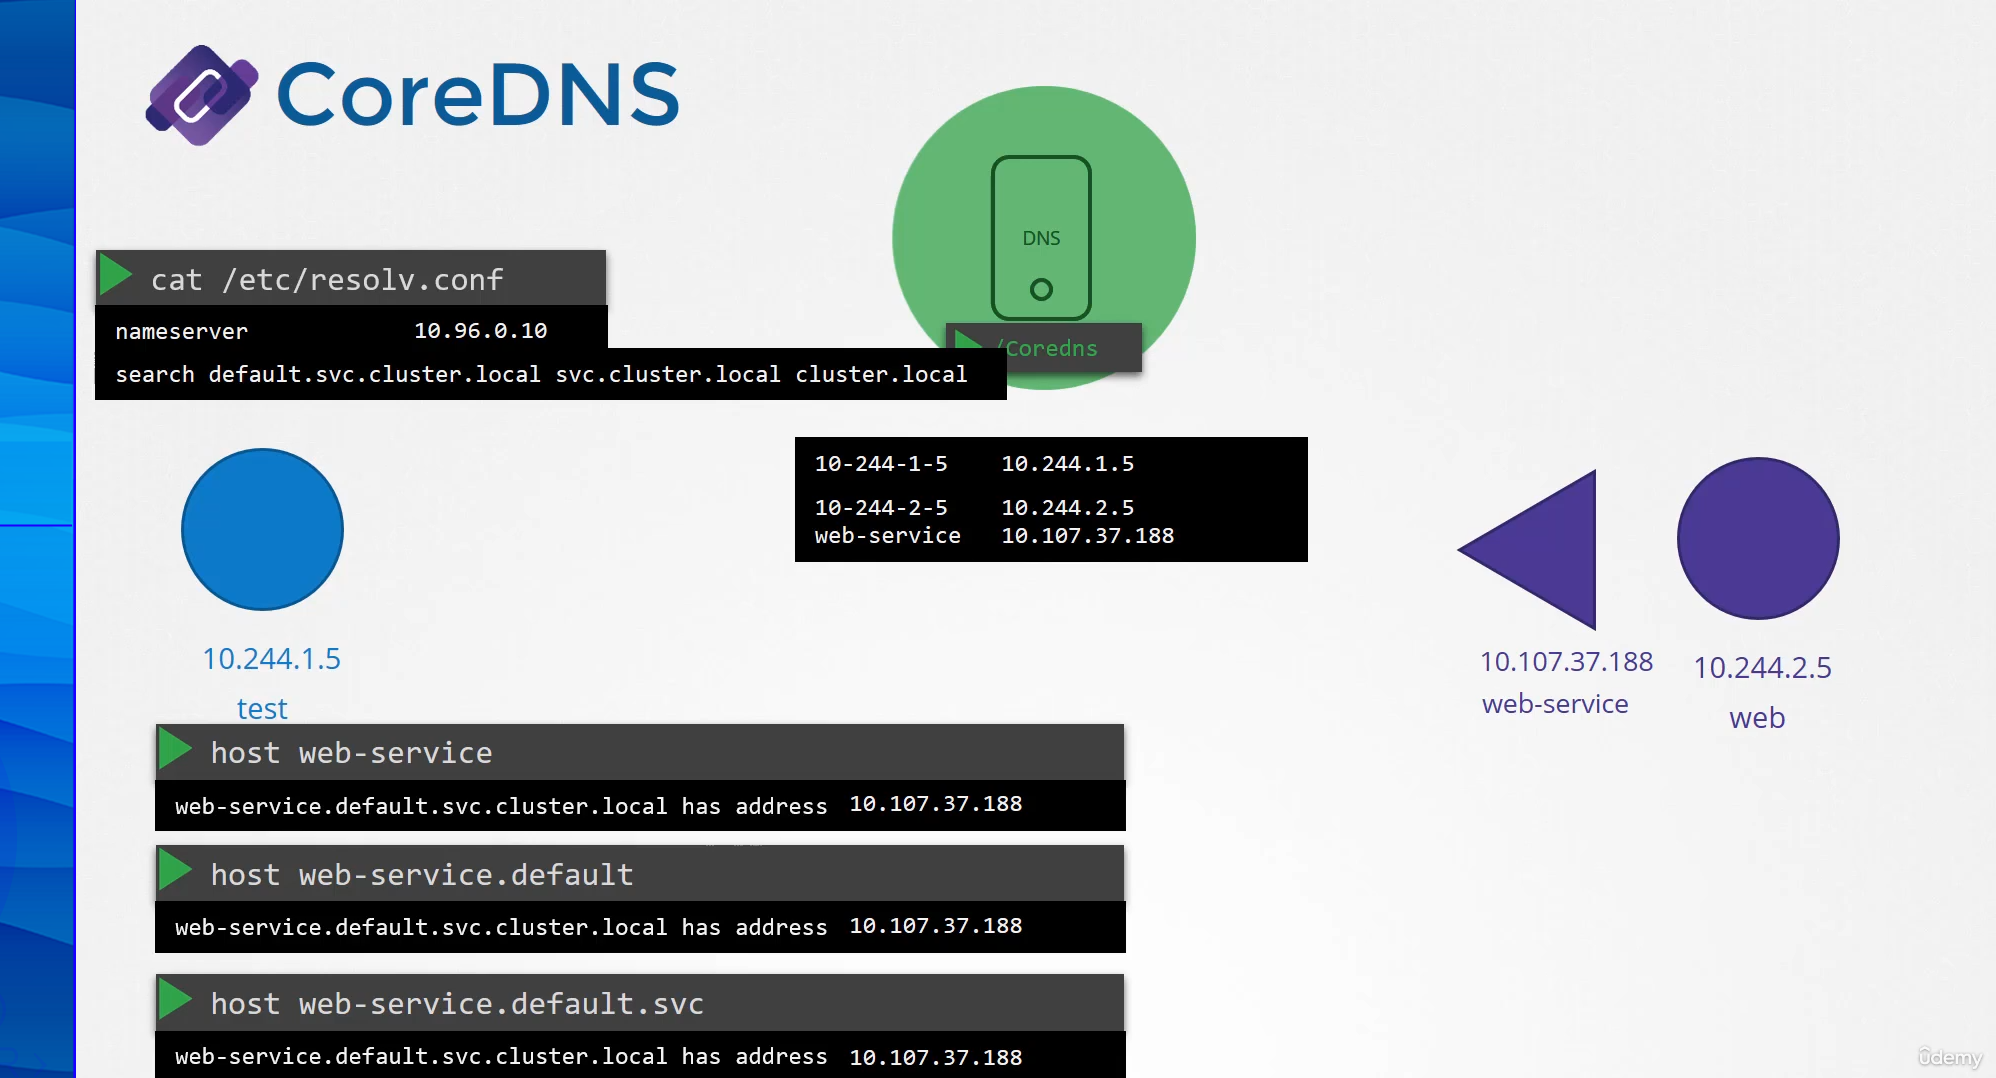 However, note that it only has search entries for service,
so you won’t be able to reach a pod the same way.
 For that, you need to specify the full FQDN of the pod.