Why we need authorization?
We saw how someone can gain access to a cluster.
We saw different ways that someone,
a human or a machine, can get access to the cluster.
Once they gain access, what can they do?
That’s what authorization defines.
 First of all, why do you need authorization in your cluster?
As an administrator of the cluster
we were able to perform all sorts of operations in it,
such as viewing various objects like pods
and nodes and deployments,
creating or deleting objects
such as adding or deleting pods
or even nodes in the cluster.
As an admin, we are able to perform any operation
but soon we will have others accessing the cluster as well
such as the other administrators,
developers,
testers
or other applications like monitoring applications
or continuous delivery applications like Jenkins, et cetera.
So, we will be creating accounts for them
to access the cluster by creating usernames
and passwords or tokens, or signed TL certificates
or service accounts as we saw in the previous lectures.
But we don’t want all of them
to have the same level of access as us.
For example, we don’t want the developers
to have access to modify our cluster configuration,
like adding or deleting nodes
or the storage or networking configurations.
We can allow them to view but not modify,
but they could have access to deploying applications.
The same goes with service accounts,
we only want to provide the external application
the minimum level of access
to perform its required operations.
When we share our cluster between different organizations
or teams, by logically partitioning it using name spaces,
we want to restrict access to the users
to their name spaces alone.
That is what authorization can help you within the cluster.
There are different authorization mechanisms supported by Kubernetes,
Authorization Mechanisms

Node Authorization
such as node authorization,
attribute-based authorization,
role-based authorization and webhook.
Let’s just go through these now.
We know that the Kube API Server is accessed by users

like us for management purposes,
as well as the kubelets on node
within the cluster for management process
within the cluster.
The kubelet accesses the API server
to read information about services and points,
nodes, and pods.
The kubelet also reports to the Kube API Server
with information about the node, such as its status.
These requests are handled by a special authorizer
known as the Node Authorizer.
 In the earlier lectures,
when we discussed about certificates,
we discussed that the kubelets
should be part of the system nodes group
and have a name prefixed with system node.
 So any request coming from a user
with the name system node
and part of the system nodes group
is authorized by the node authorizer,
and are granted these privileges,
the privilege is required for a kubelet.
So that’s access within the cluster.
Let’s talk about external access to the API.
ABAC
For instance, a user. Attribute-based authorization is where you associate a user or a group of users with a set of permissions.
In this case, we say the dev user
 can view, create and delete pods.
You do this by creating a policy file
 with a set of policies defined in adjacent format this way
you pass this file into the API server.
Similarly, we create a policy definition file
 for each user or group in this file.
Now, every time you need to add
or make a change in the security,
you must edit this policy file manually
and restart the Kube API Server.
As such, the attribute-based access control configurations
are difficult to manage.
RBAC
We will look at role-based access controls next.
Role-based access controls make these much easier.
With role-based access controls,
instead of directly associating a user
or a group with a set of permissions,

we define a role, in this case for developers.
We create a role with the set
of permissions required for developers
then we associate all the developers to that role.
Similarly, create a role for security users
 with the right set of permissions required for them
then associate the user to that role.
Going forward, whenever a change
needs to be made to the user’s access
we simply modify the role
 and it reflects on all developers immediately.
Role-based access controls provide a more standard approach
to managing access within the Kubernetes cluster.
We will look at role-based access controls
in much more detail in the next lecture.
For now, let’s proceed
with the other authorization mechanisms.
Webhook
Now, what if you want to outsource
all the authorization mechanisms?
 Say you want to manage authorization externally
and not through the built-in mechanisms
that we just discussed.
For instance, Open Policy Agent is a third-party tool
that helps with admission control and authorization.
You can have Kubernetes make an API call
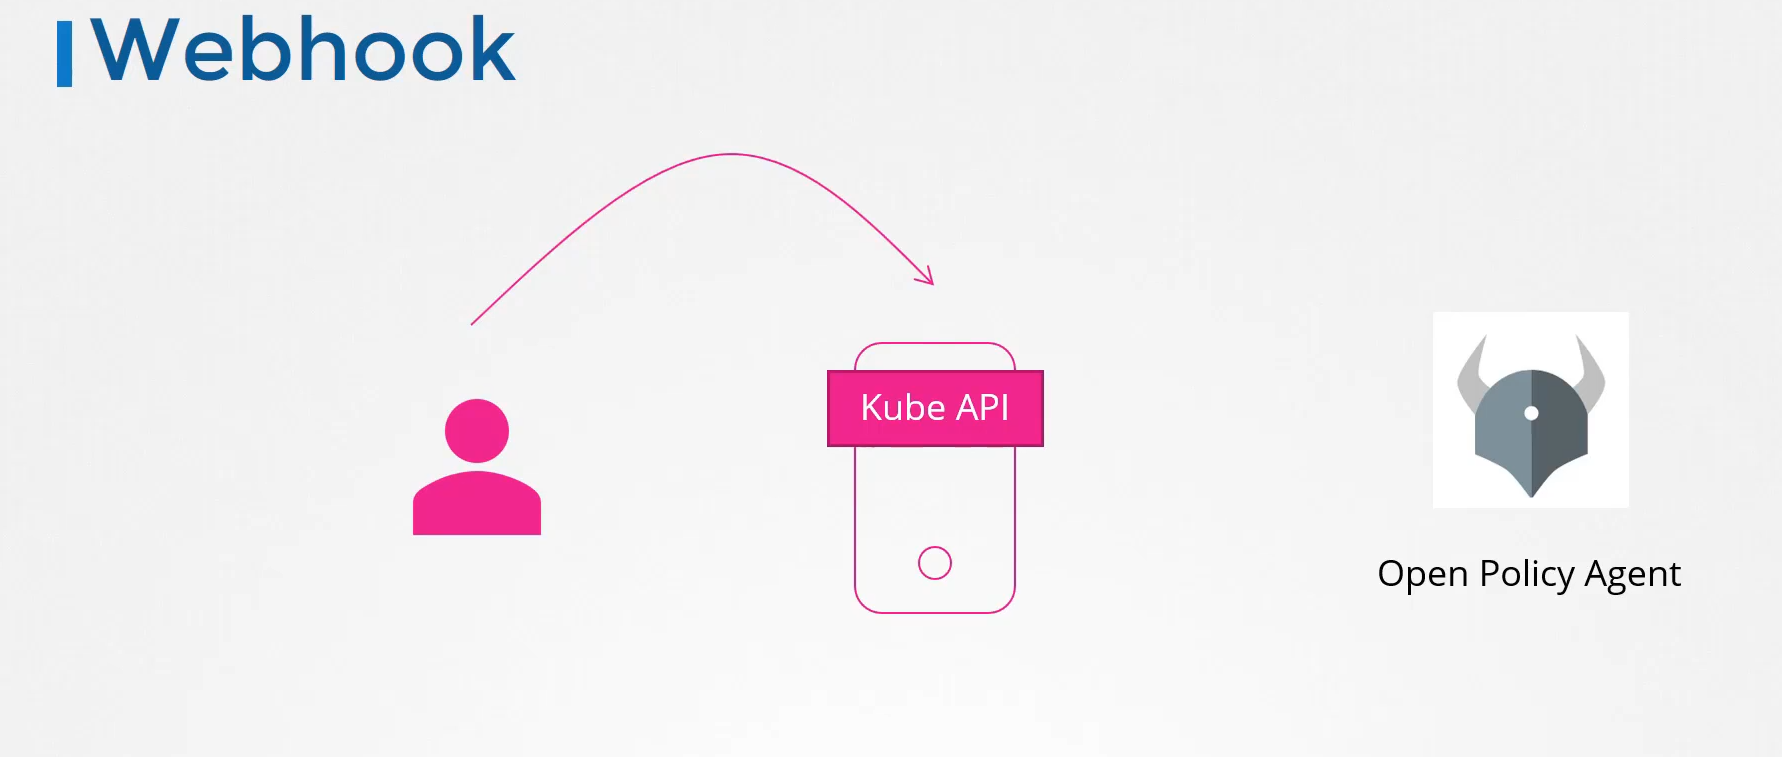 to the Open Policy Agent with the information
about the user and his access requirements,
and have the Open Policy Agent decide
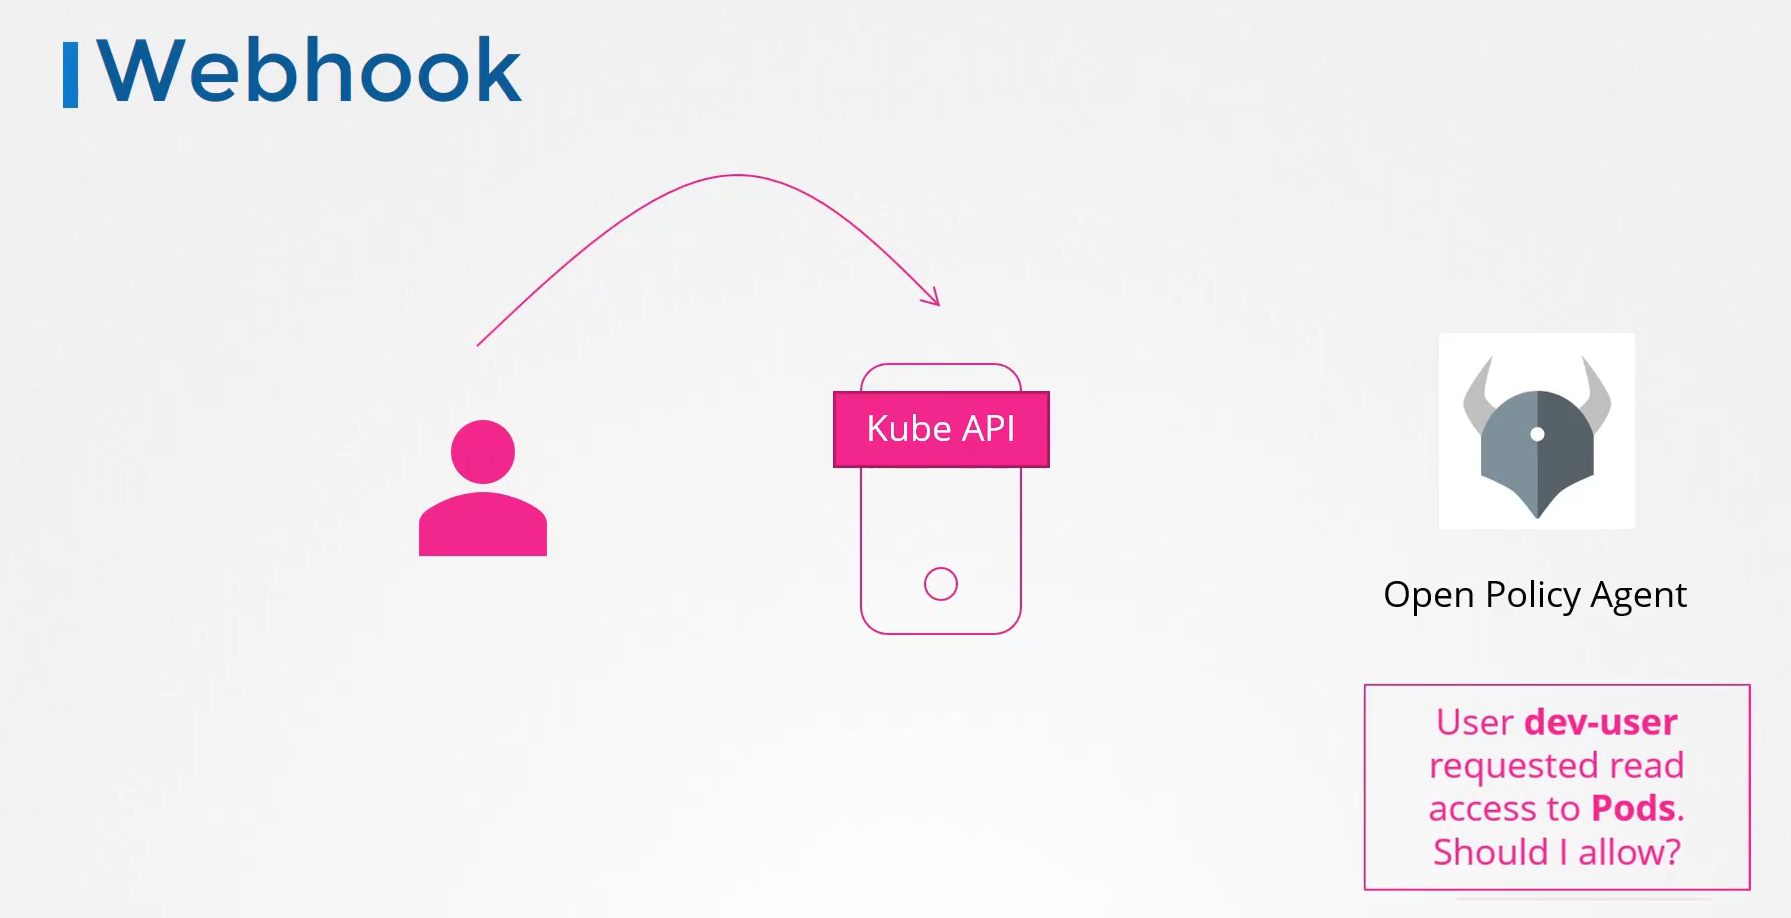 if the user should be permitted or not.
 Based on that response, the user is granted access.
Other Authorization Methods
Now, there are two more modes
 in addition to what we just saw.
Always Allow and Always Deny.
As the name states, Always Allow,
allows all requests without performing
any authorization checks.
Always Deny, denies all requests.
So, where do you configure these modes?
Which of them are active by default?
Can you have more than one at a time?
How does authorization work
if you do have multiple ones configured?
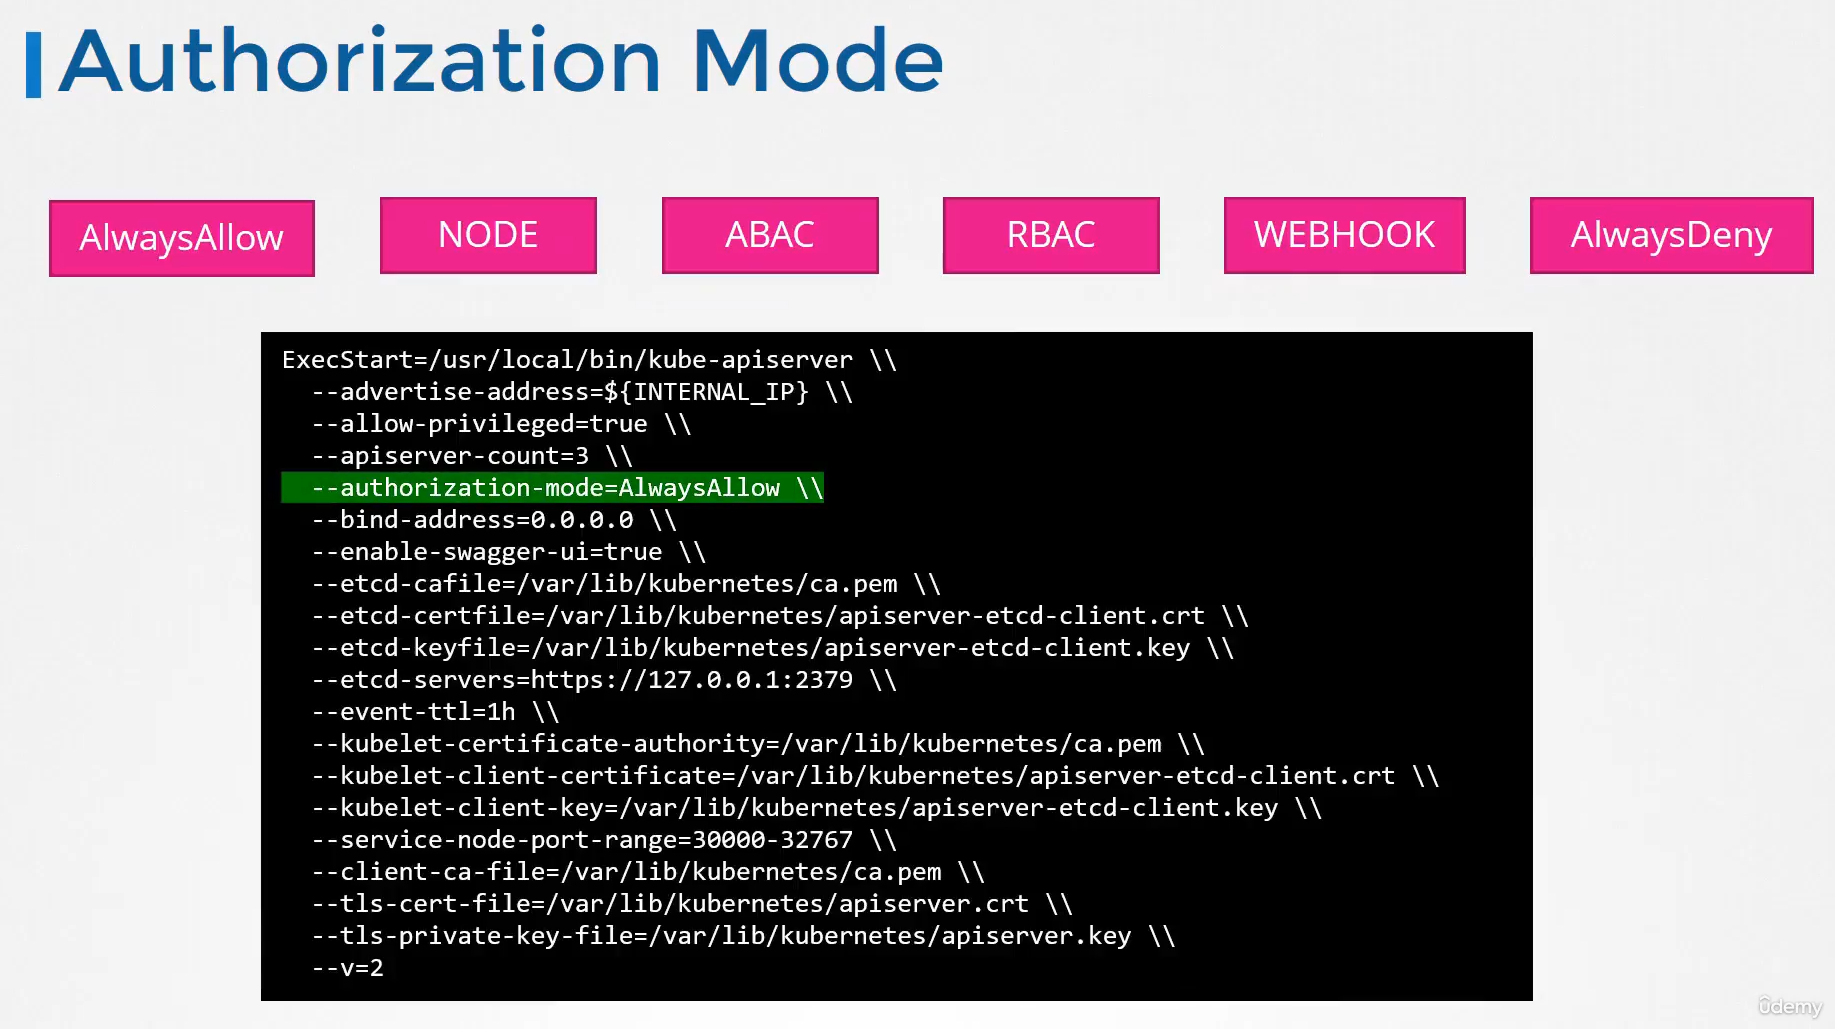 The modes are set using the Authorization Mode Option
on the Kube API Server.
If you don’t specify this option,
it is set to Always Allow by default.
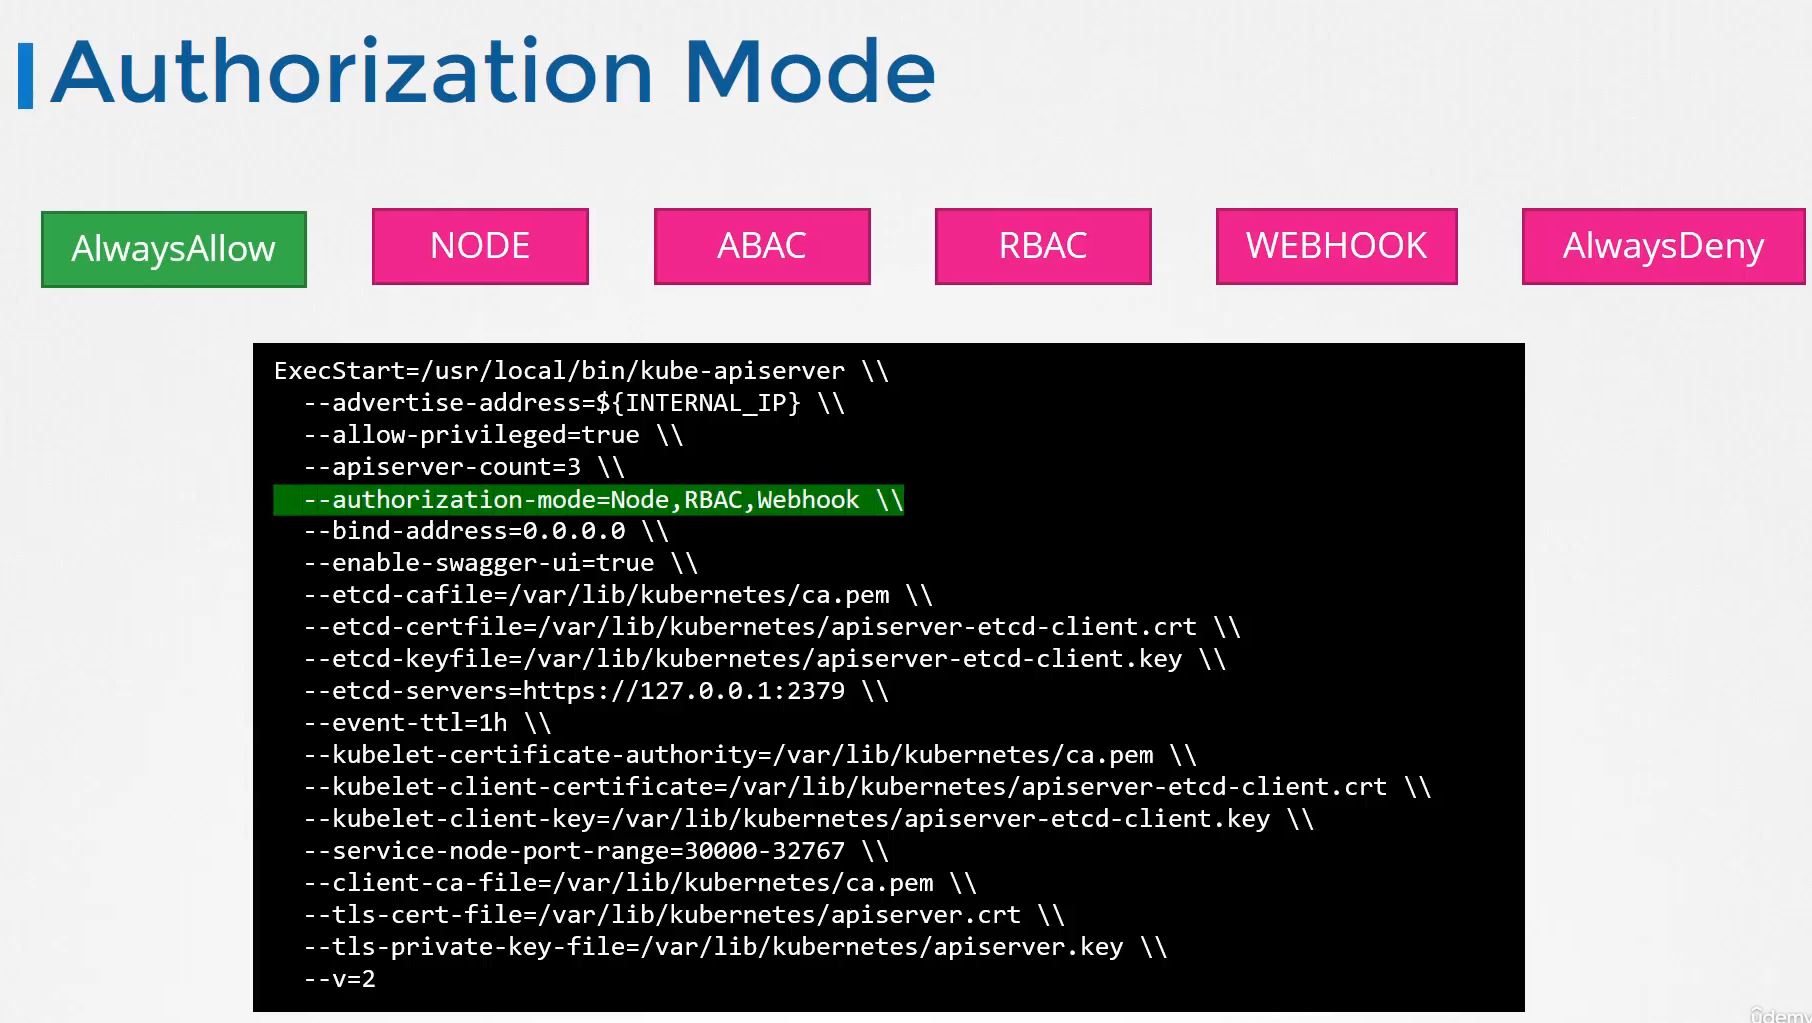
You may provide a comma separated list
of multiple modes that you wish to use.
In this case, I wanna set it to node-rbac and webhook.
When you have multiple modes configured
your request is authorized using each one
in the order it is specified.
For example, when a user sends a request
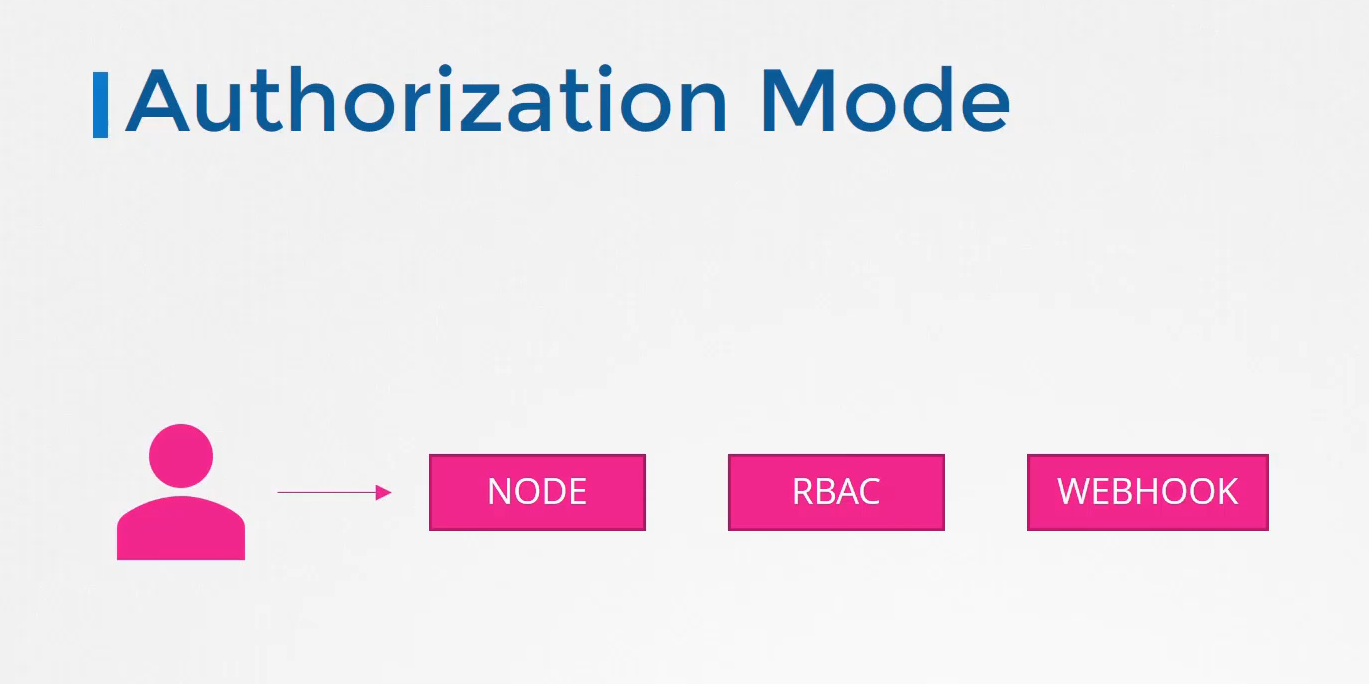 it’s first handled by the Node Authorizer.
The Node Authorizer handles only node requests,
so it denies the request.
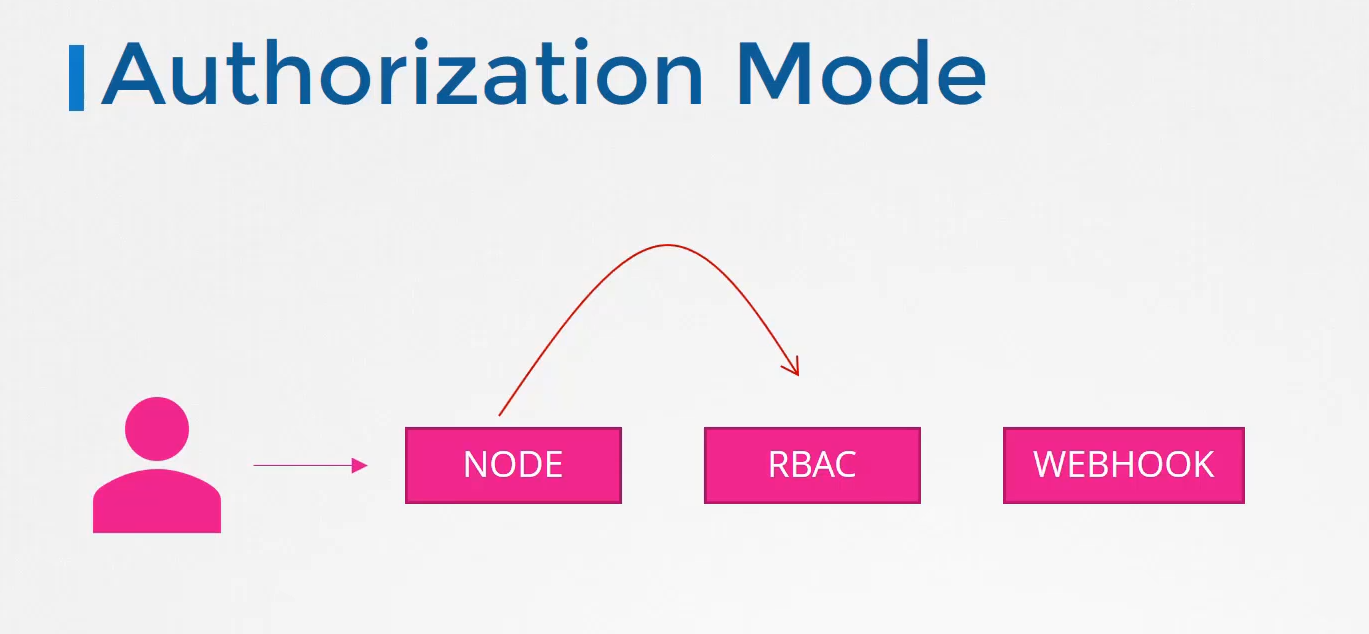 Whenever a module denies a request
it is forwarded to the next one in the chain.
The role-based access control module
performs its checks and grants the user permission.
Authorization is complete
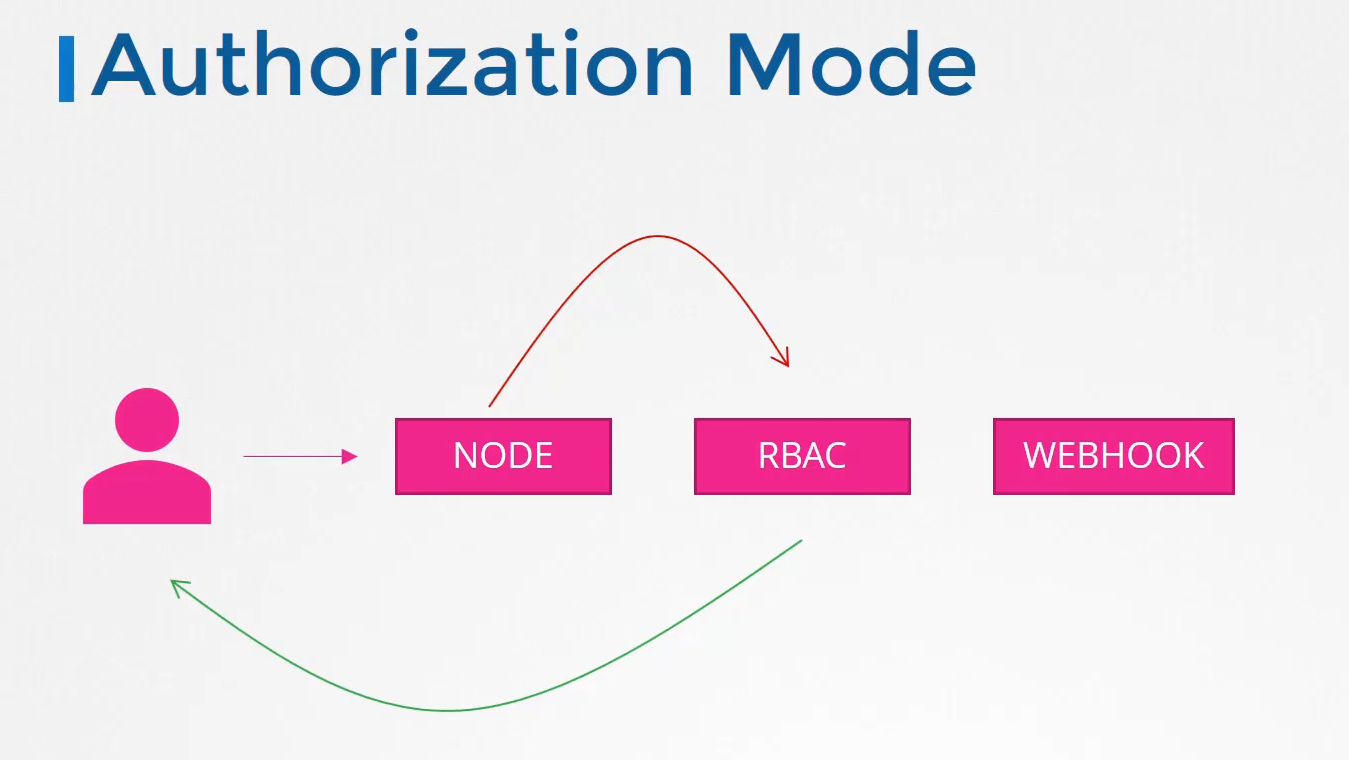 and user is given access to the requested object.
So, every time a module denies the request
it goes to the next one in the chain
and as soon as a module approves the request
no more checks are done and the user is granted permission.