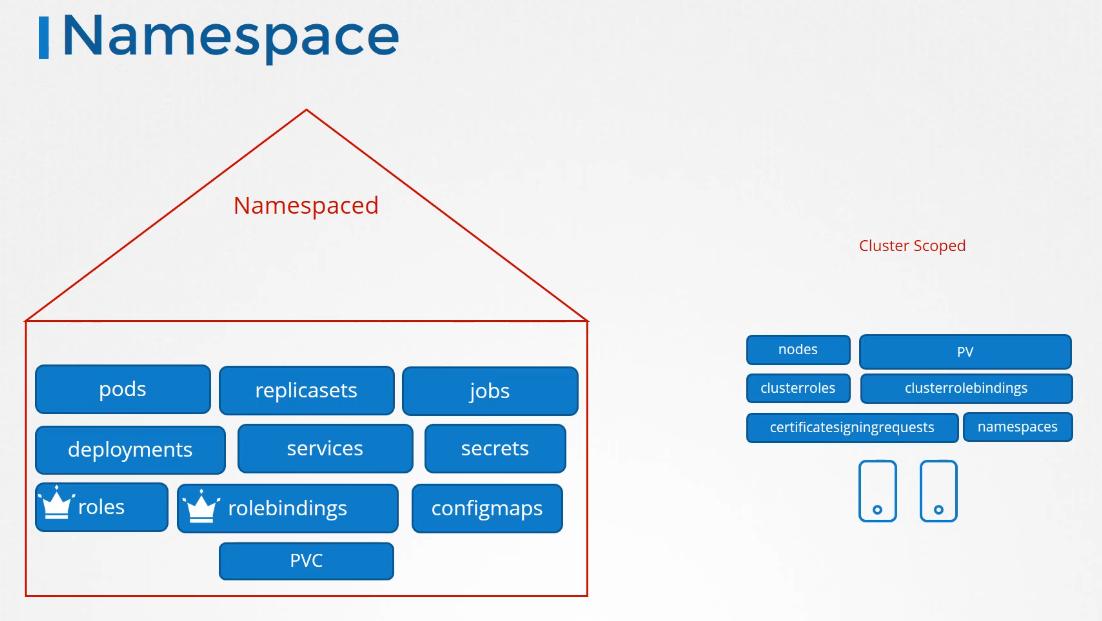
When we talked about roles and role bindings,
we said that roles and role bindings are namespaced,
meaning they are created within namespaces.
If you don’t specify a namespace,
they are created in the default namespace
 and control access within that namespace alone.
In one of the previous lectures,
we discussed about namespaces
and how it helps in grouping, or isolating,
resources like pods, deployments, and services.
But what about other resources like nodes?
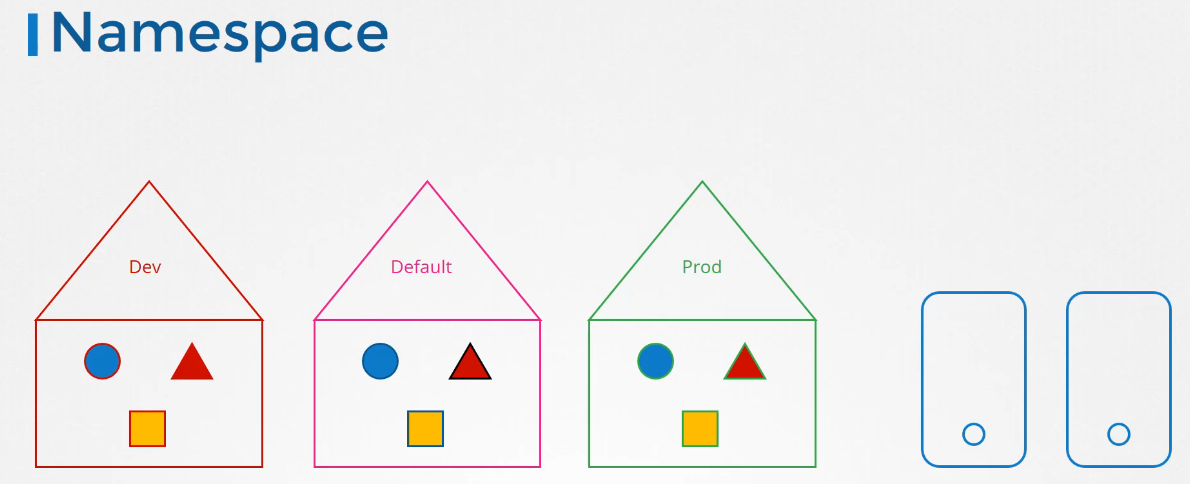 Can you group or isolate nodes within a namespace?
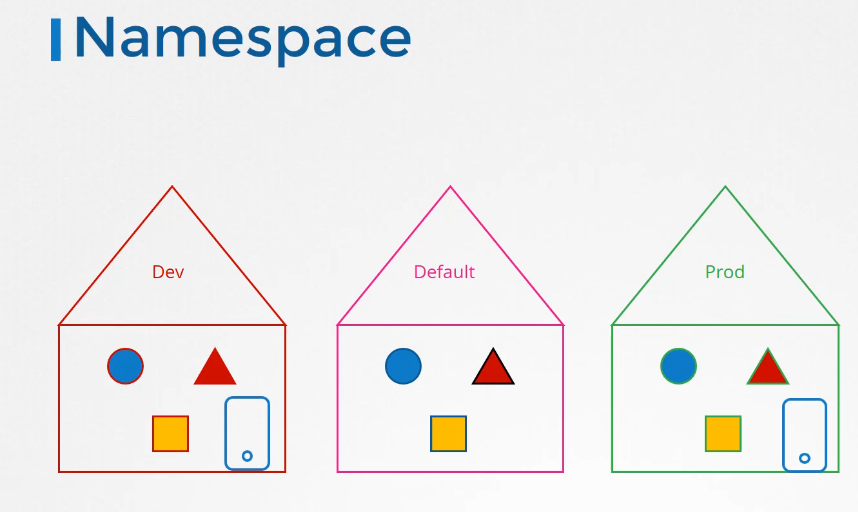 Like can you say node 01 is part of the dev namespace?
No, those are cluster-wide or cluster-scoped resources.
 They cannot be associated to any particular namespace.
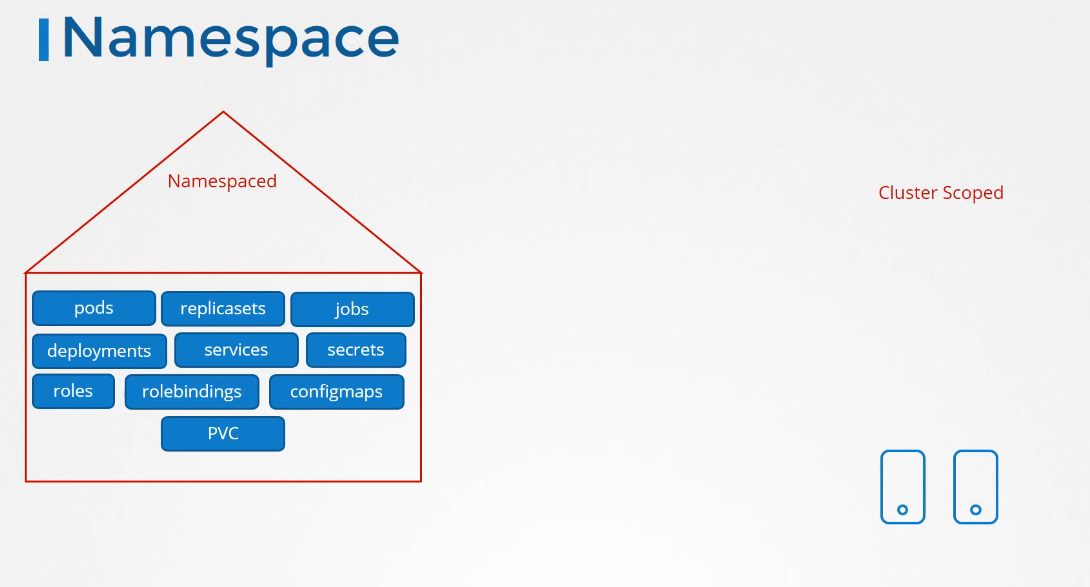
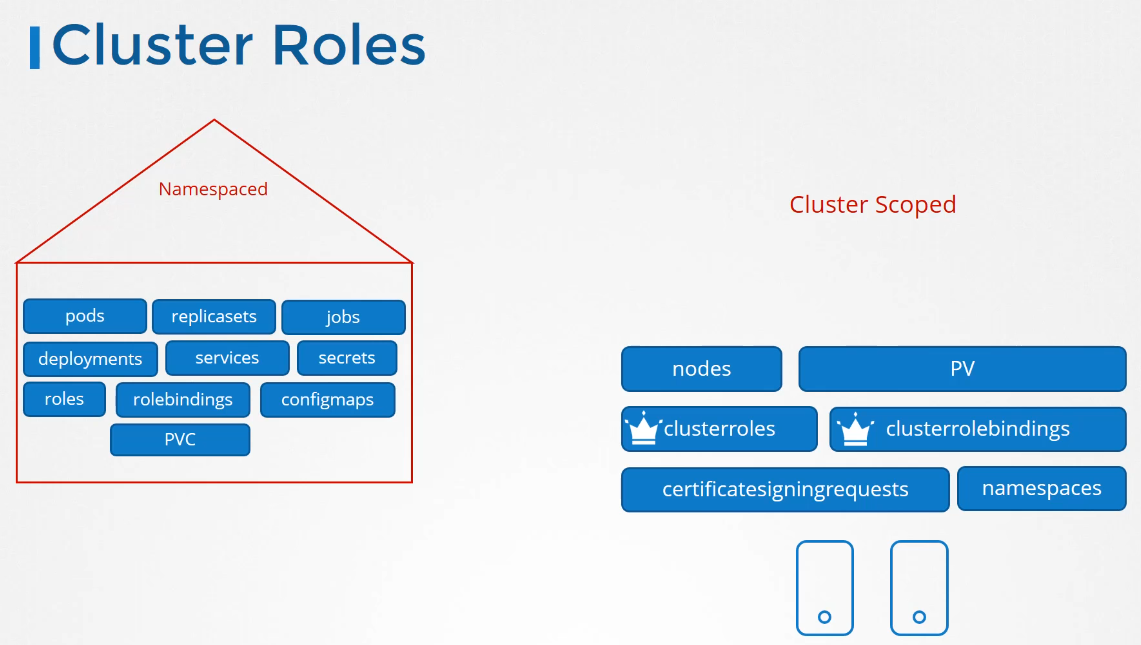
So the resources are categorized
as either namespaced or cluster-scoped.
Now we have seen a lot of namespaced resources
throughout this course, like pods, and replica sets,
and jobs, deployments, services, secrets,
and in the last lecture,
we saw two new roles and role bindings.
These resources are created in the namespace
you specify when you created them.
If you don’t specify a namespace,
they are created in the default namespace.
To view them, or delete them, or update them,
you always specify the right namespace.
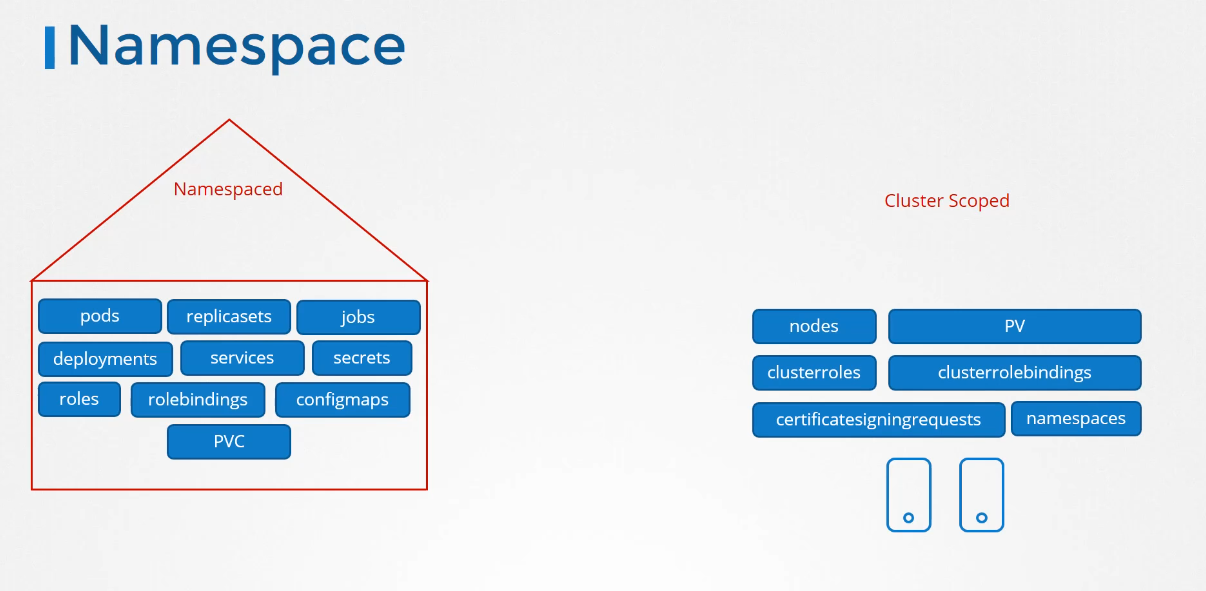 The cluster-scoped resources
are those where you don’t specify a namespace
when you create them, like nodes, persistent volumes,
versus the cluster roles and cluster roled bindings
that we’re gonna look at in this lecture.
Certificate signing request we saw earlier,
and namespace objects themselves,
are, of course, not namespaced.
Note that this is not a comprehensive list of resources.
To see a full list of namespaced
and non-namespaced resources,
 run the kubectl API resources command
with the namespaced option set.
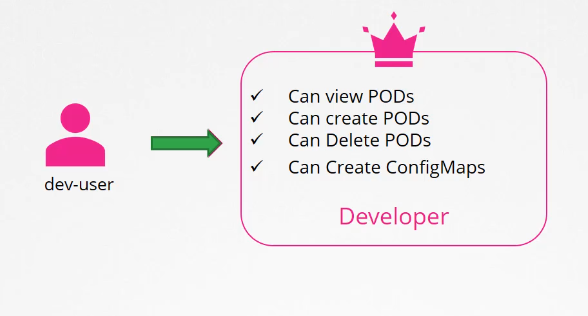
In the previous lecture,
 we saw how to authorize a user to namespace resources.
We used roles and role bindings for that.
But how do we authorize users to cluster-wide resources
like nodes or persistent volumes.
 That is where you use cluster roles
and cluster role bindings.
Cluster roles are just like roles,
except they are for cluster-scoped resources.
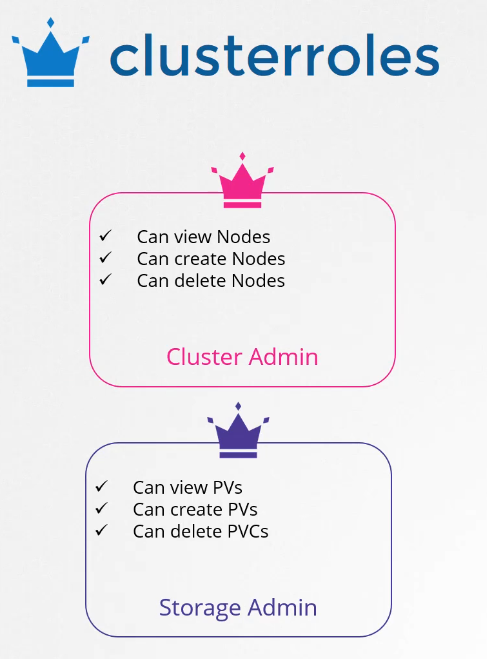
For example, a cluster admin role can be created
to provide a cluster administrator
permissions to view, create, or delete nodes in a cluster.
Similarly, a storage administrator role
can be created to authorize a storage admin
to create persistent volumes and claims.
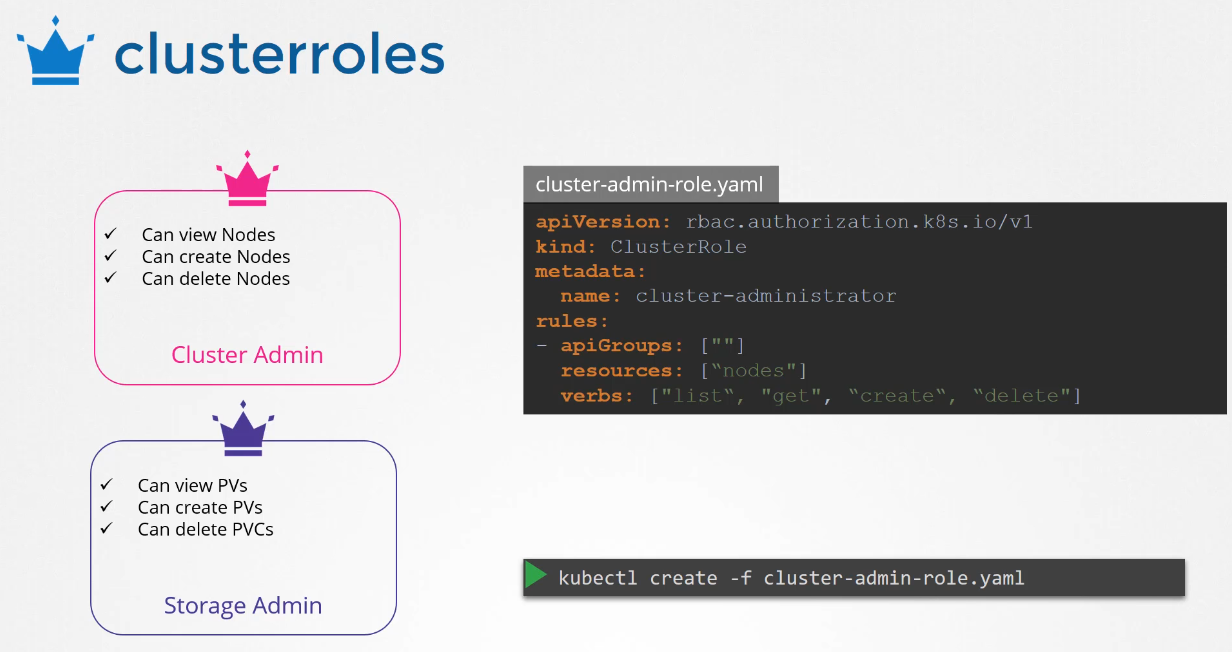 Create a cluster role definition file
with the kind cluster role
and specify the rules as we did before.
In this case, the resources are nodes,
then create the cluster role.
The next step is to link the user to that cluster role.
For this, we create another object
called cluster role binding.
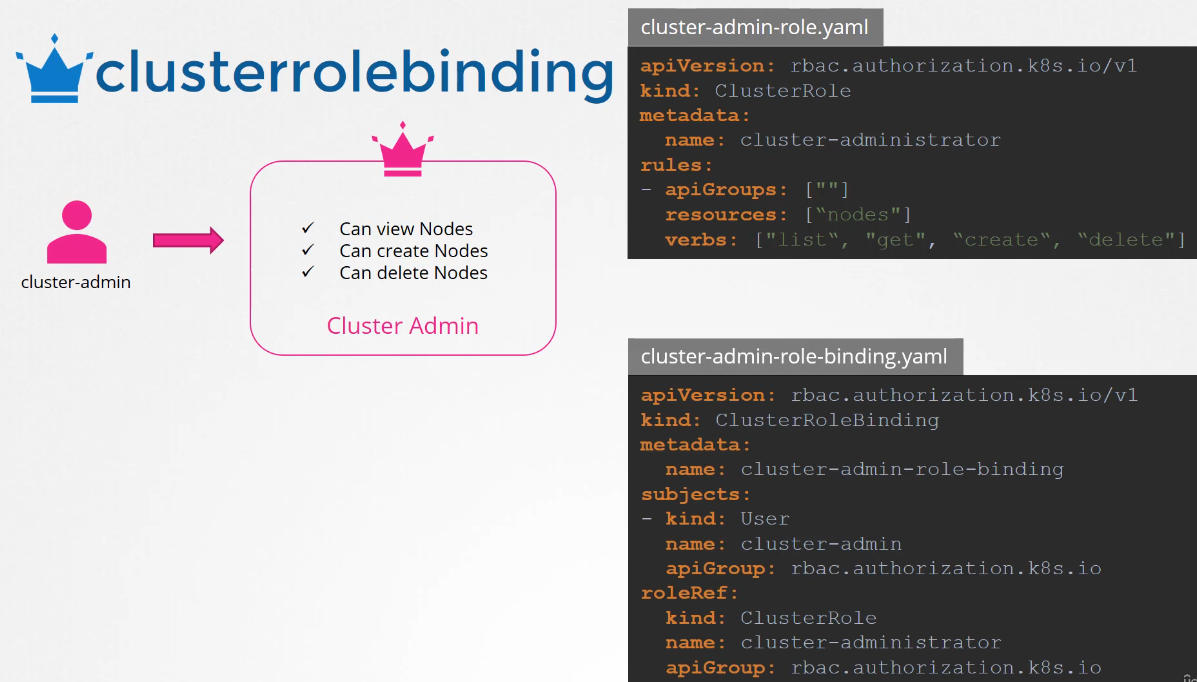 The role binding object links the user to the role.
We will name it Cluster Admin Role Binding.
The kind is cluster role binding.
Under subjects, we specify the user details,
cluster admin user in this case.
The role ref section is where we provide the details
of the cluster role we created.
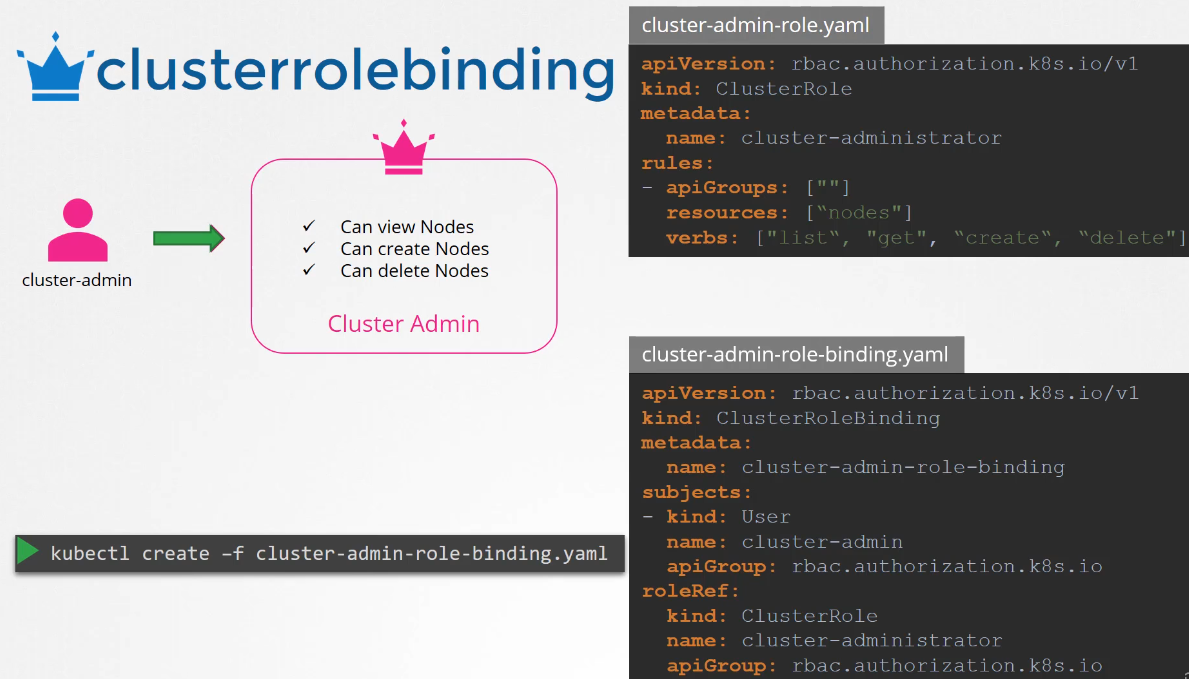 Create the role binding using the kubectl create command.
One thing to note before I let you go.
 We said that cluster roles and binding
are used for cluster-scoped resources,
but that is not a hard rule.
You can create a cluster role
for namespaced resources as well.
When you do that,
the user will have access to these resources
across all namespaces.
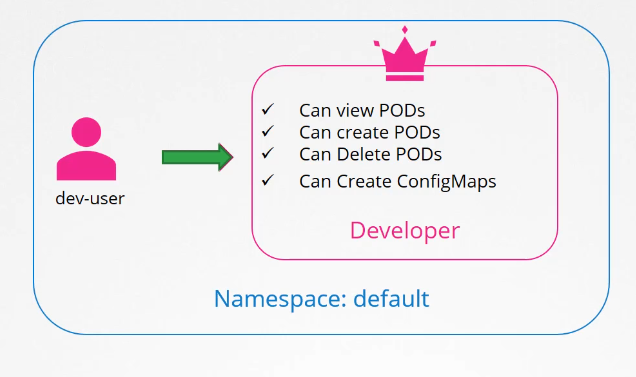
Earlier, when we created a role
to authorize a user to access pod,
the user had access to pods in a particular namespace alone.
With cluster roles,
when you authorize a user to access the pods,
the user gets access to all pods across the cluster.
Kubernetes creates a number of cluster roles by default
when the cluster is first set up.