
Container Runtime
Container Runtime
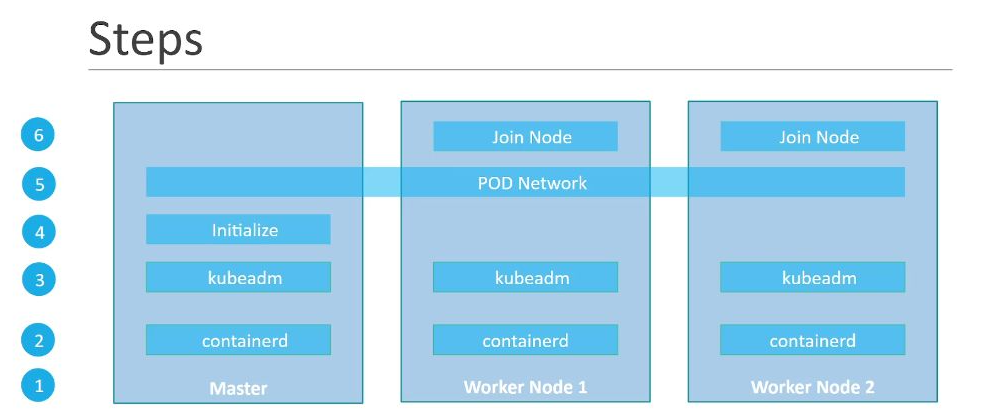
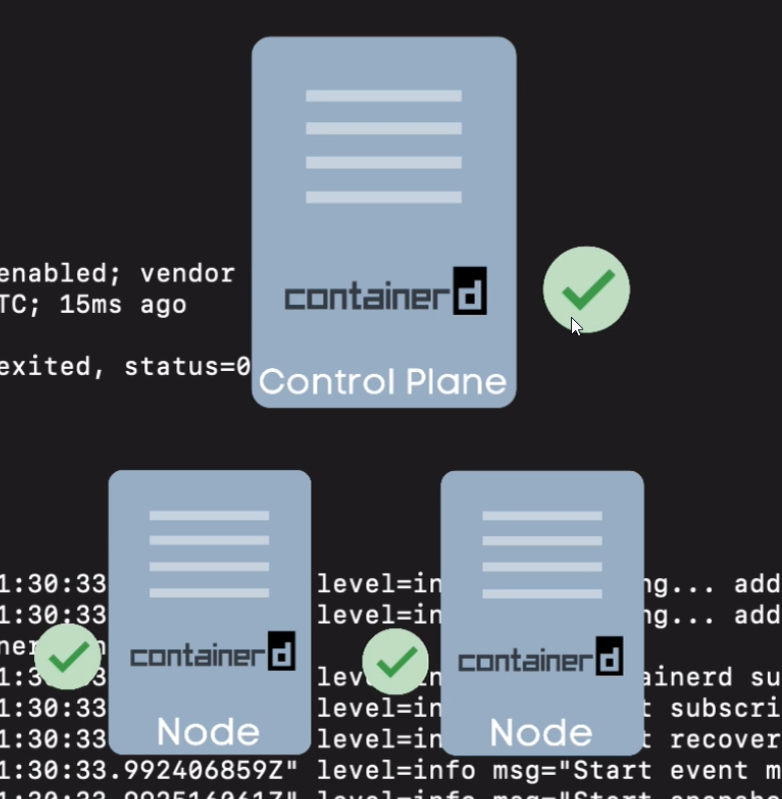
- First, we need to deploy a container runtime on every node so that containers can be scheduled on them.


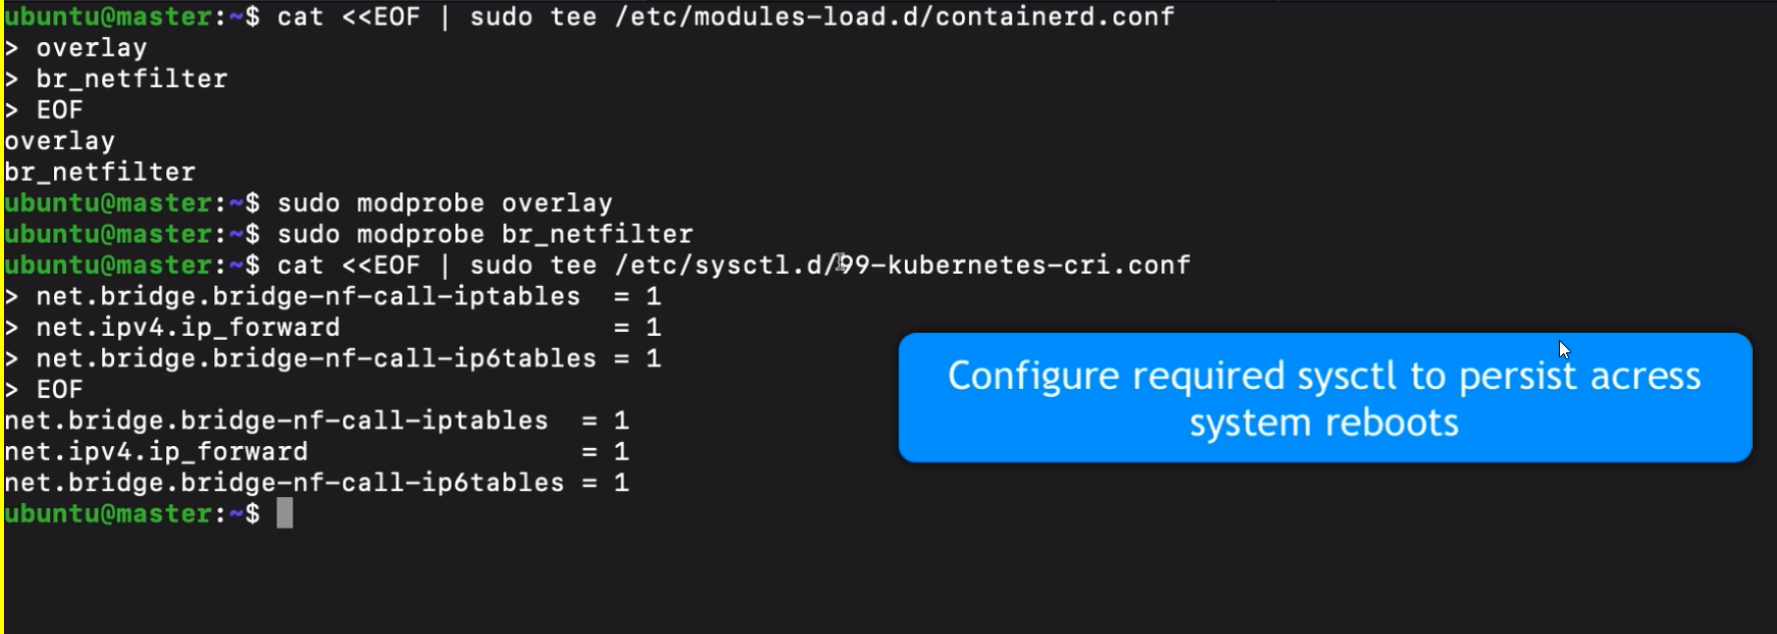
sudo sysctl --system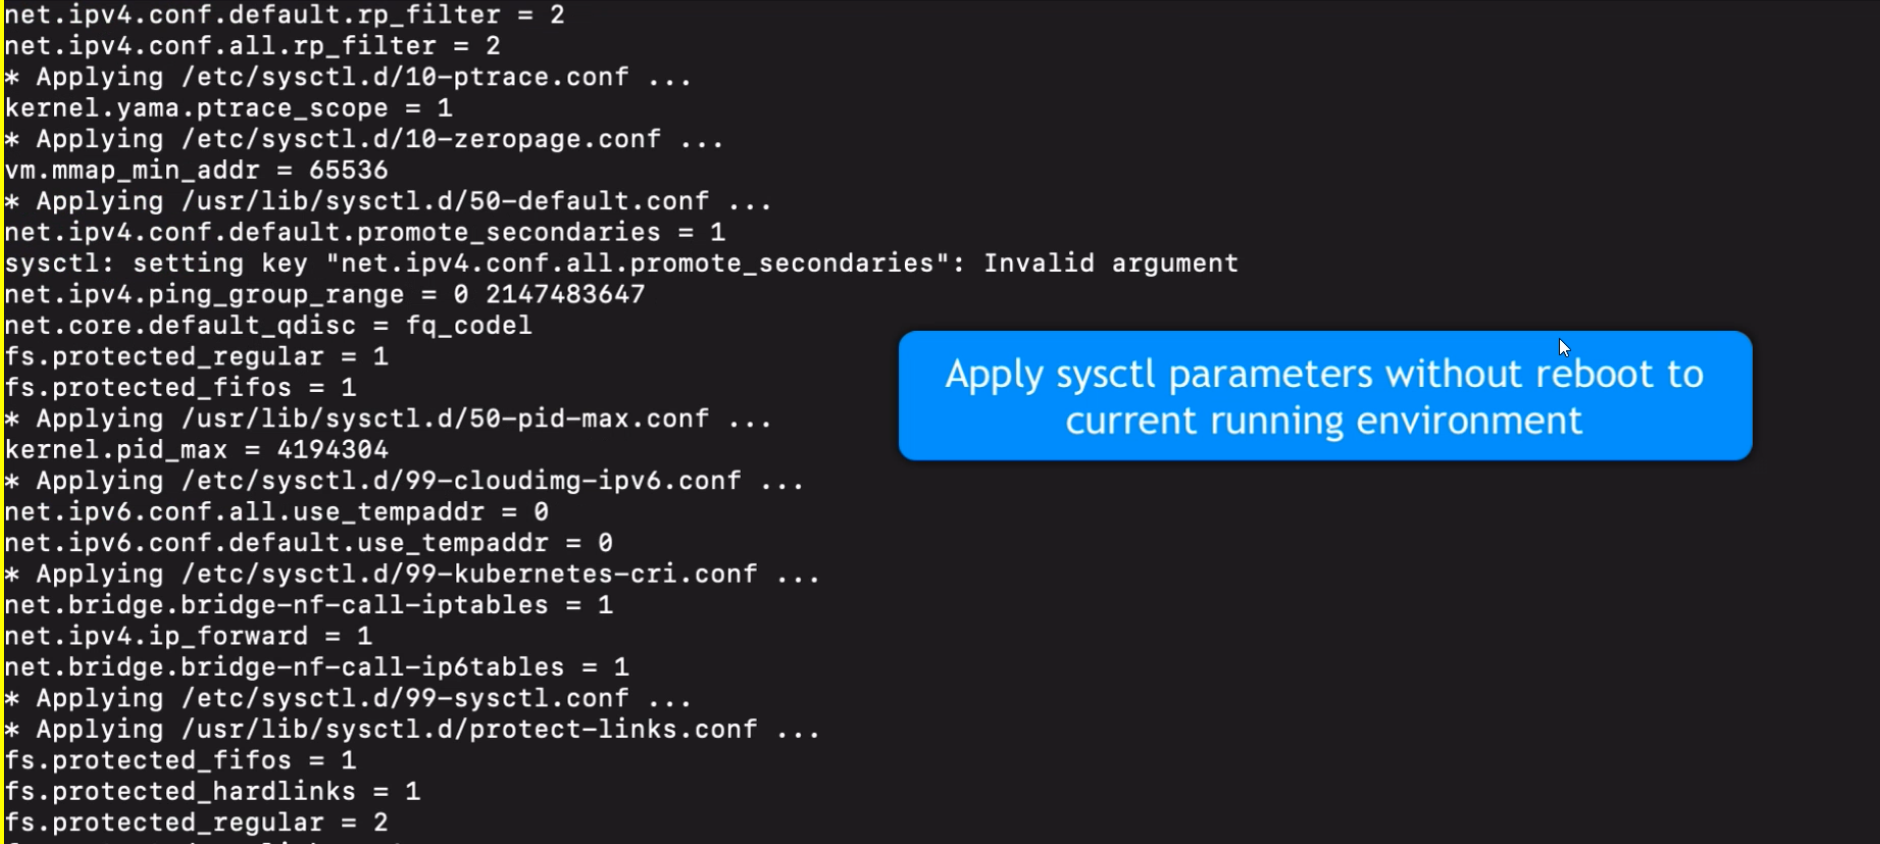
Importnat
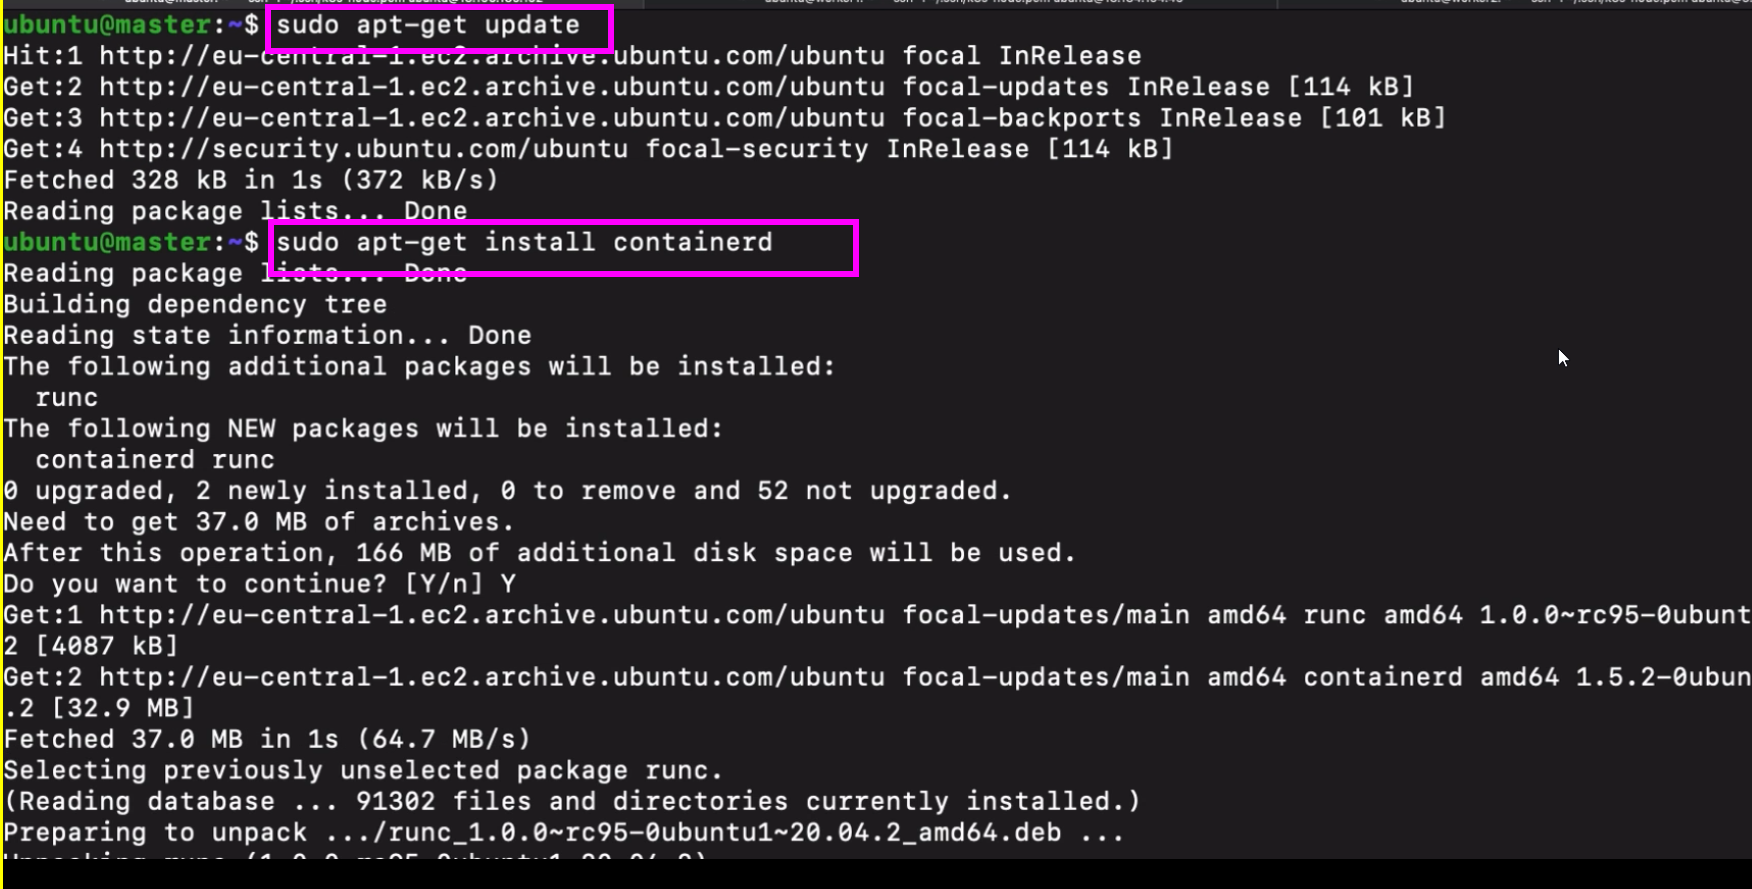
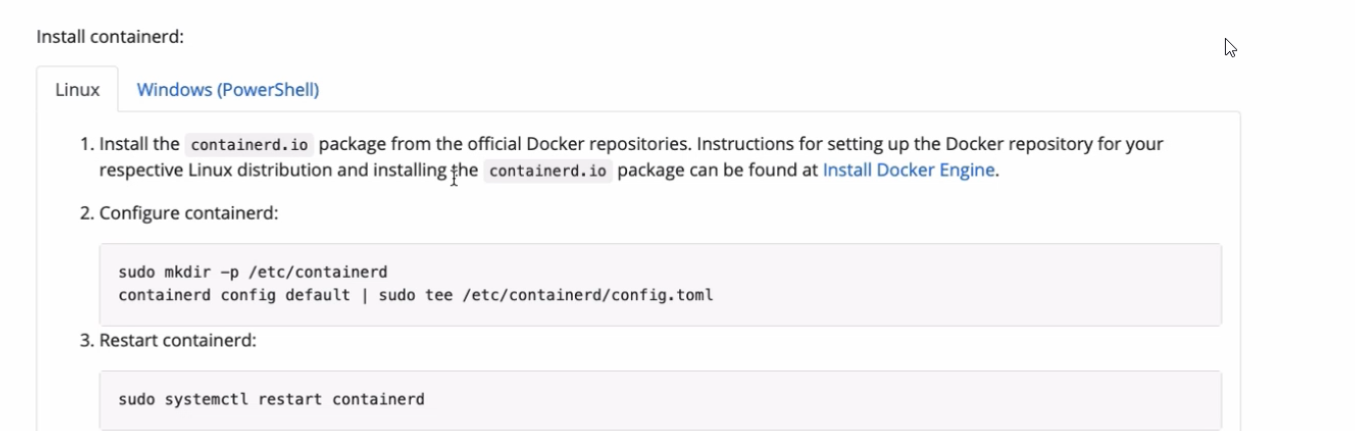
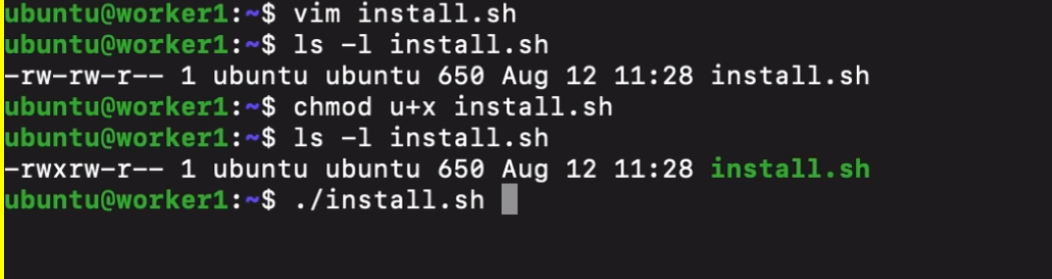
- we need to install containerd for every vm.
- so instead of installing this manually on every server we can create a script

- do that for every vm
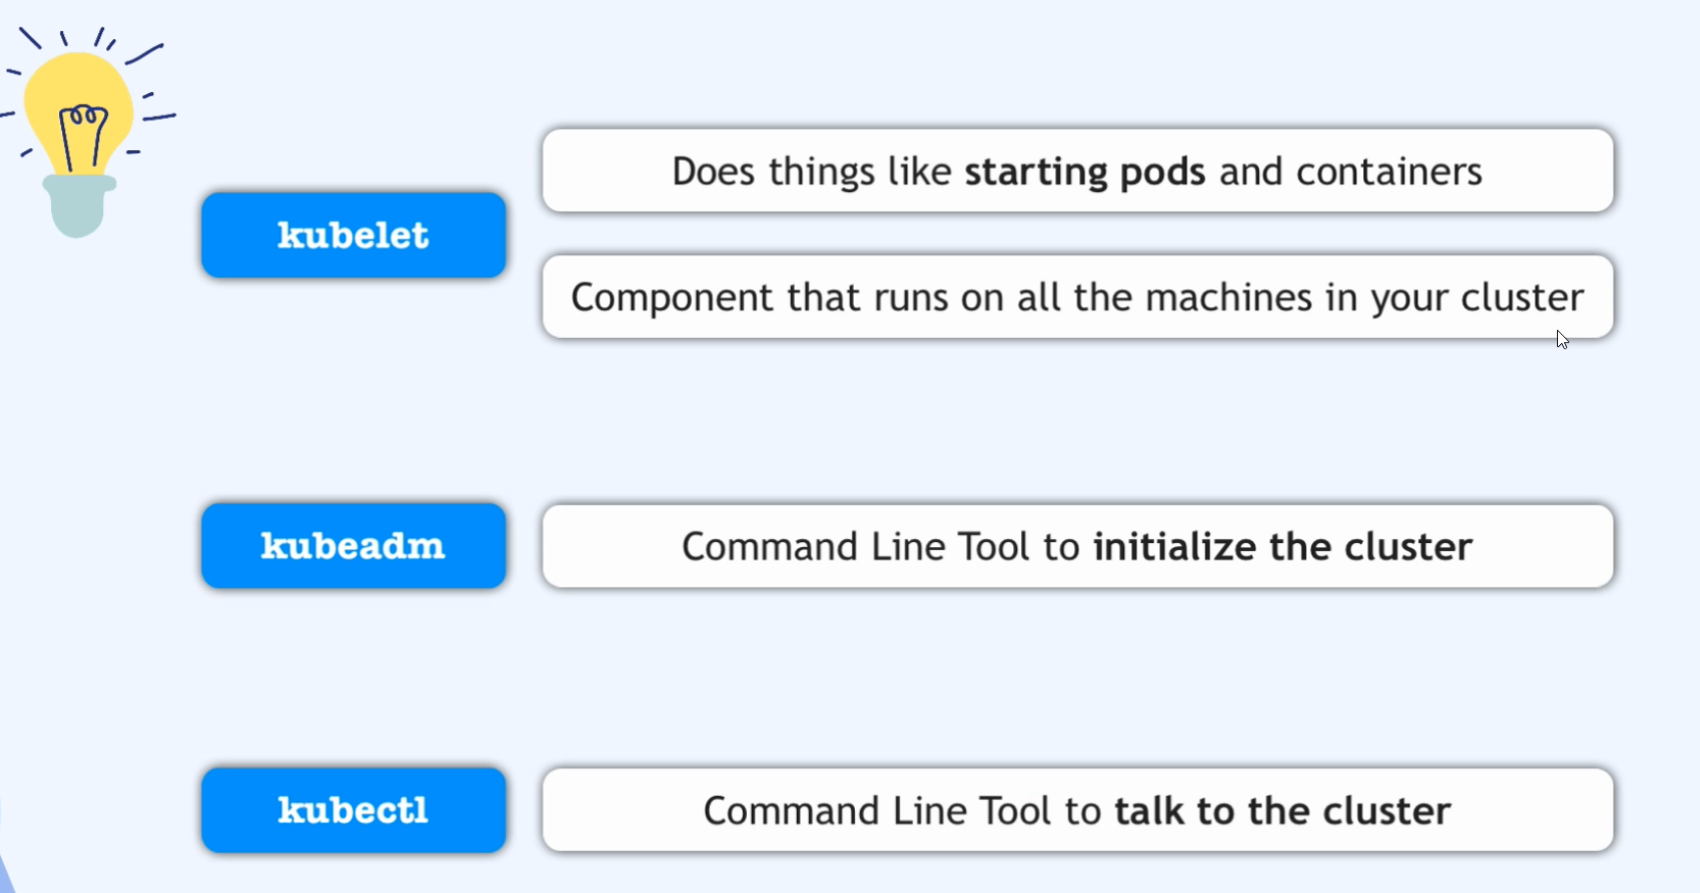
Kubelet
Kubelet
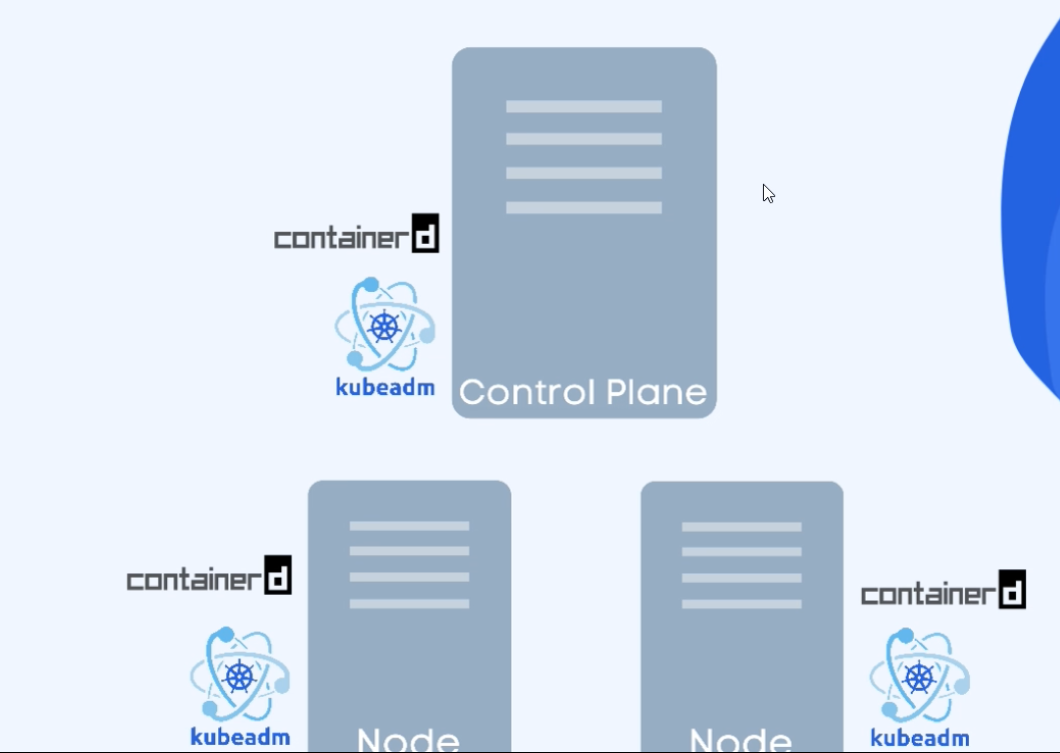
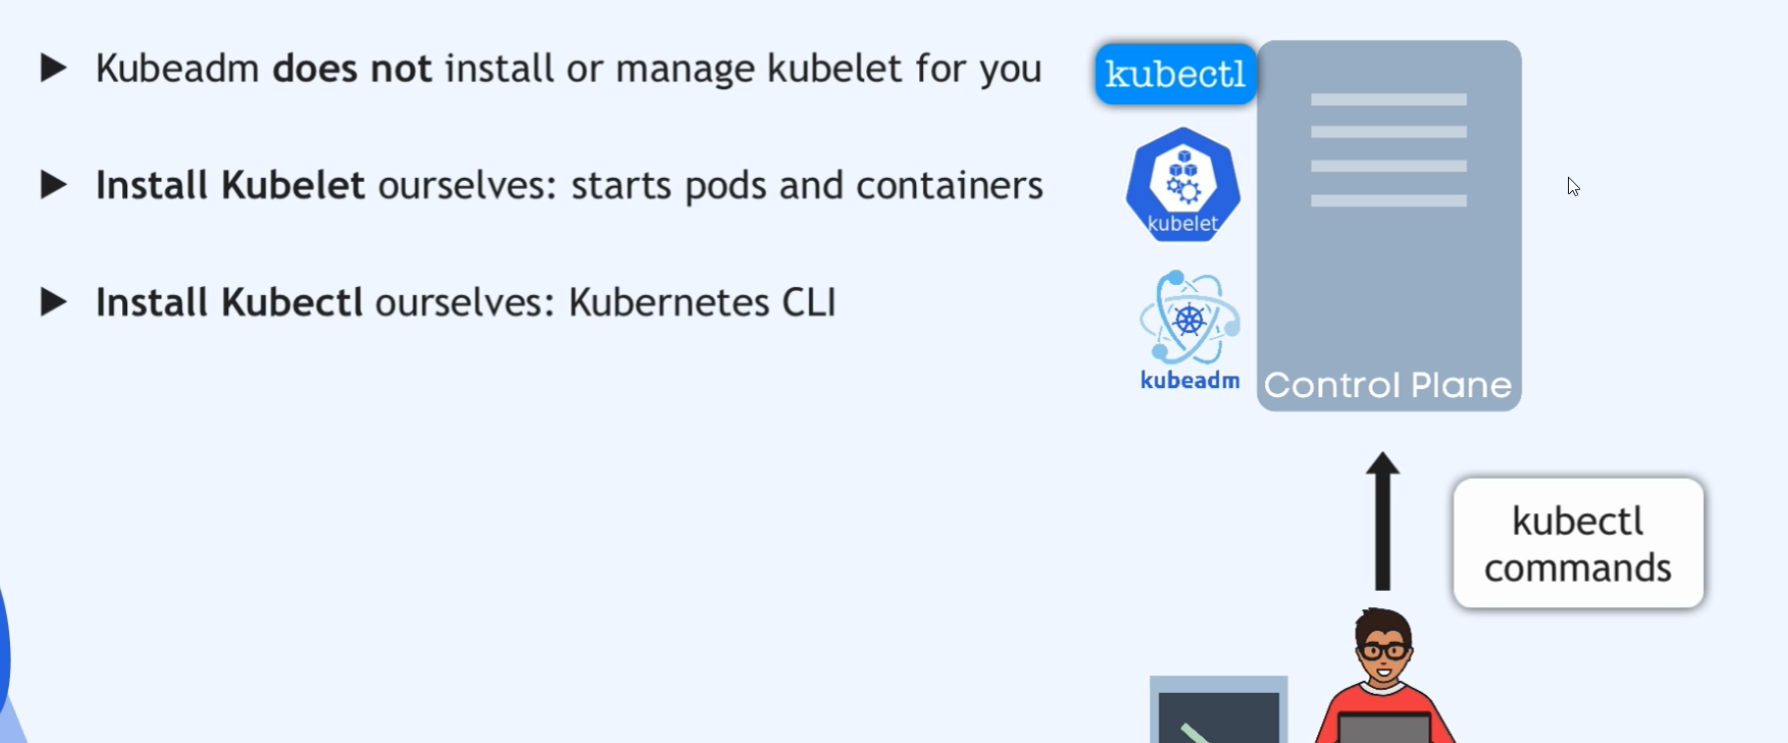
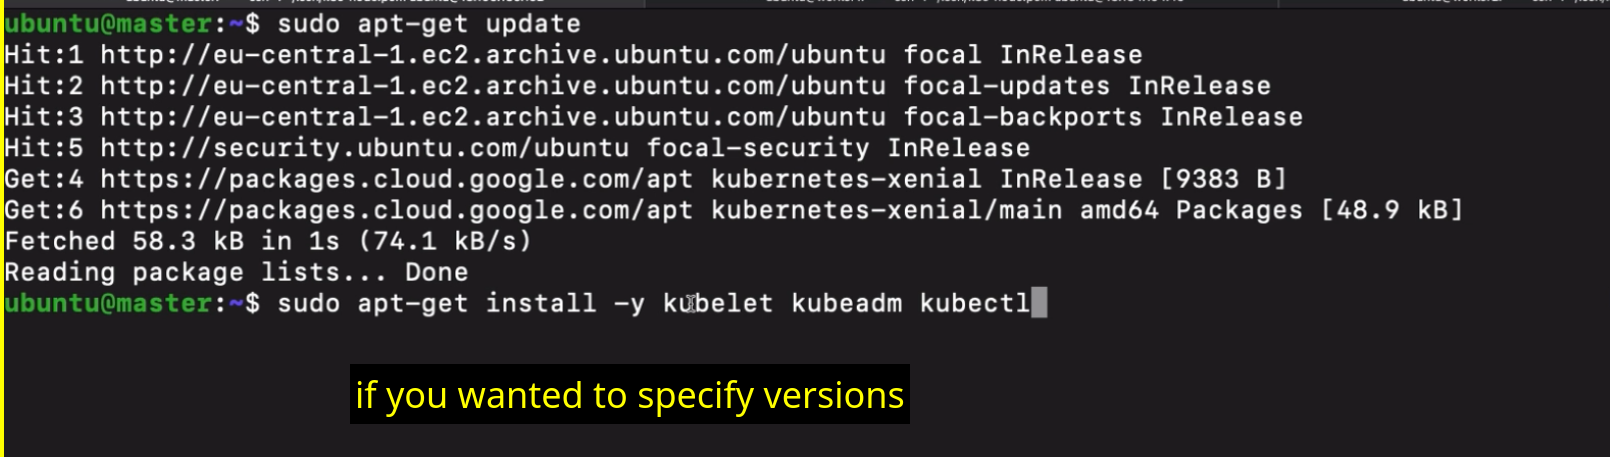
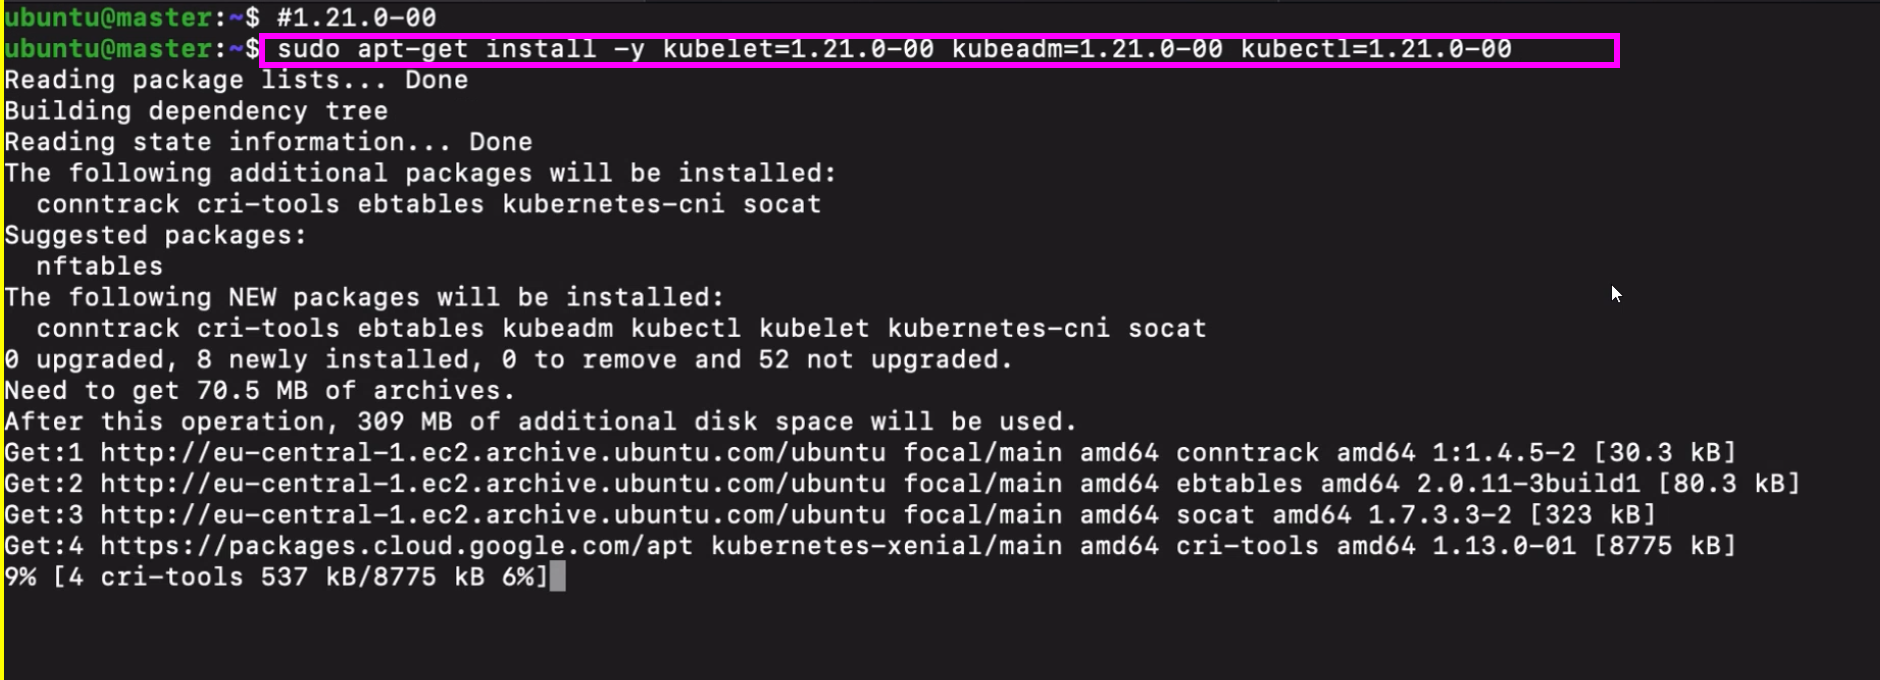
- After that, we need to install Kubelet application also on every node, which will basically run as a regular Linux process, just like the container runtime.
- So they will both be installed from a package repository, just like we install any application on Linux servers.
- And again, these two need to run on each server, whether it’s a masternode or worker node. And with these two in place, we can now deploy pods for all the other Kubernetes components on the control plane node,

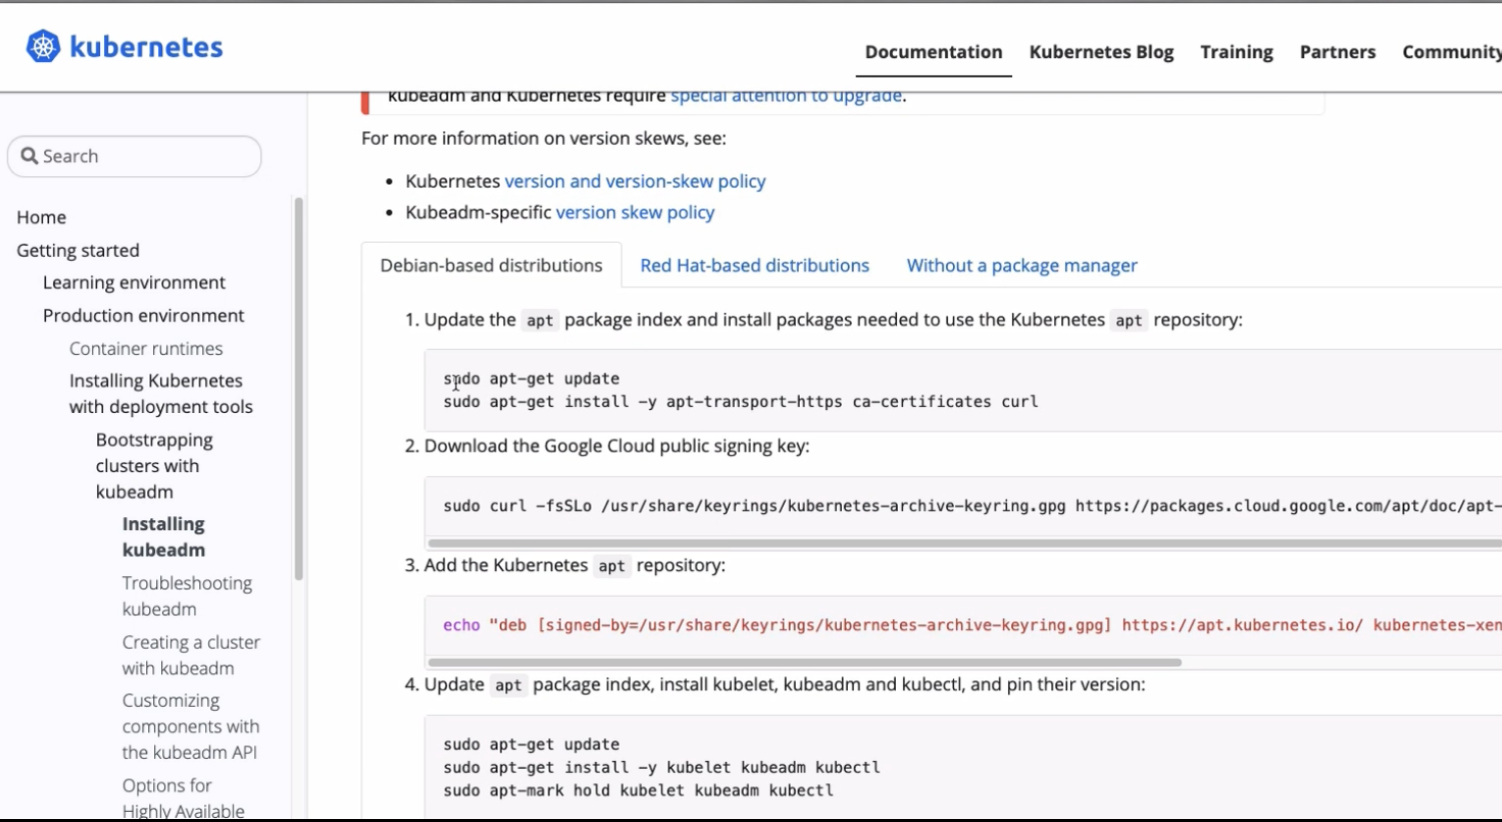
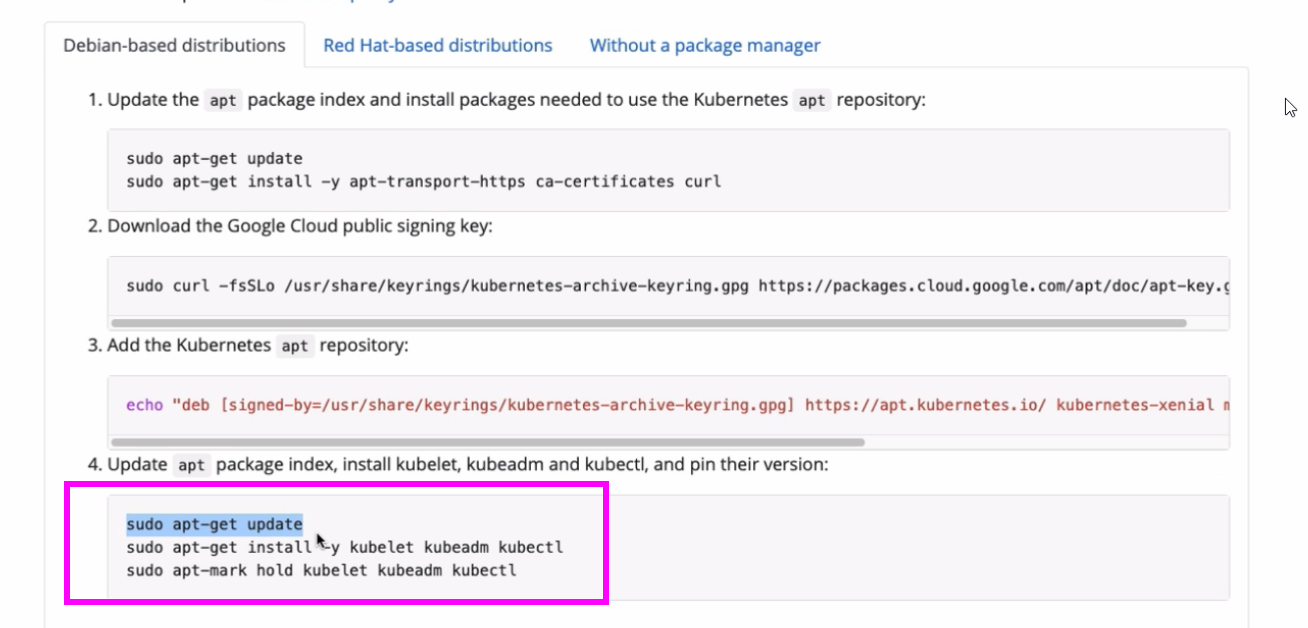
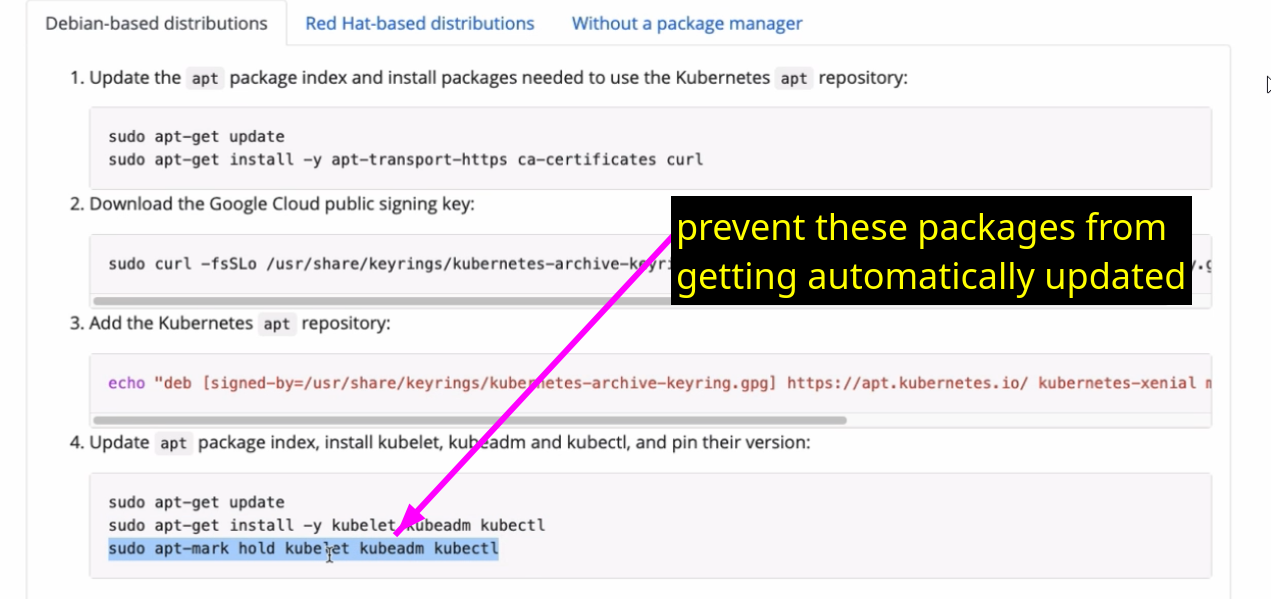
poublic sign in key
it is needed for our package manager to connect to app repository


- we need to now deploy

- pods which run the master applications.

- So API server, scheduler, controller, manager and ETCD applications will all be deployed as pods on the masternode.
- Plus we shouldn’t forget about the Kube proxy application, which again will be deployed on each node, because worker nodes also need them.

- And Kube proxy application will also run as a pod.
- Now, there are two things we need in order to deploy these applications.
- The first one is that since all these applications are pods, we need the Kubernetes manifest file for each application.
- And the second thing is that we need to make sure these applications are also deployed securely.
- This means unauthorized users shouldn’t be able to access these applications. And also the applications should talk to each other securely in an encrypted way.

- So let’s see both of these points in more detail.
Static Pods
Why static pods
- to deploy normal pods, api, etct, kube-controller-manager and scheduler getting involved.
- but how to create those master pods because they don’t exist at first place?
- that’s where static pods comes into picture
- they are solely managed by kubelet on that node
api, sheduler, kube-config-manager, etcd

- So how do we schedule these components without having them in the cluster?

- So we have this chicken and the egg problem. Well, for that specifically, we have what’s called static pods.


Kubelet can actually schedule pods on its own.
How does that happen?

-
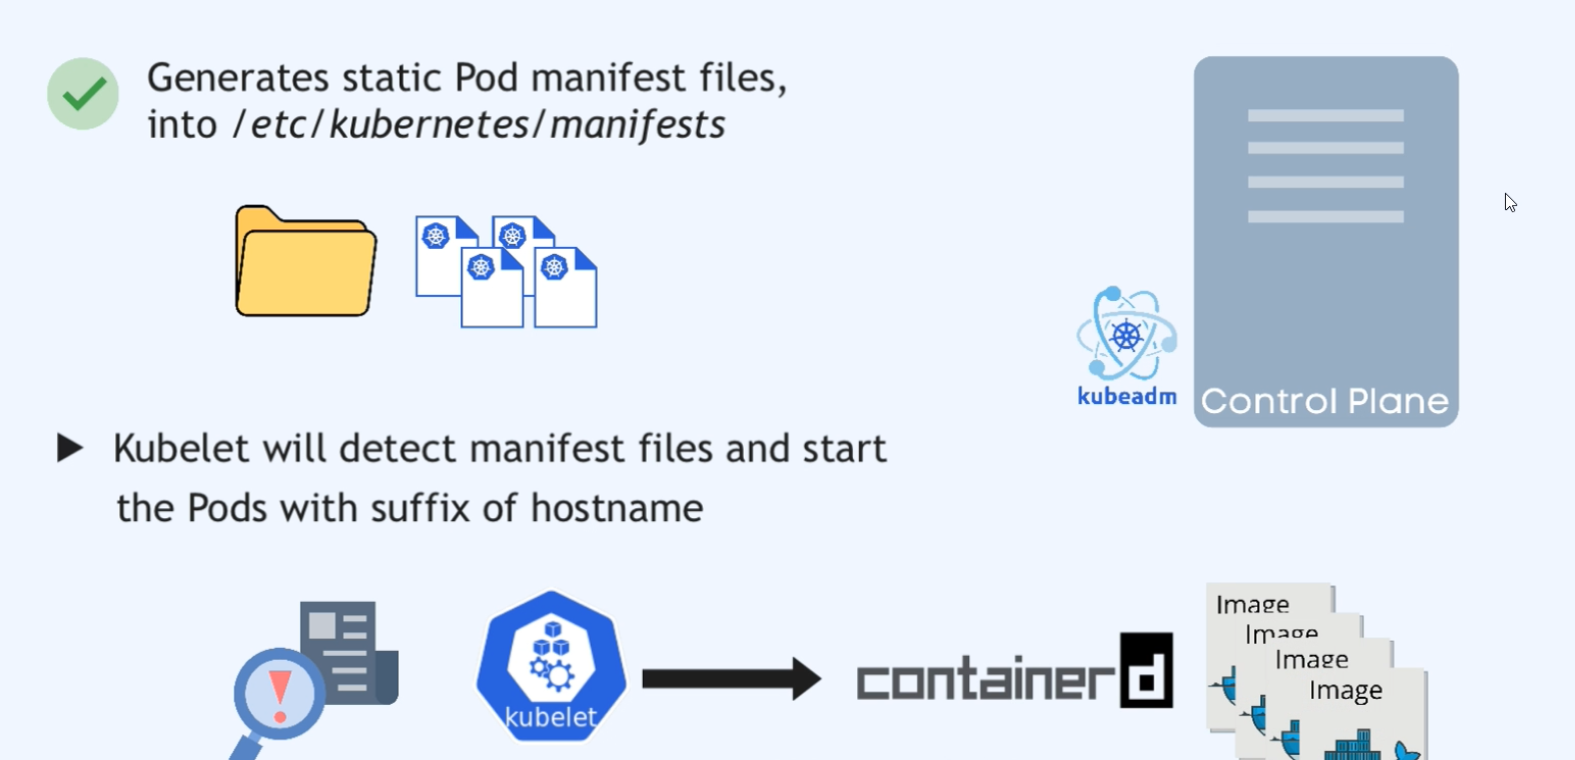
Well, Kubelet continuously watches a specific location on the node where it’s running, and that location is
/etc/kubernetes/manifests/.
-
And it watches that folder for any Kubernetes manifest files.
-
And if it finds a podmanifest there, it will schedule it as a static pod, no master processes required.
-
Now, why is it called a static pod and how is it different from the regular pods deployed through the API server?

Well, there are a couple of differences. First of all,
even though static pods are visible on the API server,
they cannot be controlled from there. So it’s a responsibility of
Kubelet. So controller manager, for example,
doesn’t manage that pod. So if it crashes
or doesn’t work anymore, it’s Kubelet’s
responsibility to pick that up and reschedule it again.
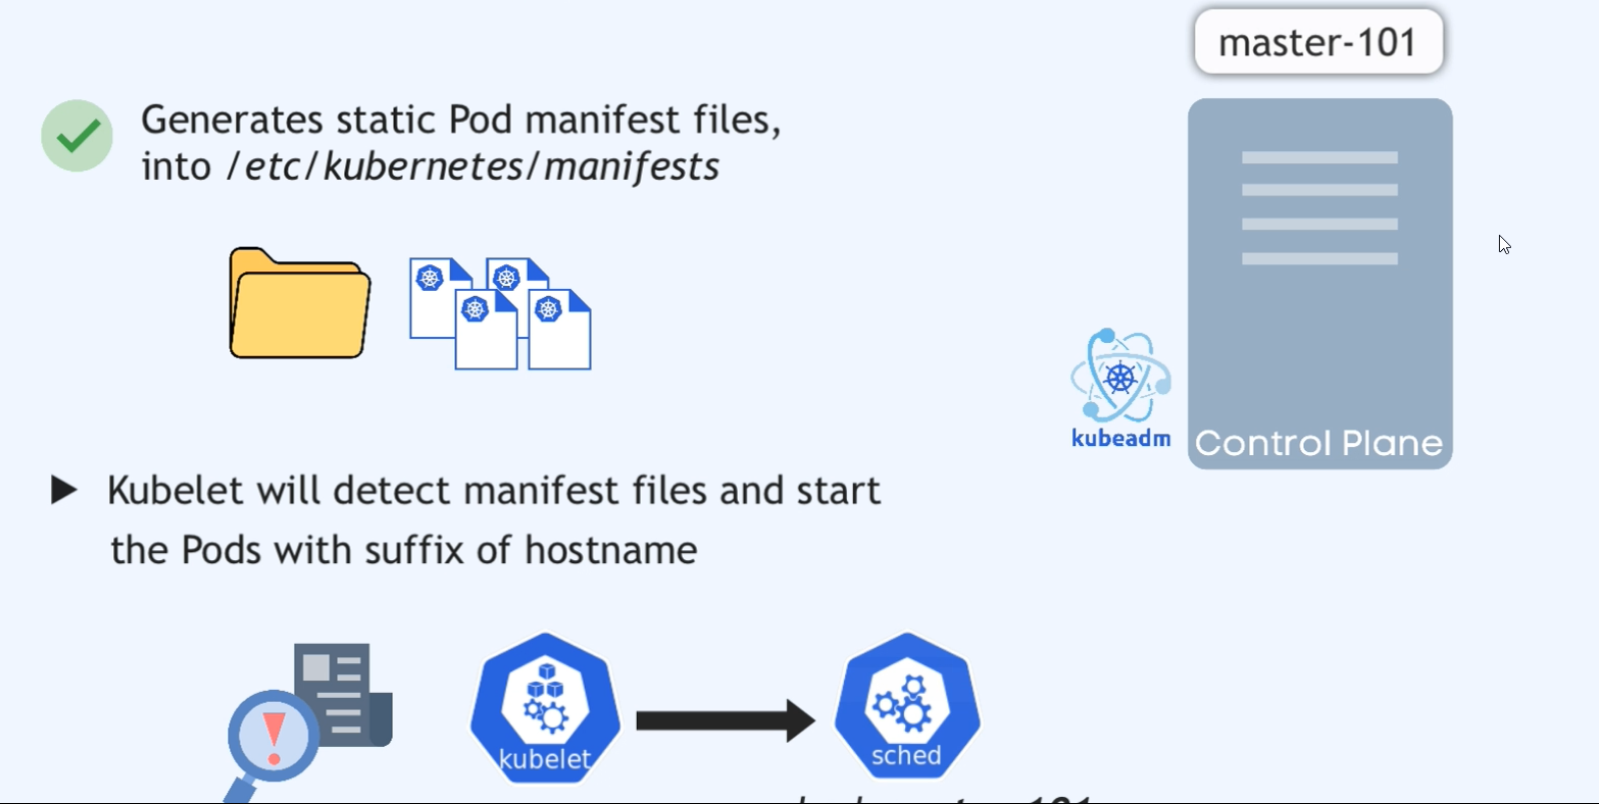
And also you can easily identify the
static pods by their names, because at the
end of their name they get a suffix of
the node name they are running on. So this
all means that when installing a Kubernetes cluster, we would need to
generate the static POD manifests for the API server,
controller manager, scheduler and etcd applications

and put these manifest files into etc/kubernetes/ manifests folder where Kubelet will find them and schedule them.
Certificates
When deploying these applications, we need to
ensure that they will run securely.
So the question is, how do they talk to each other securely?

How can each component identify the
other component in the communication process and
also establish a a mutual TLS connection
so that the communication between them is encrypted?
Well, we need certificates for that.
Now let’s see exactly who talks to who in Kubernetes
cluster and what certificates we need for them.
Well, the API server is in the center of all the things and
all the communication. So almost every
other component will talk to the API server.

And that means
every component that wants to talk to the API server
will need to provide A certificate to be able to authenticate
itself with the API server.


So the way it works is we
need to first generate a self signed CA certificate
for Kubernetes, which we will then use to sign
all the client and server certificates for each component
in the cluster. And we can store these certificates in
Etc. Kubernetes PKI folder.

Why these Certificates?
- Scheduler and Controller Manager (clients) -⇒ API (server)
- API (client) -⇒ kubelet and etcd (server)
- kubelet (client) -⇒ API (server)
So API Server will have a server certificate
and Scheduler and Controller Manager will both have their client
certificates to talk to the API server.
Same way API Server talks to Etcd
and Kubelet applications. Which means Etcd and
Kubelet will need their own server certificates. And since in
this case apiserver is the client, it will need
its own client certificate to talk to the Etcd
and Kubelet applications so that it can authenticate
itself with them. For that it can use its existing
server certificate. Or alternatively, we should
create new client certificates specifically
for talking to Etcd and Kubelet applications.
Kubelet also talks back to the API server, so it
can also use a separate client certificate for that.
So basically the idea is that whenever an application
talks to the API server, for example,

API Server doesn’t know whether that application is a
legitimate application, whether the request is coming from a
hacker or an unauthorized source or whatever. So for API
Server, any application connecting to it is
basically just a regular client. And for
for every such client, API Server needs
to make sure that this client is authorized.

And the same goes for Etcd when
API Server connects to it, right? It’s a D has to decide
is this client authorized to talk
to me? And to ensure proper identification,

each component will get certificate signed
by the same certificate authority.
So now when Scheduler connects to API Server, it will say,
this is my certificate, which is a proof that I am part of

the same cluster as you are, therefore I should be
allowed to talk to you. So that’s how the whole setup

public key infrastructure PKI should work
in Kubernetes. So all these components talk
to each other to do their jobs. But there is
one more client that we need to give certificate or
access to the cluster to, and that is ourselves as

administrators of the cluster. Right? Because we as
admins also need to talk to the API server to administer
it. Because as you learned, all the queries and updates in the cluster
go through the API server. And this means we also need

our own client certificate for the admin user to
authenticate with the API server. And of course to
be valid and accepted by API Server.
This certificate also needs to be signed by the CA that
we created in Kubernetes. So when
preparing the installation of the cluster, all the certificates
need to be created. First the self signed CA certificate
for the whole cluster and then all the server and client certificates

which will be signed by the CA certificate that we created.
So these are the main things that we need to prepare
for the cluster. Plus there are a couple of minor things and
configuration details we also need to provide
to install Kubernetes cluster.
So as you see, all of this is pretty complex and
it would be really difficult to set all this up manually,
like generating all these certificates
and making them available for each pod, creating those manifest
files and configurations for the applications and
so on.
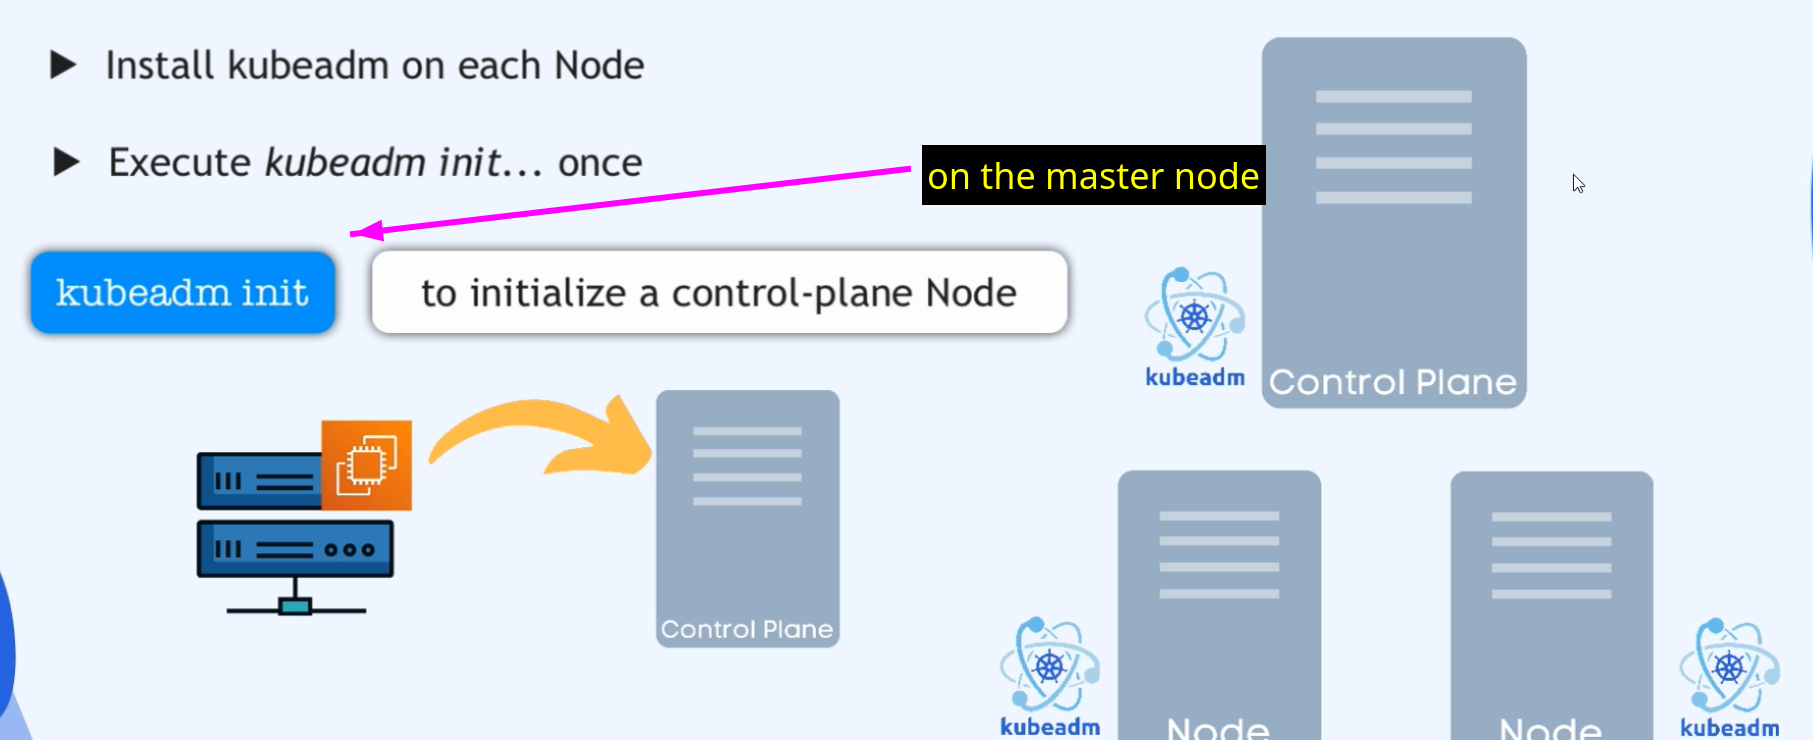
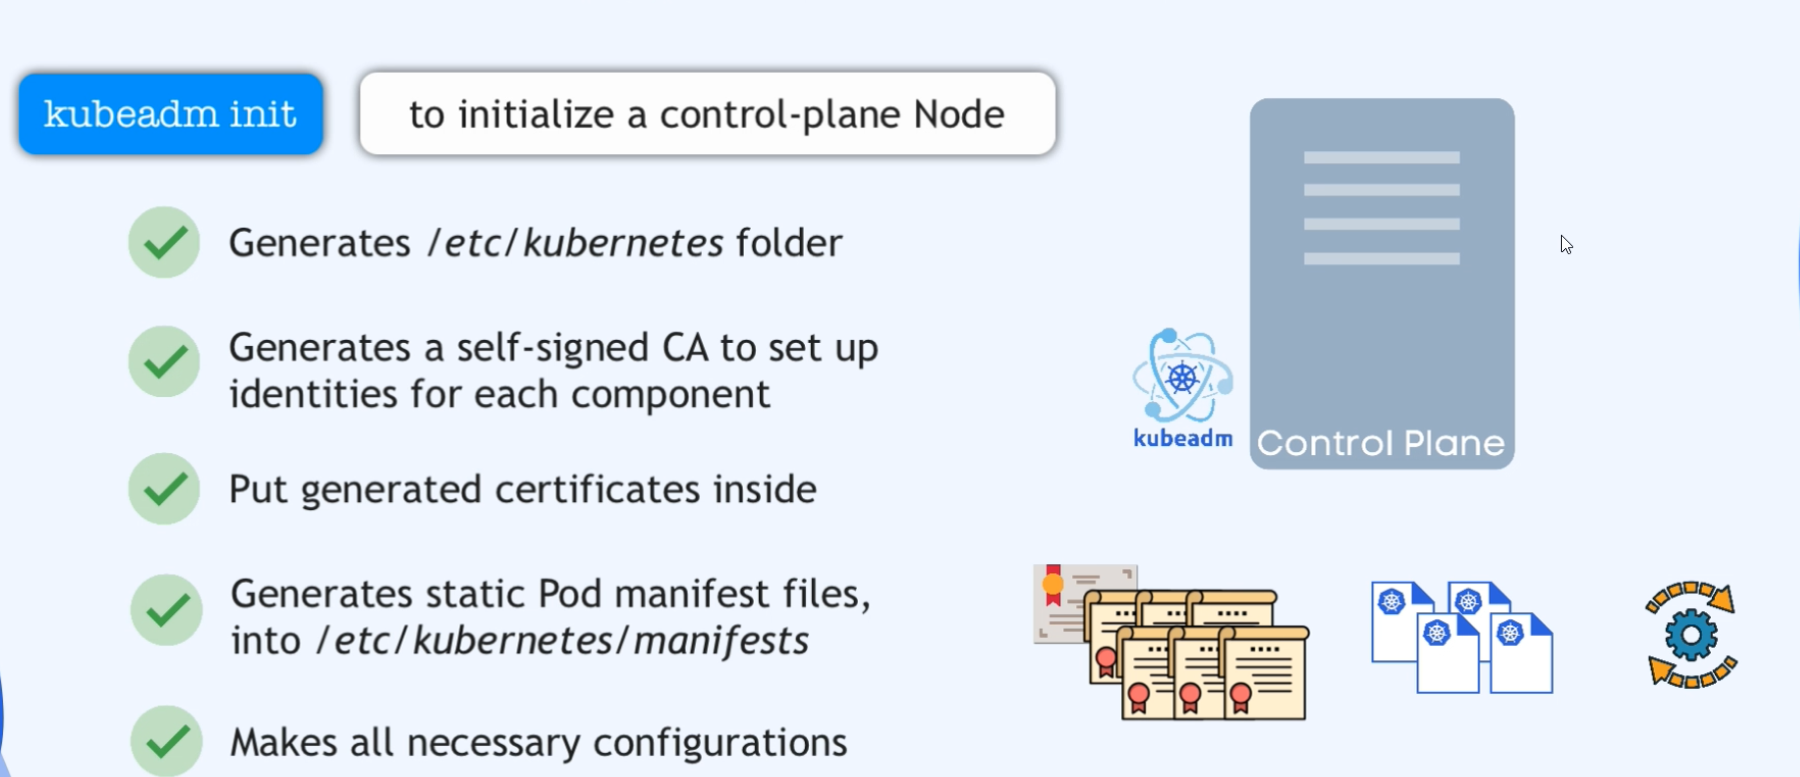
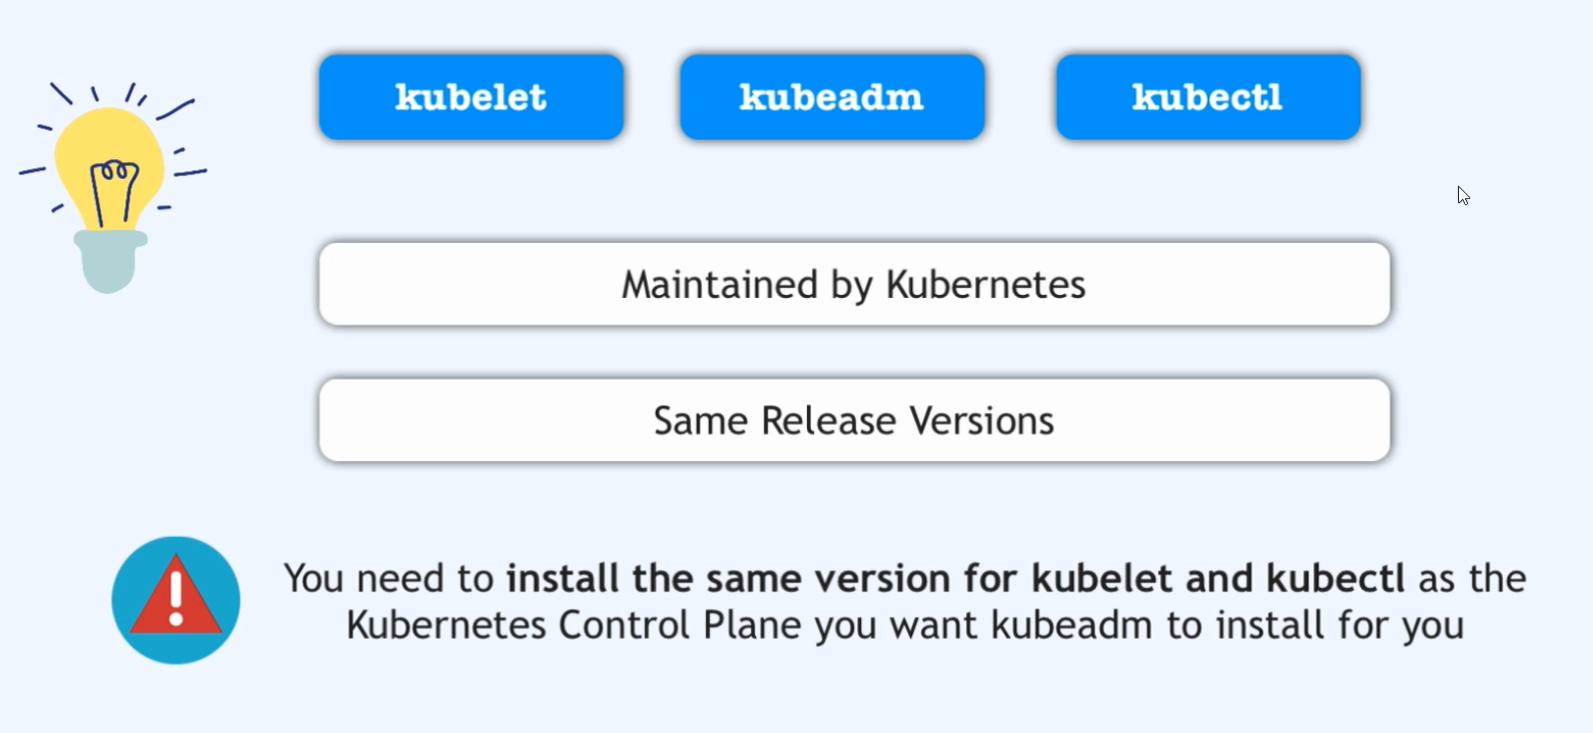
Kubeadm

Well, thankfully there is a command line tool called kubeadm or kubeadmin which will bootstrap all of this and do all this stuff and generate all the necessary configurations and certificates and everything in the background.
And kubeadm is created and maintained by Kubernetes itself.
So in the kubernetes official documentation, kubeadm is used as one way of installing the cluster. And you have all the documentation of KubeADM and, and its commands here and that’s the tool we’re going to use to create our cluster.

Same Subnet
We have unique host names on our AWS infrastructure
as well as our servers are in the same private
network in the vpc. So that should be fine.
Swapoff
But we need to disable the swap and also
open some ports on our machines. So let’s go
ahead and do those two things. The first one is pretty easy
to disable Swap on our server.
sudo swapoff -aWe execute swapoff -a command and we
need to do that on each of the servers. So we’re going
to do that on worker nodes as well later.
Ports
And the second thing is about opening ports
on our machine. So if I click here,

these are basically a list of ports that we need to configure on control plane nodes and on worker nodes. Now, what are all these ports and why do we have to configure them?

- have to change inbound rules to allow those ports accordingly

Host Names
vi /etc/hosts #for every ec2 instance

172.31.44.88 master
172.31.44.219 worker1
172.31.37.5 worker2
sudo hostnamectl hostname master
sudo hostnamectl hostname worker1
sudo hostnamectl hostname worker2Installing Runtime

Provisioned and configured. And we also made
sure that all the prerequisites for installing the cluster
are fulfilled. So we are ready to start installing
the applications necessary to set
up a cluster. And the first one is a container
runtime. That’s the first application that we’re going to install.
And container runtime is not a Kubernetes component.
It’s basically a separate application that Kubernetes will then
use to schedule the containers.
 However, before we actually install a container runtime, let’s actually understand
what a container runtime is. What options do
we have here, as well as what a container runtime
interface actually means?
 As you learned in the lecture about Kubernetes architecture,
on every Kubernetes node there needs to be a container runtime,
because the applications in Kubernetes run as containers.
Now, important to note here is that not only our own
applications or databases and other services will run
as containers in Kubernetes, but also Kubernetes
processes themselves, such as API server scheduler
or controller, manager, etcd and so on.
All these are applications, right? And they also
run as containers in Kubernetes.

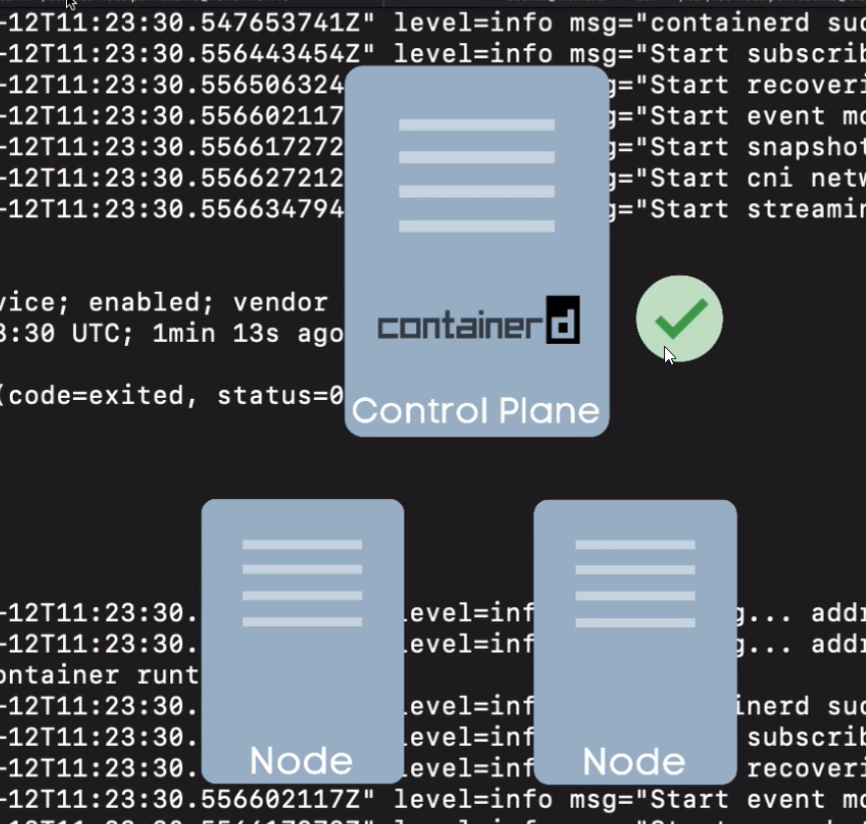
So that
means we need a container runtime on both Master
and Worker nodes.

Now, how do we choose a container
runtime? And how is it that Kubernetes doesn’t care
which runtime we choose and gives us this flexibility
to basically plug in any container runtime we want?

Well, at the beginning, Kubernetes didn’t have this flexibility,
and it supported Docker runtime as the first container
runtime by having the code to talk to Docker
directly into the Kubelet code. Remember,
Kubelet runs on every node, Master and Worker nodes,
and talks to Docker to make it scheduled containers.
So that code for talking to Docker was inside the
Kubelet code.

However, as more container runtimes
were emerging, Kubernetes wanted to make it more flexible
and allow any container runtime usage with
Kubernetes. But integrating code to talk to all
these different runtimes would have been time consuming and increase
the code maintenance effort for Kubernetes developers,
because you would need to have separate code for for each container
runtime.

Instead, Kubernetes decided to create a
single generic interface where any container runtime
who implemented that interface could be plugged
into.

And this plugin interface is
what’s called the Container Runtime Interface.
So Container Runtime Interface, or CRI,
is basically a set of rules that that defines what
a container runtime technology must implement and
how it should implement it in order for it to be pluggable
to Kubernetes as a container runtime.

And through this interface, Kubelet will be able to talk
to it, to schedule containers, pull images,
et cetera.

Now, Docker, which was the first
container runtime, did not implement CRI
rules. So Kubernetes developers needed to now
reintegrate Docker with Kubelet using
the cri. How did they do that?

Well, they created
a CRI compatible layer in their code for
Docker specifically, which is called a Docker shim.
And shim basically means a bridge or connection
between two things. So. So Docker Stream is part of Kubernetes
code, which lets Kubelet talk to Docker using the
Container Runtime Interface API. Now,
as I mentioned, Docker was the first most popular container
runtime and important one to be supported.

But it’s more than just a container runtime.
Docker is also used to build the images.
So whenever you write an application that needs to be deployed as a
container it, you build a Docker image out
of it. It also has its own command line interface
and user interface. So container
runtime is just one part of the Docker technology.

But Kubernetes only needs the container runtime part
of Docker. It doesn’t actually need any other parts.

And with
the time, more lightweight and more fitting container
runtimes emerged that didn’t have all these extra
components that Kubernetes didn’t actually need. And two of
the most popular container runtimes that emerged are
Container D and Cryo. So Docker
was not the number one runtime option anymore. And also
Kubernetes team had to continue maintaining the Docker
scheme code to keep Docker support, even though
it doesn’t implement the CRI standard like other
runtimes.

So Kubernetes recently decided to
deprecate and stop maintaining the Docker scheme in version

1.20 and then completely remove it in version
1.22, which would mean Kubernetes
will not directly support Docker runtime anymore.
Now, does that mean you can’t use Docker in Kubernetes from
version 1.22?

No, because if Docker
itself or some other company decided to maintain the Docker
Shim code or create a service similar to that,
you can deploy that service with Docker and it will still work.

However, it’s better to use more lightweight container
runtimes instead of Docker,

especially because you
can still pull and run Docker images with other container
runtimes.

So you can be creating a bunch of Docker
images for your applications and running them in Kubernetes cluster
that uses a Container D runtime, and that will work just fine.
So there is really no reason to use Docker as a container
runtime anymore.
EKS and AKS and GKE

And that’s what all cloud platforms are
doing. AWS, Google Cloud, Azure Cloud,
etc. All use container D as a container runtime
in their managed Kubernetes clusters. And that’s
also what we’re going to do. We’re going to install and use Containerd
as a runtime in our cluster, which is just
as easy to install as Docker.

So there should be no big difference there.
The only thing would be that we won’t be able to execute Docker
commands on Kubernetes nodes to check and troubleshoot
the containers. But again, in most cases the that shouldn’t
be necessary, since we’re going to be working on a Kubernetes level,
using Kubernetes tools to troubleshoot applications.